Operations with datasets
After you upload your own datasets, you can manage them. Available operations depend on how you uploaded the data: as a file or via API.
You can combine all uploaded datasets into groups and move datasets between them: see the Operations with dataset groups instruction.
Datasets uploaded as a file
In the Urbi Pro interface, you can manage only datasets that you uploaded as a file:
- rename datasets
- add and edit dataset descriptions
- create filters by territory and delete them
- add point objects to a dataset or delete them
- configure tooltips with data attributes
- manage access to datasets
- export data from datasets
- delete datasets (also available for datasets uploaded via API)
To work with a dataset, go to the Main tab and click All datasets or go to the Data tab.
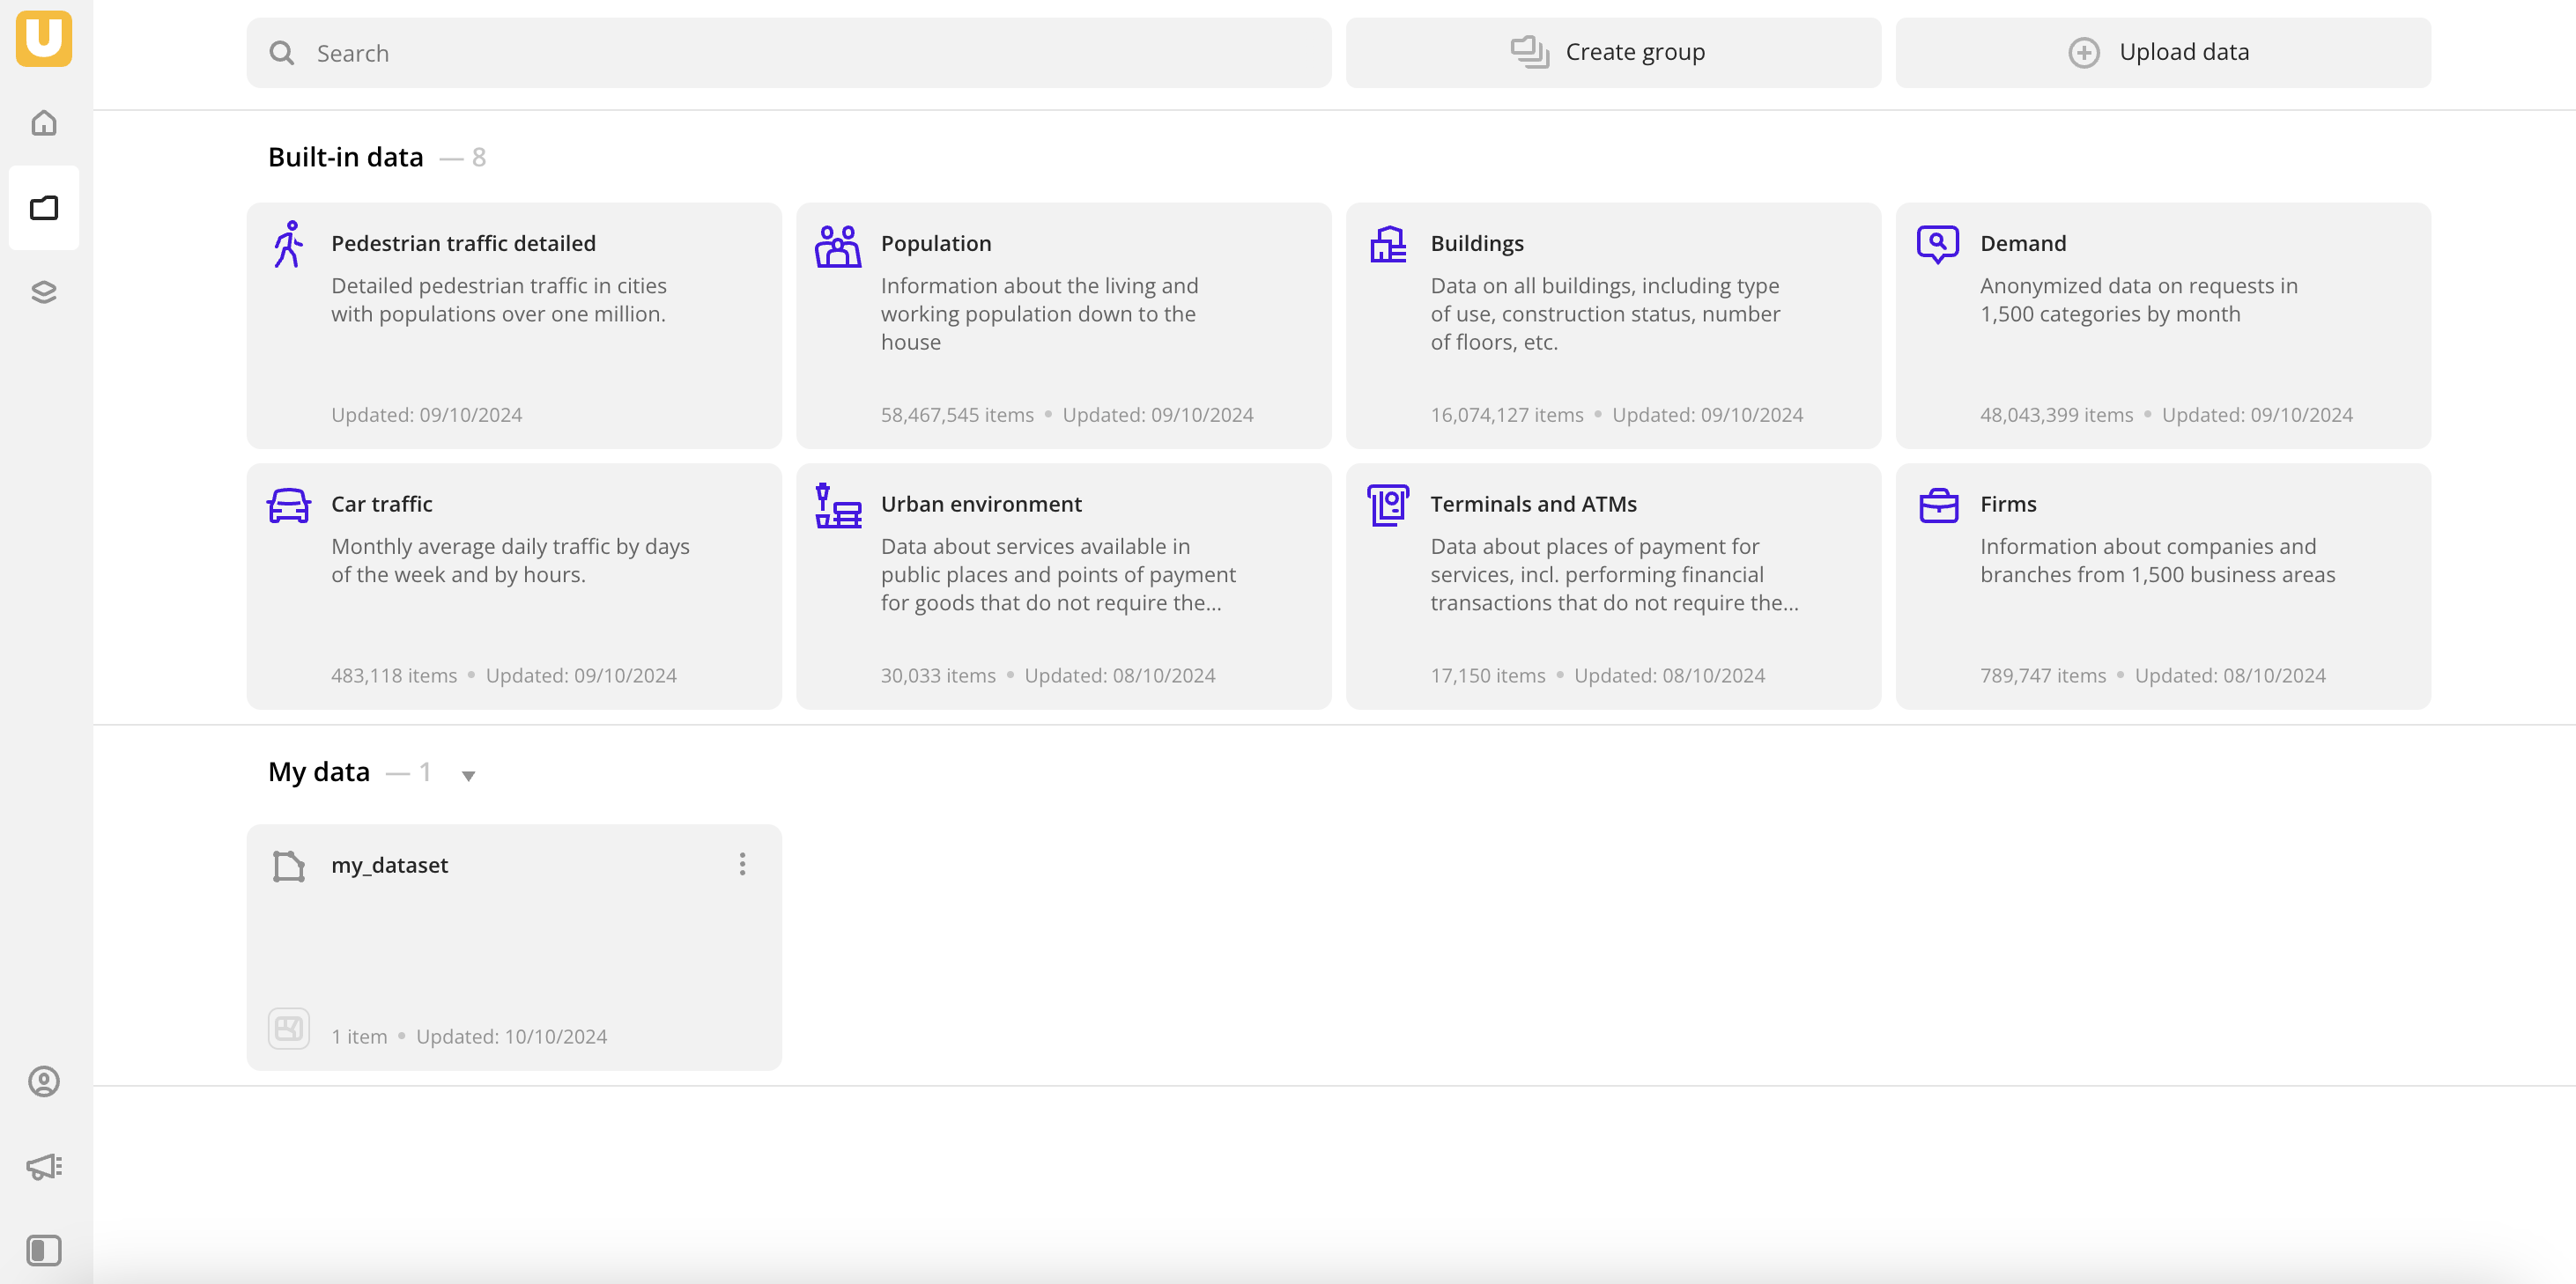
Renaming a dataset
- Go to the Data tab.
- On the required dataset card, click
 icon and select Edit.
 - Enter a new dataset name (not longer than 100 characters).
- Click Apply.
Editing a dataset description
- Go to the Data tab.
- On the required dataset card, click icon and select Edit.
- In the Description field, enter a text (not longer than 200 characters).
- Click Apply.
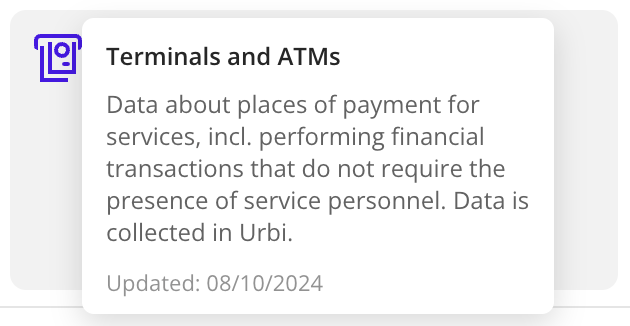
If the description is too long, only its abstract is displayed by default. To see the full description, hover the cursor over the dataset card:
Creating a filter by territory
If uploaded data contains geometries of the polygon type, you can use them to create your own territorial division. It allows you to create new territory filters (geofilters) and filter any Urbi Pro data not only by standard territory types (regions, districts, settlements, and others) but also by your unique areas.
- Go to the Data tab.
- On the required dataset card, click icon and select Create a filter by territory.
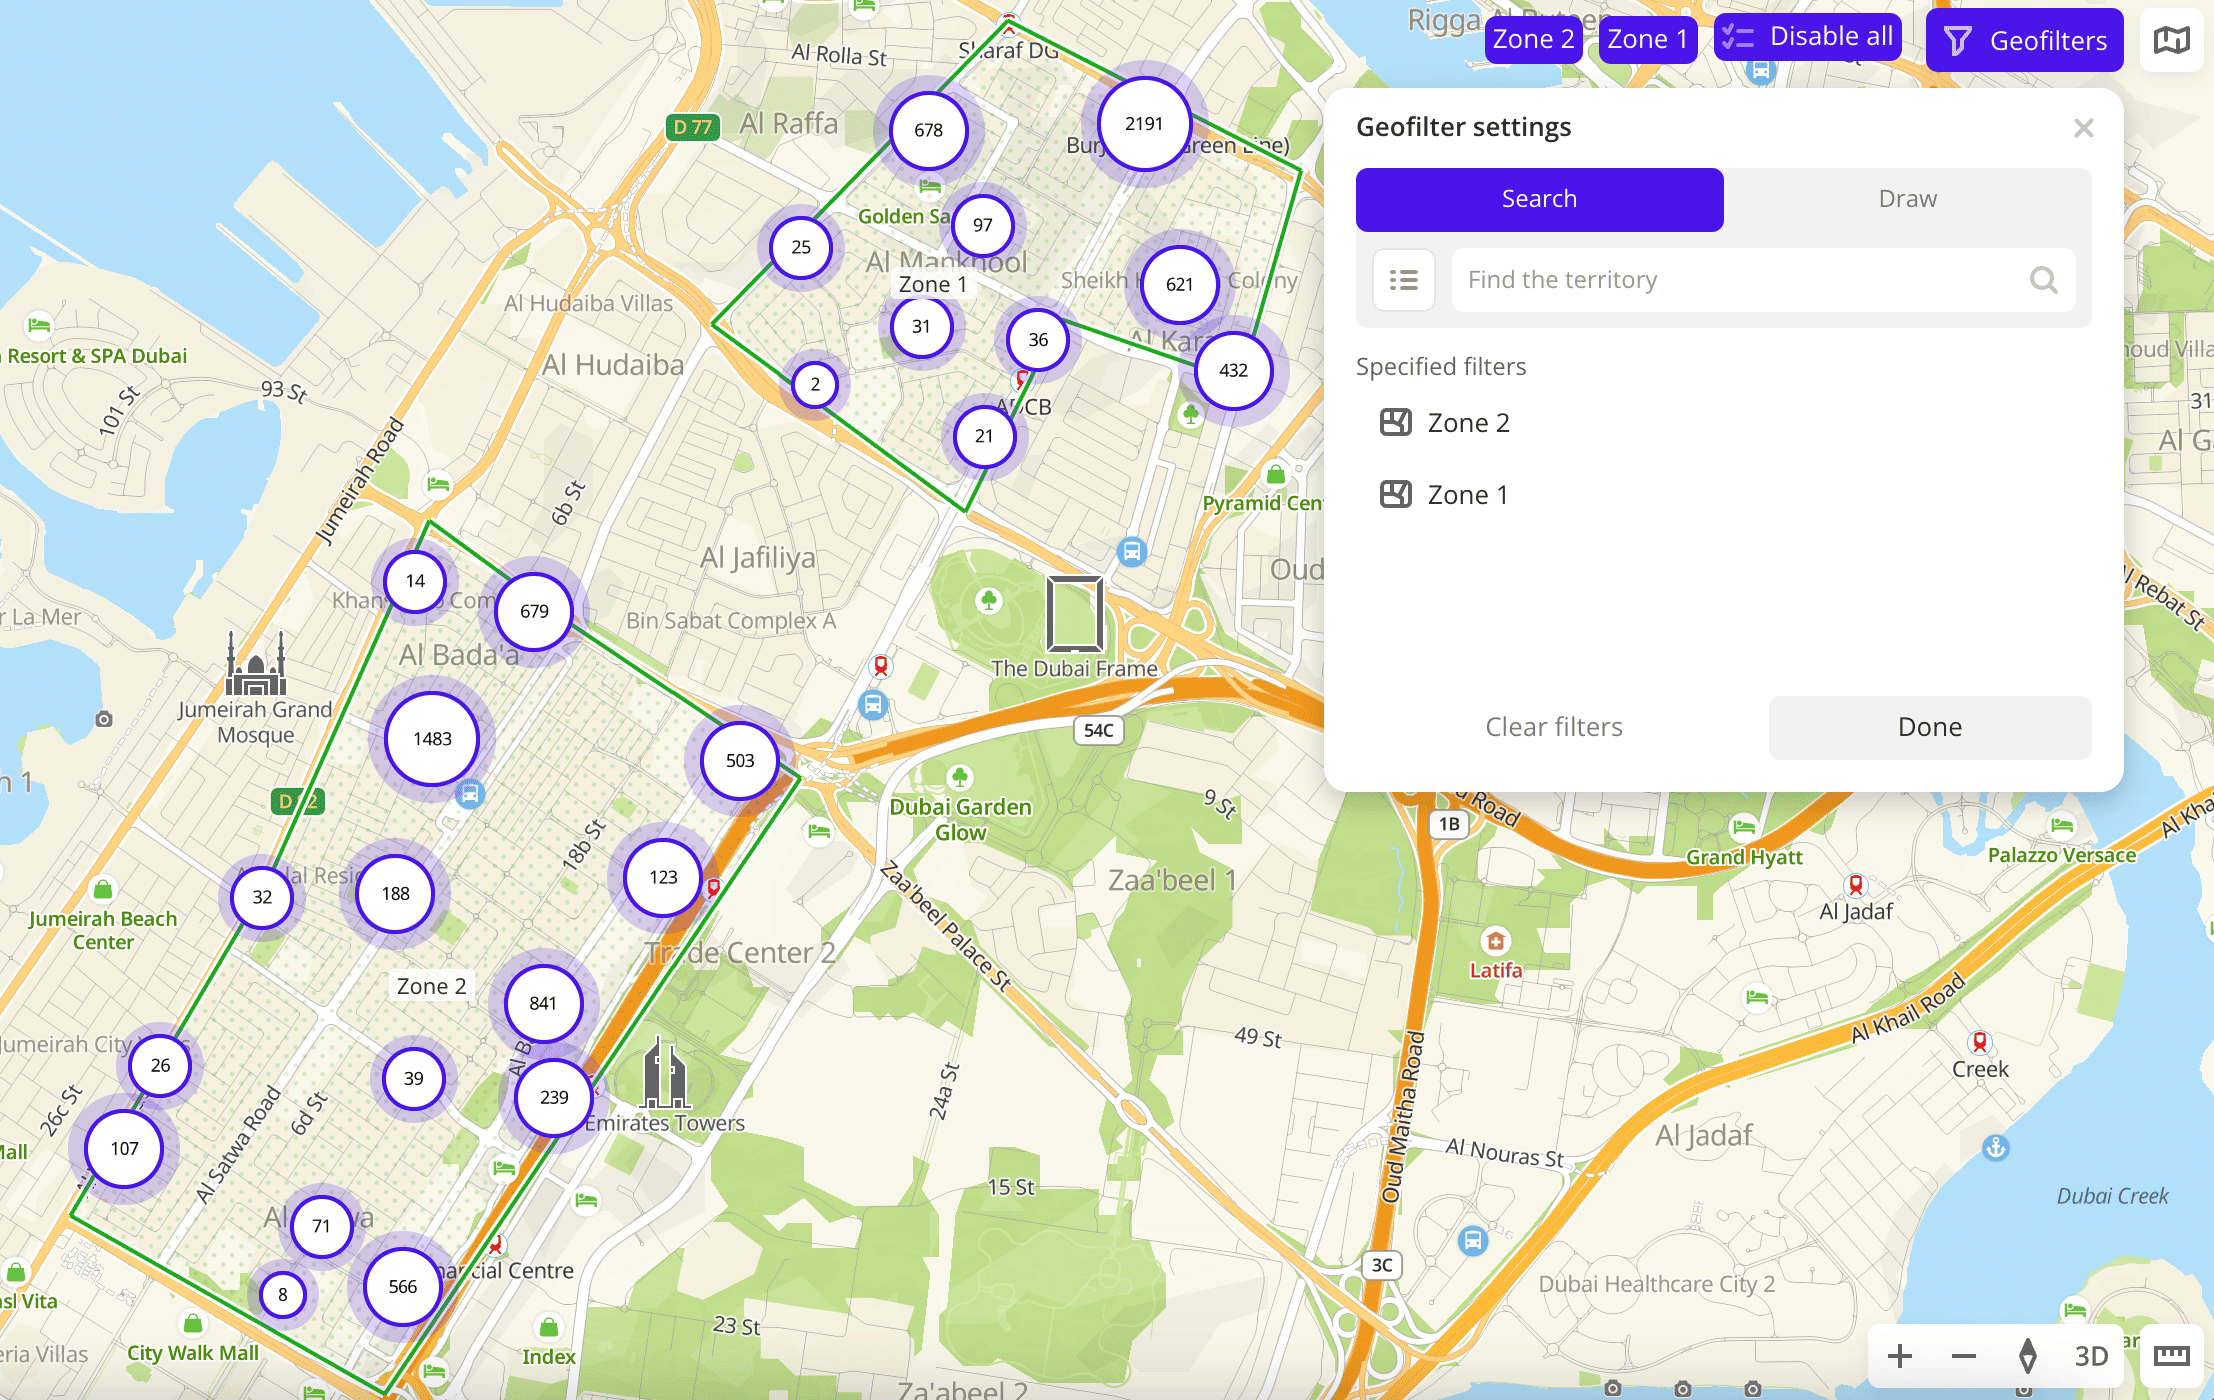
Now when you filter data by territories, you can select the territories from the uploaded dataset in the Geofilter settings dialog:
Deleting a filter by territory
- Go to the Data tab.
- On the required dataset card, click icon and select Remove a filter by territory.
- To confirm deleting, click Delete.
Adding point objects
If you uploaded a dataset with point objects, you can add new objects to the dataset or remove existing ones. Lines and polygons cannot be added.
Important
Adding or removing points changes the data in the dataset. Any samples created from the dataset, as well as layers and widgets, automatically reflect the changes.
You can add and remove objects both when creating a layer and after creating it.
-
To edit a dataset when creating a layer:
- Go to the Main or Data tab.
- Select the required uploaded dataset.
- In the Geofilter settings dialog, select up to 50 territories for which the data sample is created. You can use standard and custom territories and also build polygons, proximity zones, and circles on the map. For more information, see the Geofilters section. After you select the territories, click Done.
-
To edit a dataset after creating a layer:
-
Go to the Dashboards tab.
-
Open the required dashboard.
-
To open a scene, use the arrows
 and
and  . If there is only one scene in the dashboard, it opens automatically when you open the dashboard.
 -
To open the layer, click
 icon and select the required layer.
 -
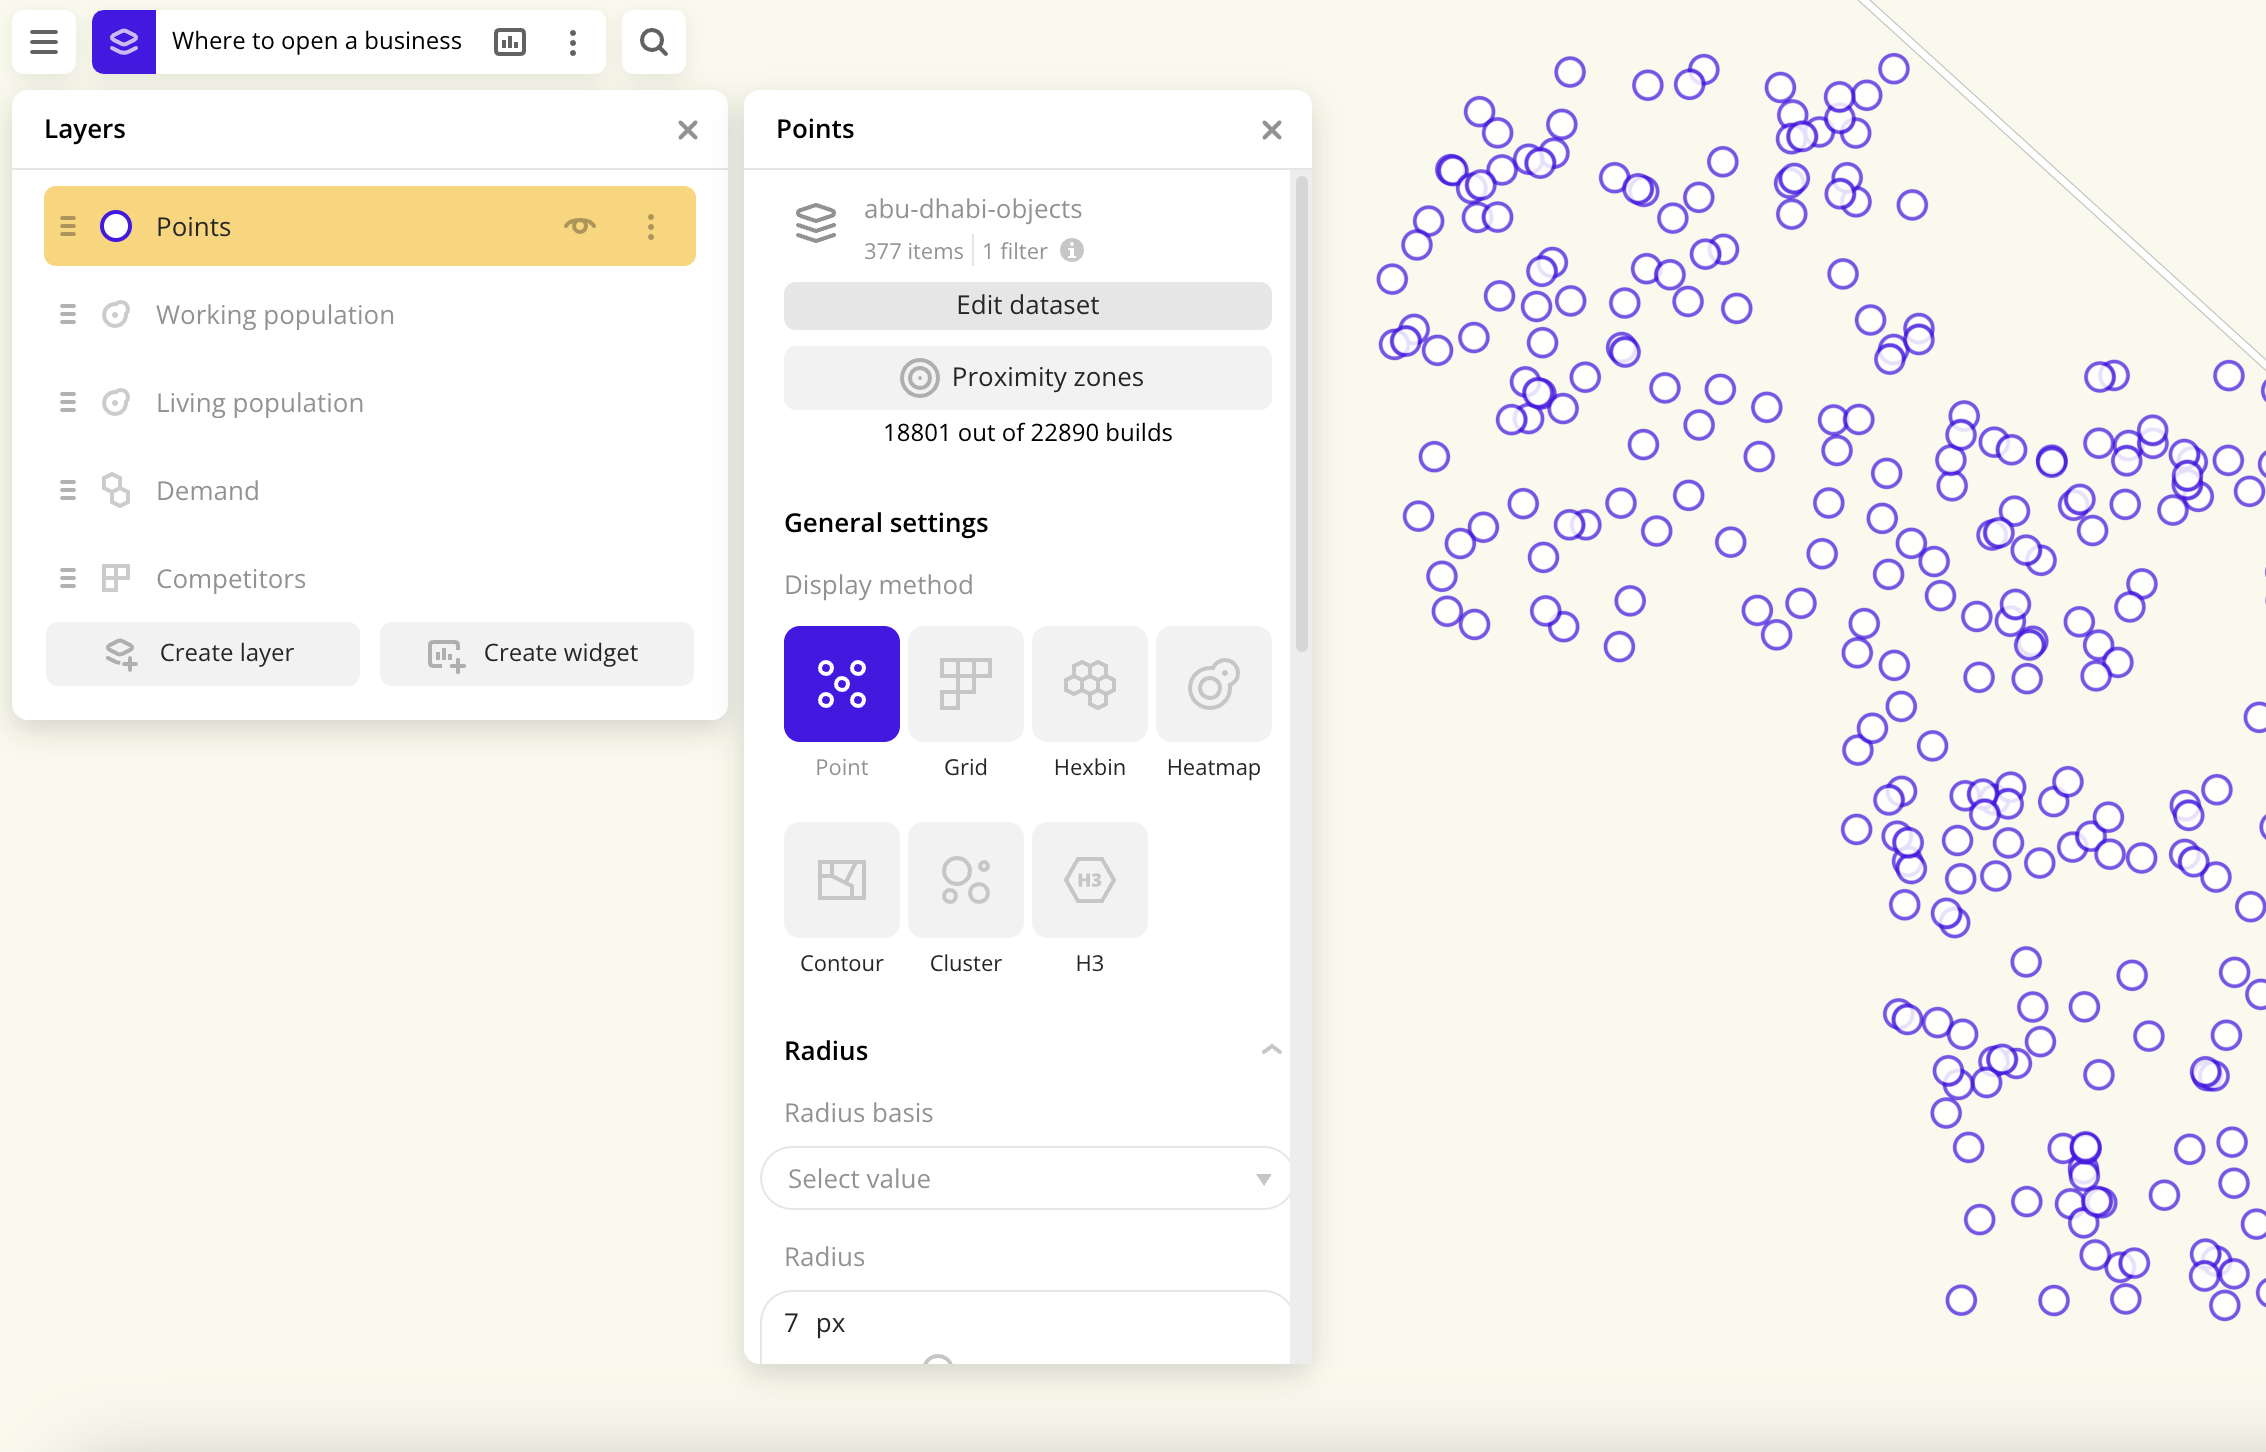
Click Edit dataset.
-
-
To add an object:
-
Go to the Results pane and click Add object.
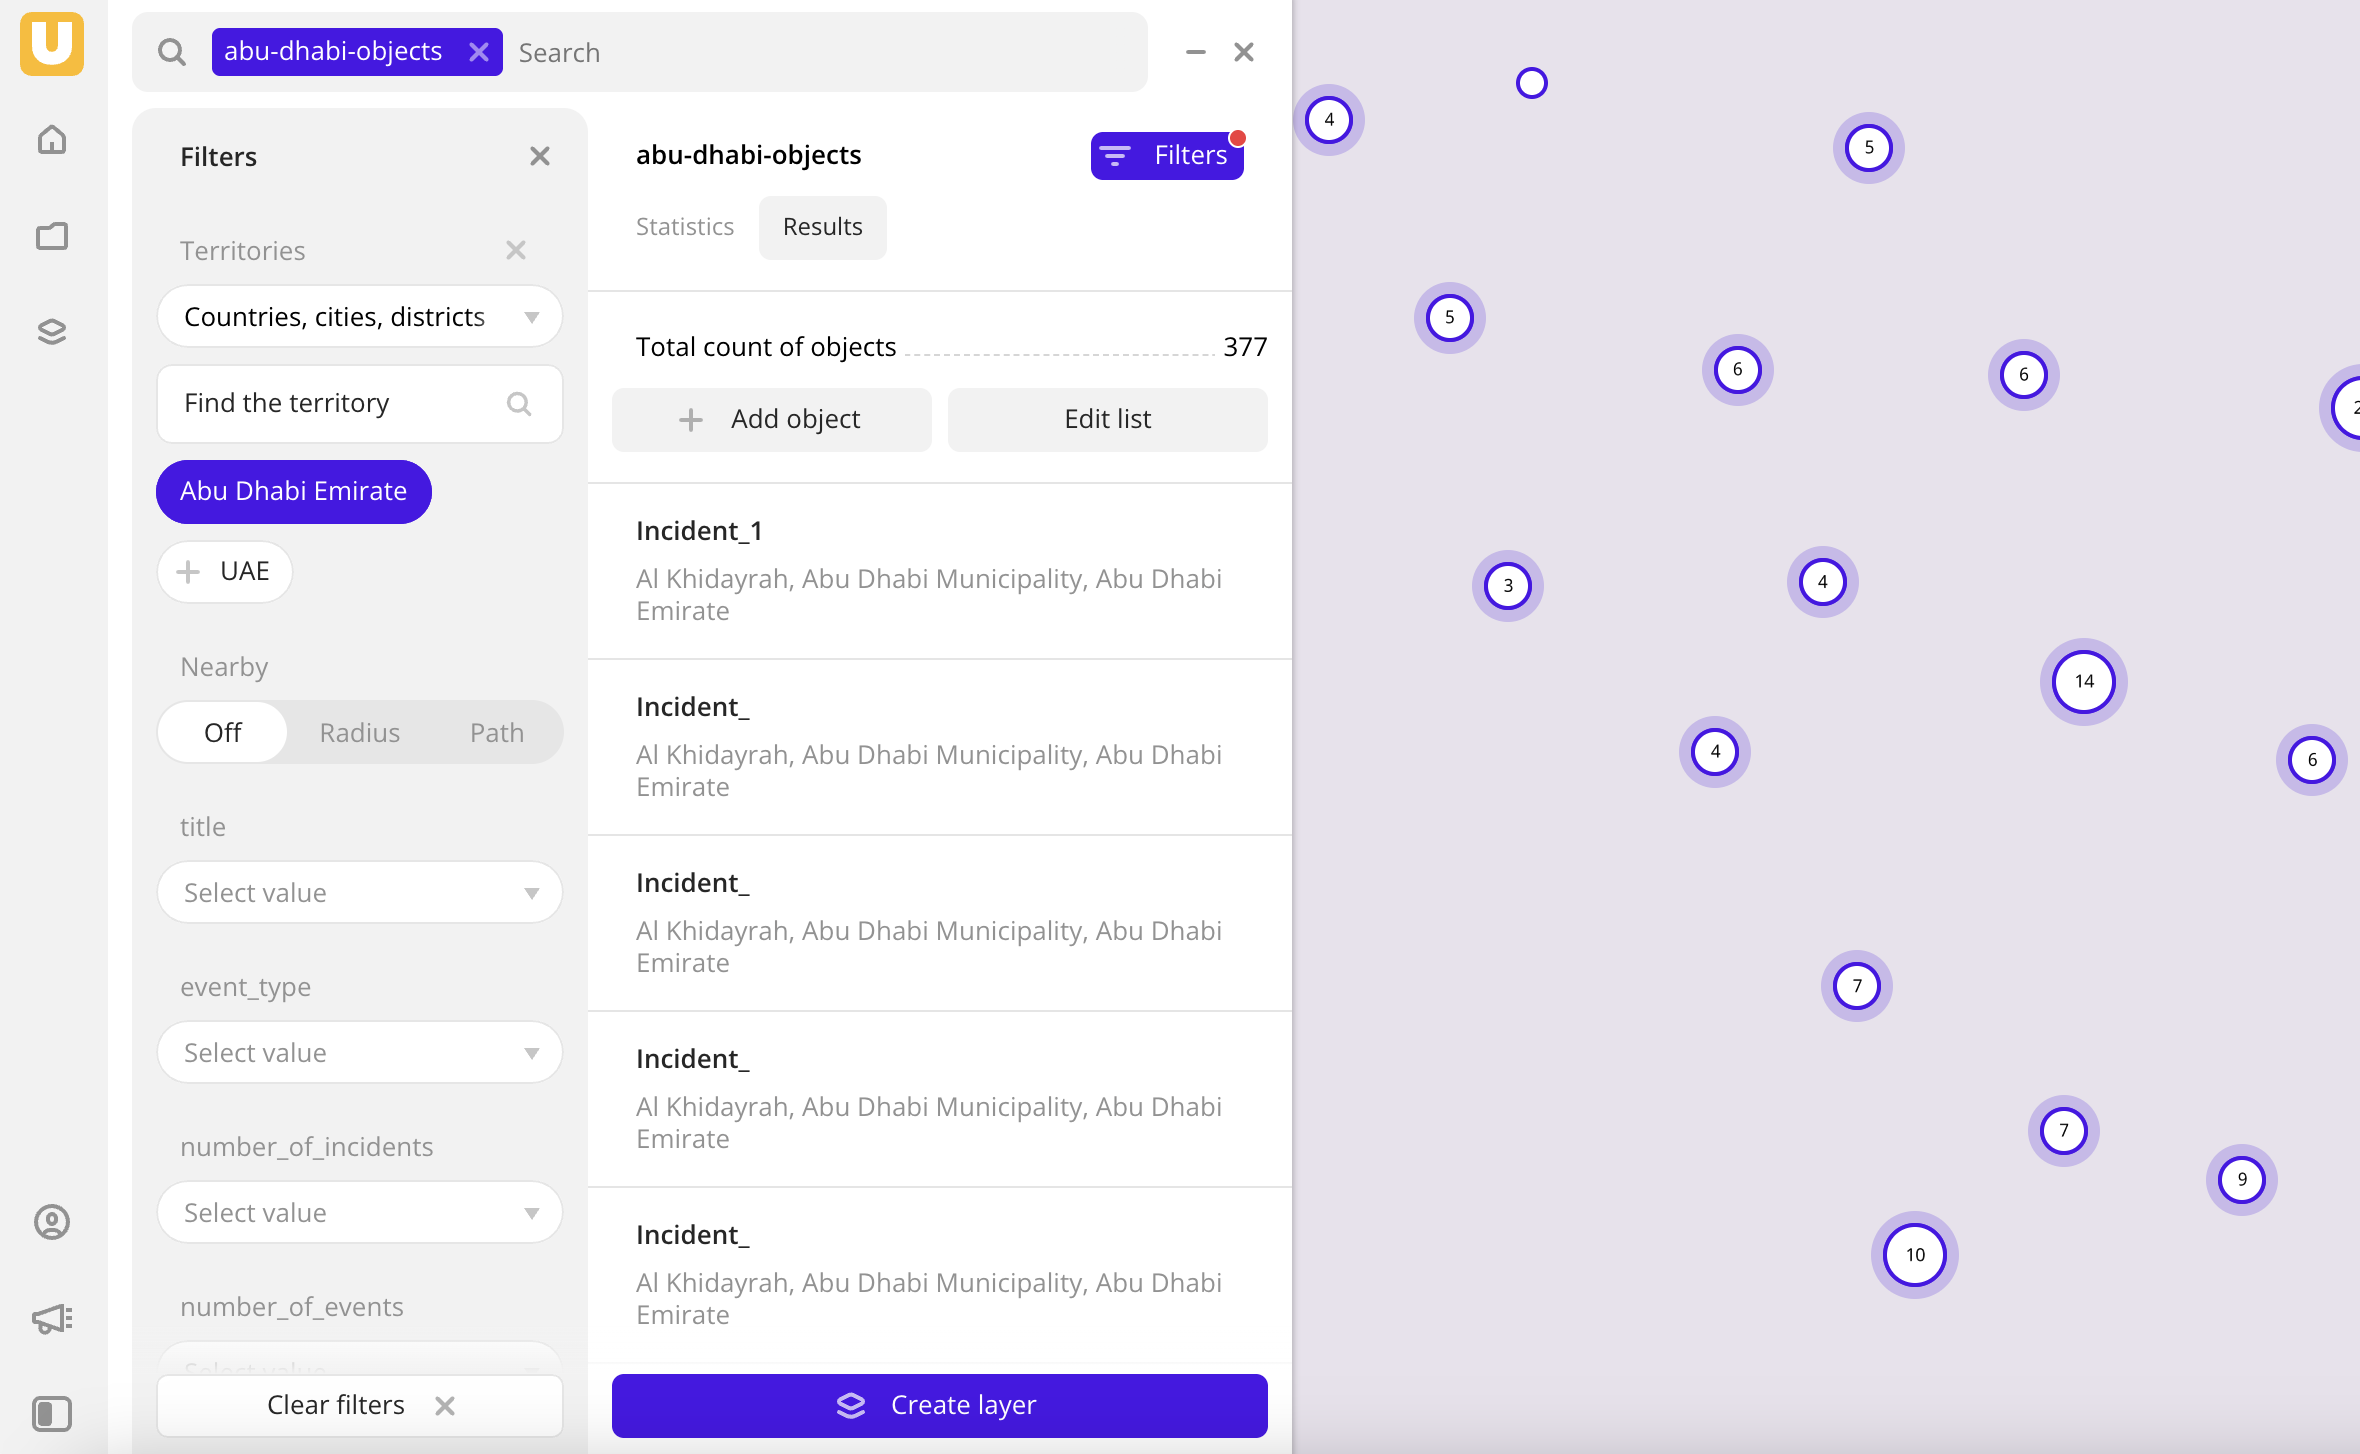
-
Specify data attributes.
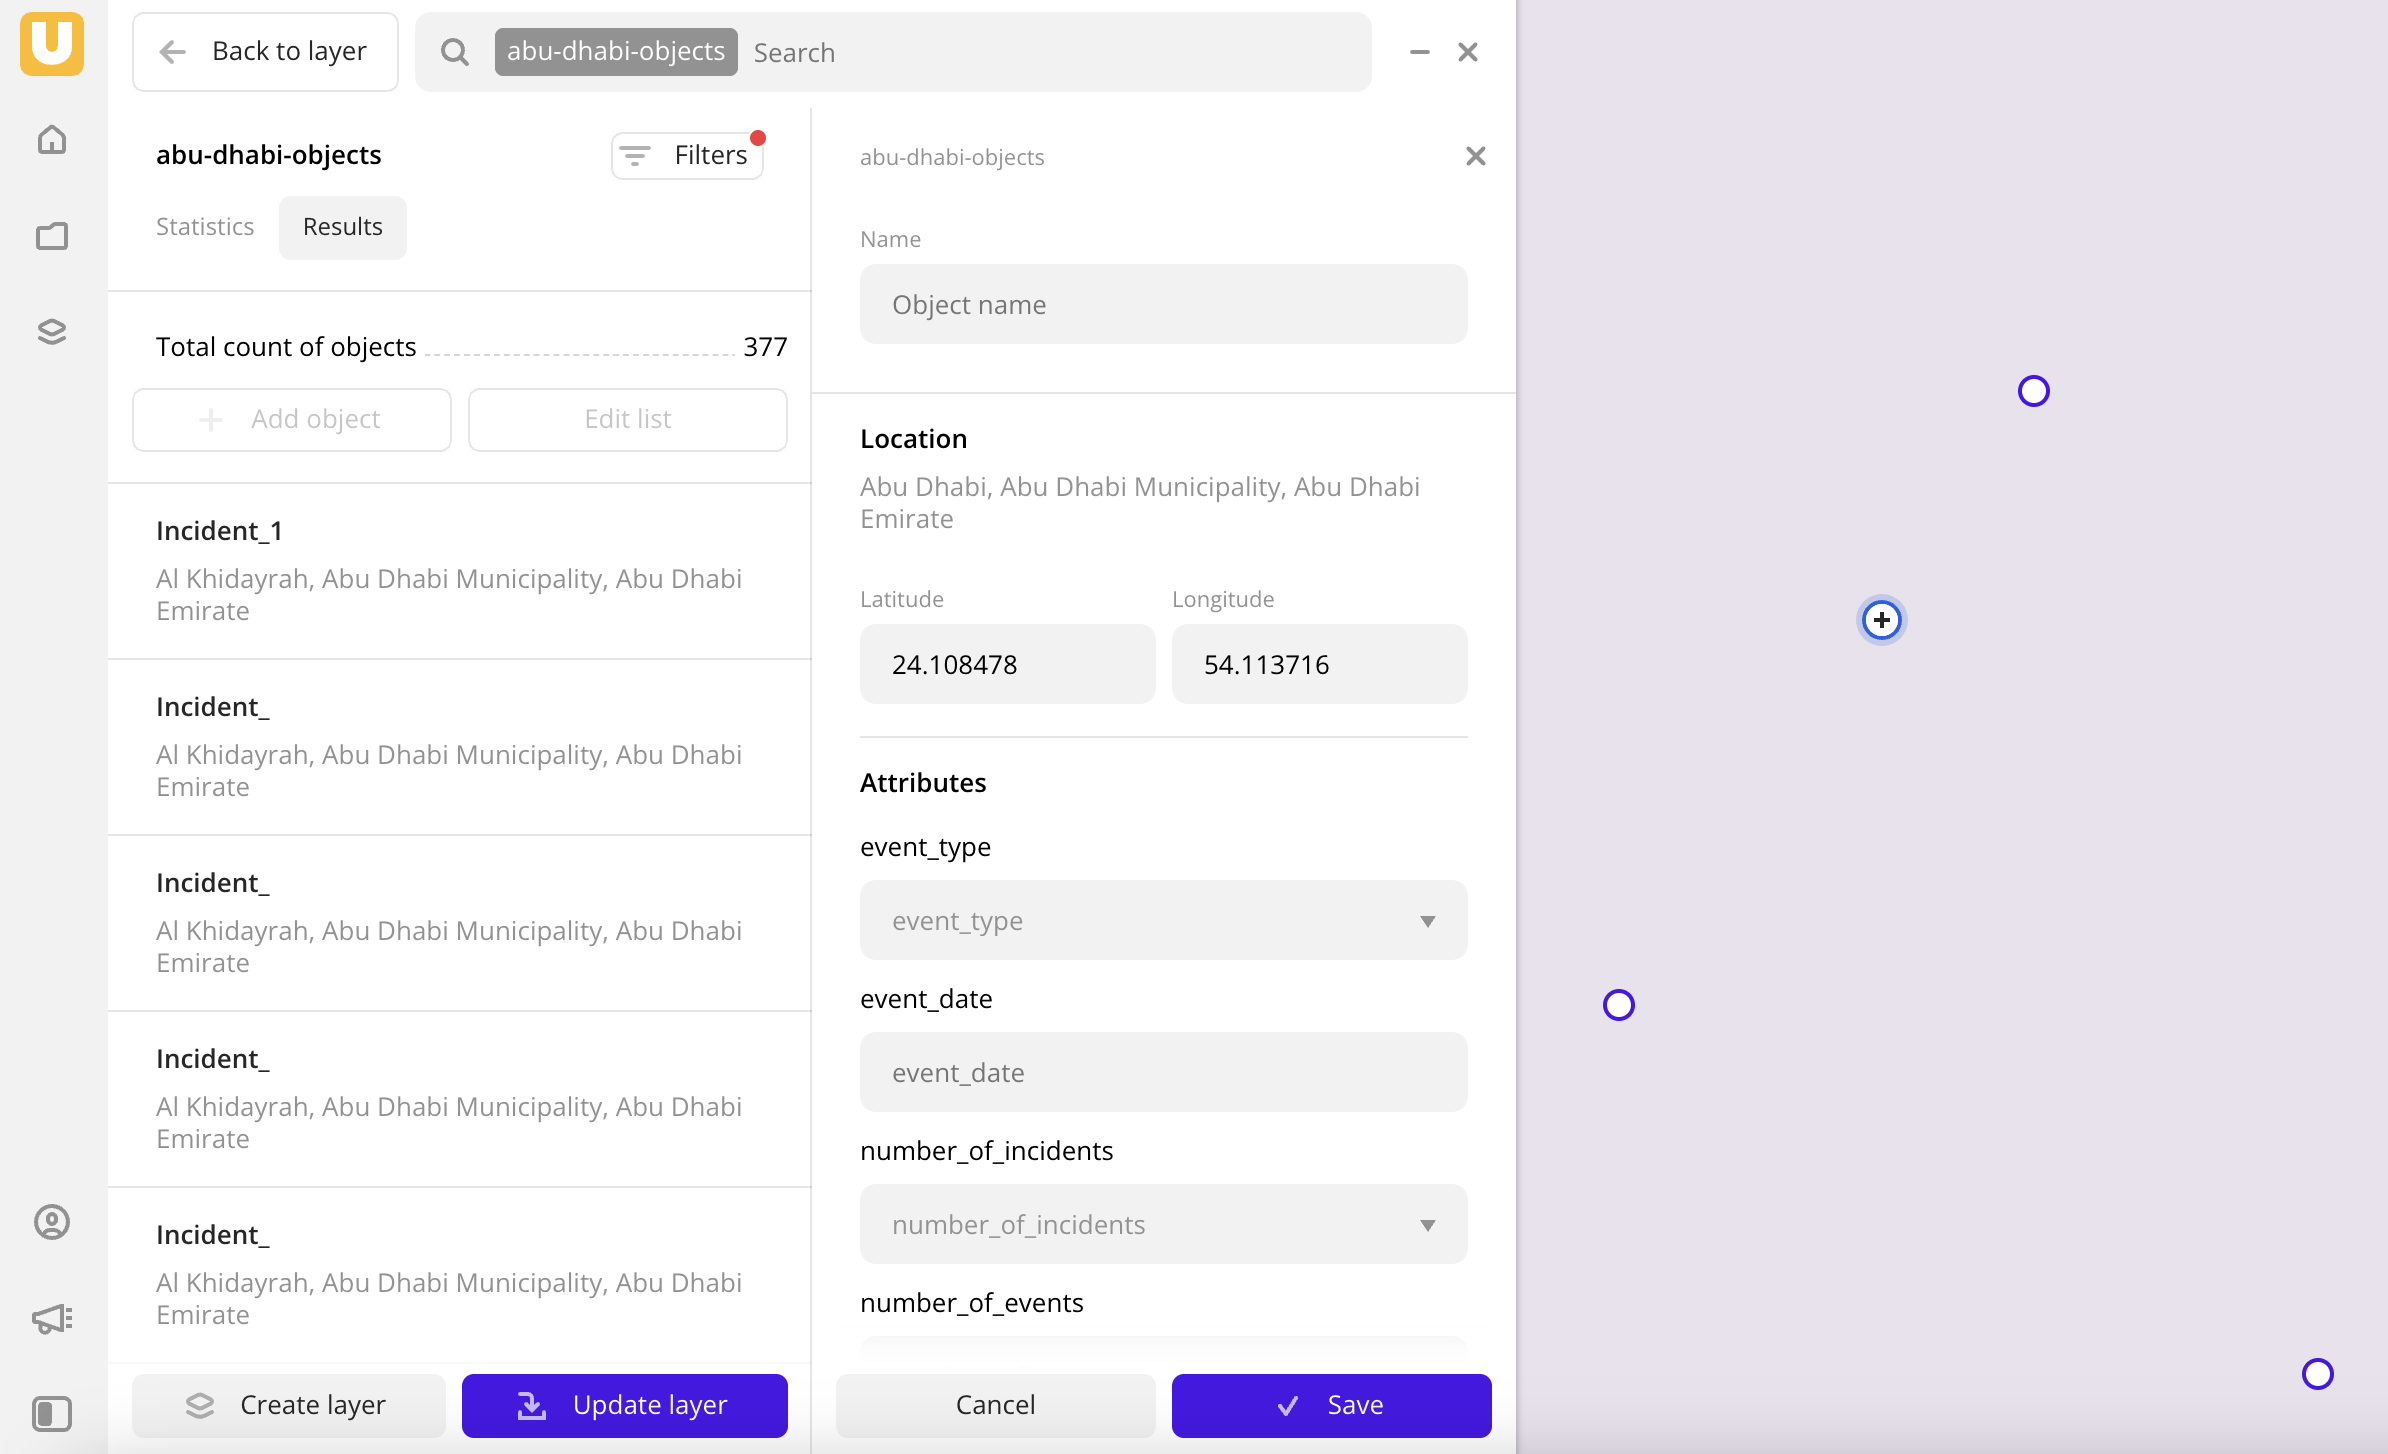
Mandatory fields:
- Name: required if the uploaded data contains attributes of this type.
- Location: you can specify coordinates manually or drag
 to the required place on the map.
If an attribute was configured to use the
Multiple choice from the listfilter type during data upload, you can specify its value manually or select an existing one from a list in this form. -
Click Save.
-
-
To delete an object:
- Go to the Results pane and select the required object.
- Click Delete and confirm deleting.
-
If you create a layer, click Create layer.
-
If you work with a created layer, click one of the buttons:
- Update layer: all changes are saved, and the layer is updated.
- Create layer: a new layer is created and added to the current dashboard scene.
- Back to layer: the changes are not saved, and the current dashboard scene is opened.
Configuring a tooltip with data attributes
After creating a layer with a data sample, when you hover the cursor over an item on the map, a tooltip with a short help about the item appears.
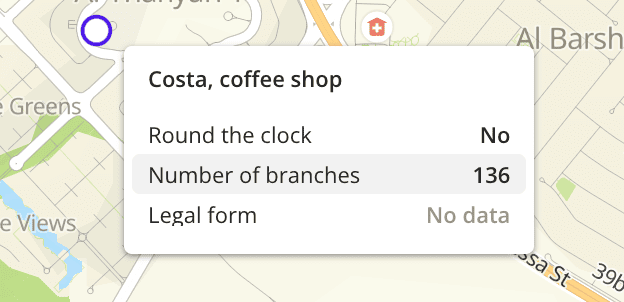
You can customize the list of data attributes that are displayed in the tooltip. By default, the tooltip settings are used in all layers created from this dataset (with the Point, Buildings, Line, and Polygon visualization methods). You can change the settings after creating the layer: see the documentation for the data visualization methods.
-
Go to the Data tab.
-
On the required dataset card, click
icon and select Edit. -
To display the attributes you specify in the tooltip, enable the Tooltip setup option.
If the option is disabled, the tooltip shows all data attributes from the dataset. The attributes are displayed in the order that was specified during uploading.
-
Set the list of attributes that will be displayed in the element tooltip. Select the required attributes and change their order if necessary. The available values depend on the data in the sample.
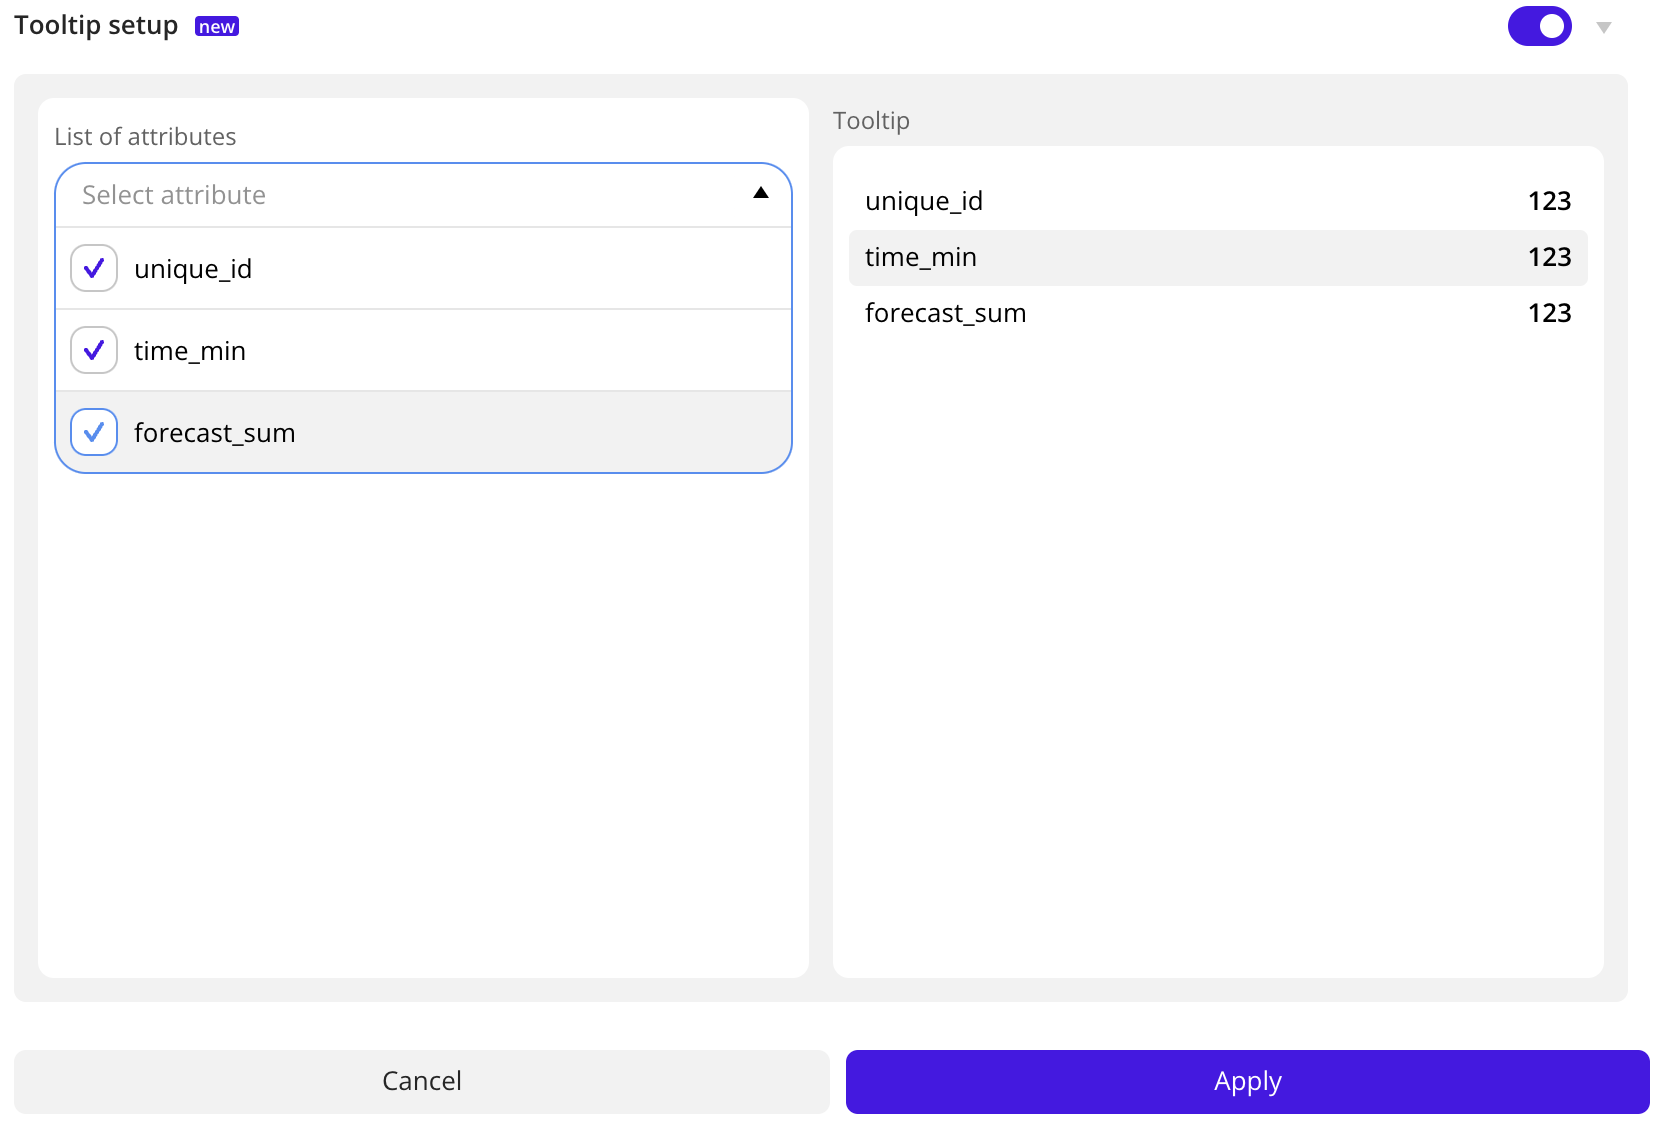
-
In the Tooltip field to the right of the attribute list, a preview of the tooltip on the map is shown. Check the tooltip display and click Apply.
Managing access to a dataset
You can grant access to view or edit the dataset to other authorized users.
If you use a demo tariff, you cannot grant access to uploaded datasets.
Depending on the access level, the user can perform different operations:
-
View: view the dataset and create data samples from it.
-
Edit: view the dataset, create data samples from it, and also perform any operations available to the dataset owner: rename the dataset; add and change the dataset description; create filters by territory and delete them; add point objects to the dataset or delete them; customize the tooltip with data attributes; grant, edit, and revoke dataset access for other users; export the dataset. If the dataset is edited, the changes are visible to both the owner and all users who have been granted access to it.
If the user deletes a dataset that they have been granted access to, they lose access to the dataset and all associated layers. The original dataset and access of other users remain unchanged. For more information, see the Deleting a dataset section.
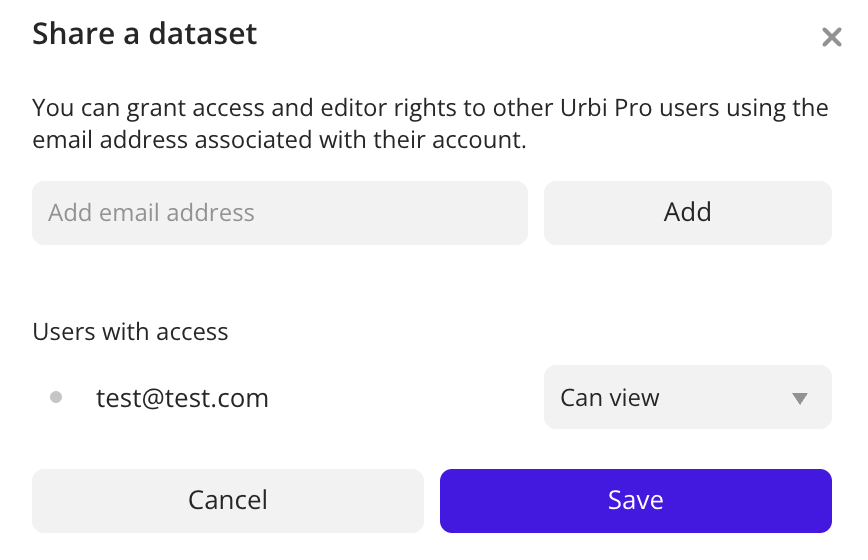
To grant access to a dataset:
- Go to the Data tab.
- On the required dataset card, click icon and select Share.
- Enter the email address of the user to grant access to and click Add.
- Next to the user address, select the access level in the list:
VieworEdit. - Click Save.
- If you need to revoke access from the user, next to the user address, select
Deletein the list.
Datasets that have been granted access to are located in the user profile on the Data tab, in the My data dataset group. On the cards of these datasets, the Publicly available tag and the email address of the user who granted access are displayed. If necessary, you can move the dataset to another group.
Exporting data
If you are the dataset owner (you previously uploaded a data file) or you have been granted access to edit the dataset, you can export data from the dataset in the .csv format. Only data from the sample is included in the export result.
If you added new objects or removed existing ones for a dataset with point objects, only data from the latest version of the dataset is exported.
To export data:
- Go to the Main or Data tab.
- Select the required uploaded dataset.
- In the Geofilter settings dialog, select up to 50 territories for which the data sample is created. You can use standard and custom territories and also build polygons, proximity zones, and circles on the map. For more information, see the Geofilters section. After you select the territories, click Done.
- If necessary, apply filters by parameters to the data or edit the filtering results manually: see the Modifying the data sample instruction.
- Click
 icon.
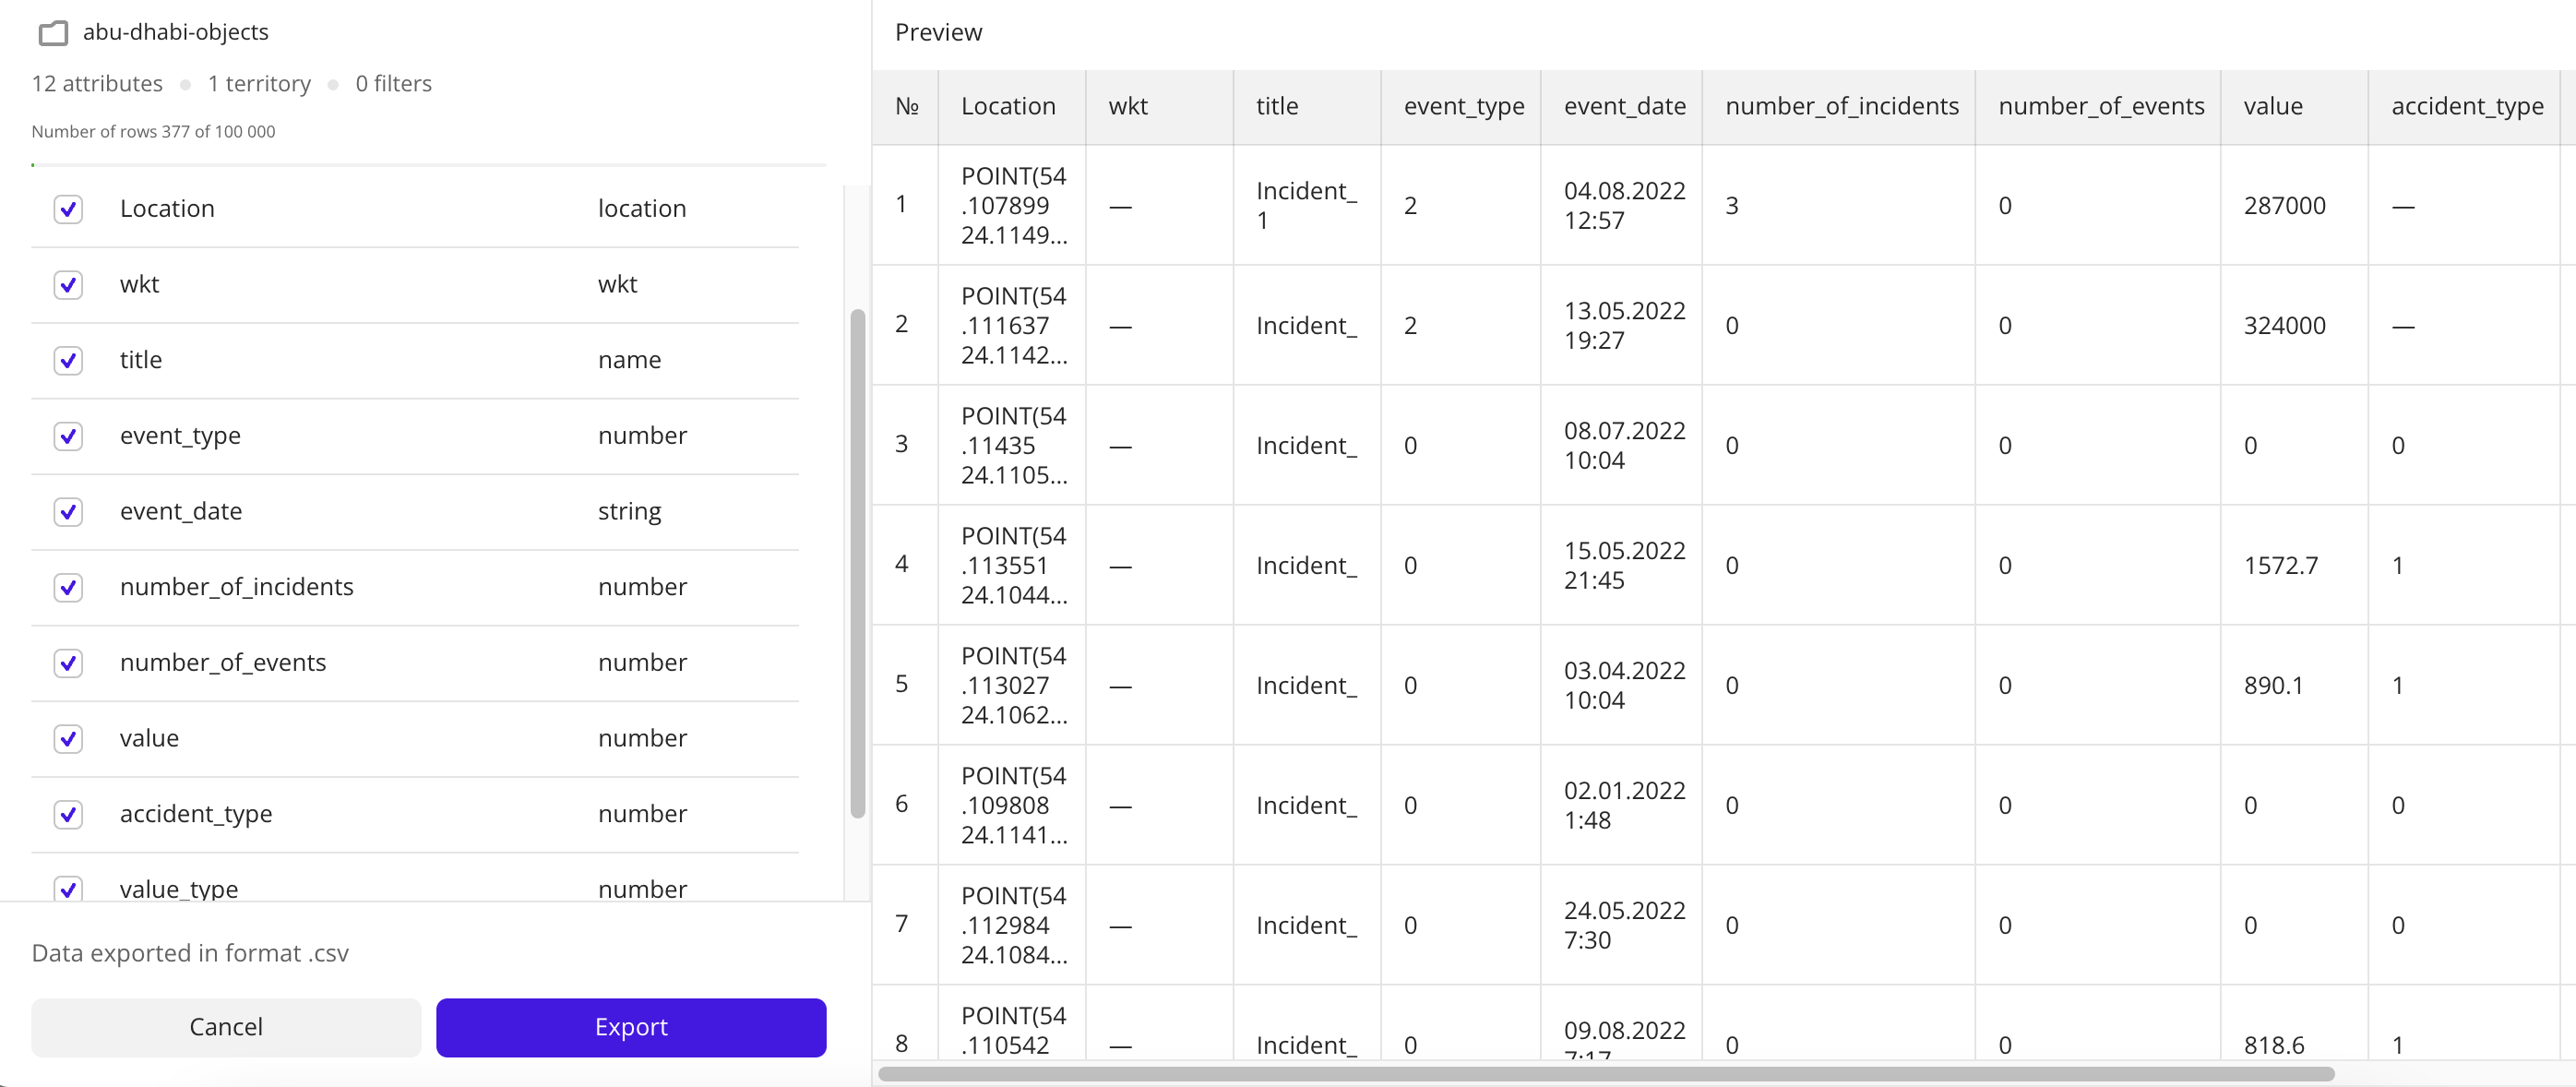
icon. - Select checkboxes next to the required rows to include the attributes in the final export.
- Check the result in preview mode. Only the first 10 rows are shown in the table.
- Click Export.
Deleting a dataset
Important
Deleting the dataset permanently deletes all layers and territory filters associated with it.
If you are the dataset owner and granted access to it to other users, they also lose that data when you delete the dataset. If you delete a dataset that you have been granted access to, the original dataset and access of other users remain unchanged.
- Go to the Data tab.
- On the required dataset card, click icon and select Delete.
- To confirm deleting, click Delete.
Datasets uploaded via API
Using the API, you can manage only datasets that you uploaded via API:
- upload new portions of data to datasets after creating them
- get datasets parameters
- change datasets parameters
- manage access to datasets
- export data from datasets
- delete several objects from a dataset
- delete all objects from a dataset
You can delete a dataset uploaded via API only in the Urbi Pro interface.
To send requests from the examples below, use the credentials that you received when created a dataset:
- Dataset ID (
assetId). Also, you can copy the ID in Urbi Pro: go to the Data tab, on the required dataset card, click icon and select Copy ID. - Access token for authorization (
access_token). Also, you can copy the token in Urbi Pro: click icon in the lower-left corner, go to the Tokens section and copy the value from the Token for dynamic datasets field.
Getting dataset parameters
Send a GET request to /dynamic_asset and specify the dataset ID (assetId parameter):
https://pro-api.2gis.ru/dynamic_asset/{assetId}
For more information about the response body, see the API Reference.
Changing dataset parameters
Important
If you add a new filter for an existing attribute, the filtering is applied only to new data uploaded after the filter was added. To index all data, add a new attribute along with a new filter.
-
Send a PUT request to
/dynamic_asset:https://pro-api.2gis.ru/dynamic_asset -
In the request body, pass the dataset ID (
assetIdparameter), dataset name, and other parameters that must be changed in the JSON format.For the full list of parameters, see the API Reference.
Managing access to a dataset
You can grant access to view or edit the dataset to other authorized users.
If you use a demo tariff, you cannot grant access to uploaded datasets.
Depending on the access level, the user can perform different operations:
-
View: view the dataset, create data samples from it, and get datasets parameters.
-
Edit: view the dataset; create data samples from it; get and change dataset parameters; delete objects from the dataset (all or several); grant, edit, and revoke dataset access for other users; export the dataset. If the dataset is edited, the changes are visible to both the owner and all users who have been granted access to it.
If the user deletes a dataset that they have been granted access to, they lose access to the dataset and all associated layers. The original dataset and access of other users remain unchanged. For more information, see the Deleting a dataset section.
To grant access to a dataset:
- Go to the Data tab.
- On the required dataset card, click icon and select Share.
- Enter the email address of the user to grant access to and click Add.
- Next to the user address, select the access level in the list:
VieworEdit. - Click Save.
- If you need to revoke access from the user, next to the user address, select
Deletein the list.
Datasets that have been granted access to are located in the user profile on the Data tab, in the My data dataset group. On the cards of these datasets, the Publicly available tag and the email address of the user who granted access are displayed. If necessary, you can move the dataset to another group.
Exporting data
If you are the dataset owner (you previously uploaded data via API) or you have been granted access to edit the dataset, you can export data from the dataset in the .csv format. Only data from the sample is included in the export result.
If you uploaded new portions of data to the dataset after creating it, or deleted objects from it, only data from the latest version of the dataset is exported.
To export data:
- Go to the Main or Data tab.
- Select the required uploaded dataset.
- In the Geofilter settings dialog, select up to 50 territories for which the data sample is created. You can use standard and custom territories and also build polygons, proximity zones, and circles on the map. For more information, see the Geofilters section. After you select the territories, click Done.
- If necessary, apply filters by parameters to the data or edit the filtering results manually: see the Modifying the data sample instruction.
- Click icon.
- Select checkboxes next to the required rows to include the attributes in the final export.
- Check the result in preview mode. Only the first 10 rows are shown in the table.
- Click Export.
Deleting several objects from a dataset
-
Send a DELETE request to
/dynamic_assethttps://pro-api.2gis.ru/dynamic_asset/{assetId}/data -
In the request body, pass the dataset ID (
assetIdparameter) and a list of object IDs in the JSON format.For more information, see the API Reference.
Deleting all objects from a dataset
Send a DELETE request to /dynamic_asset and specify the dataset ID (assetId parameter):
https://pro-api.2gis.ru/dynamic_asset/{assetId}/data/all
For more information, see the API Reference.
Deleting a dataset
Important
Deleting the dataset permanently deletes all layers associated with it.
If you are the dataset owner and granted access to it to other users, they also lose that data when you delete the dataset. If you delete a dataset that you have been granted access to, the original dataset and access of other users remain unchanged.
- Go to the Data tab.
- On the required dataset card, click icon and select Delete.
- To confirm deleting, click Delete.
What's next?
- See available Operations with dataset groups.
- Quick start.
- Get to know how to work with Data visualization.
- Get to know more about Layers, Dashboards, Scenes, and Widgets.
- Get to know prepared Analytics presets.