Tasks
Task is a planned route that a driver must follow to perform recording and to collect data. As a route, you can use:
-
Polygons: draw polygons on the interactive Urbi map or upload your own polygons with unique areas, regions, districts, and others. All roads inside the polygon are automatically included in the route. If necessary, you can exclude them.
You can also automatically split the polygon into multiple tasks depending on the number of drivers, time to complete the task, and the length of the route.
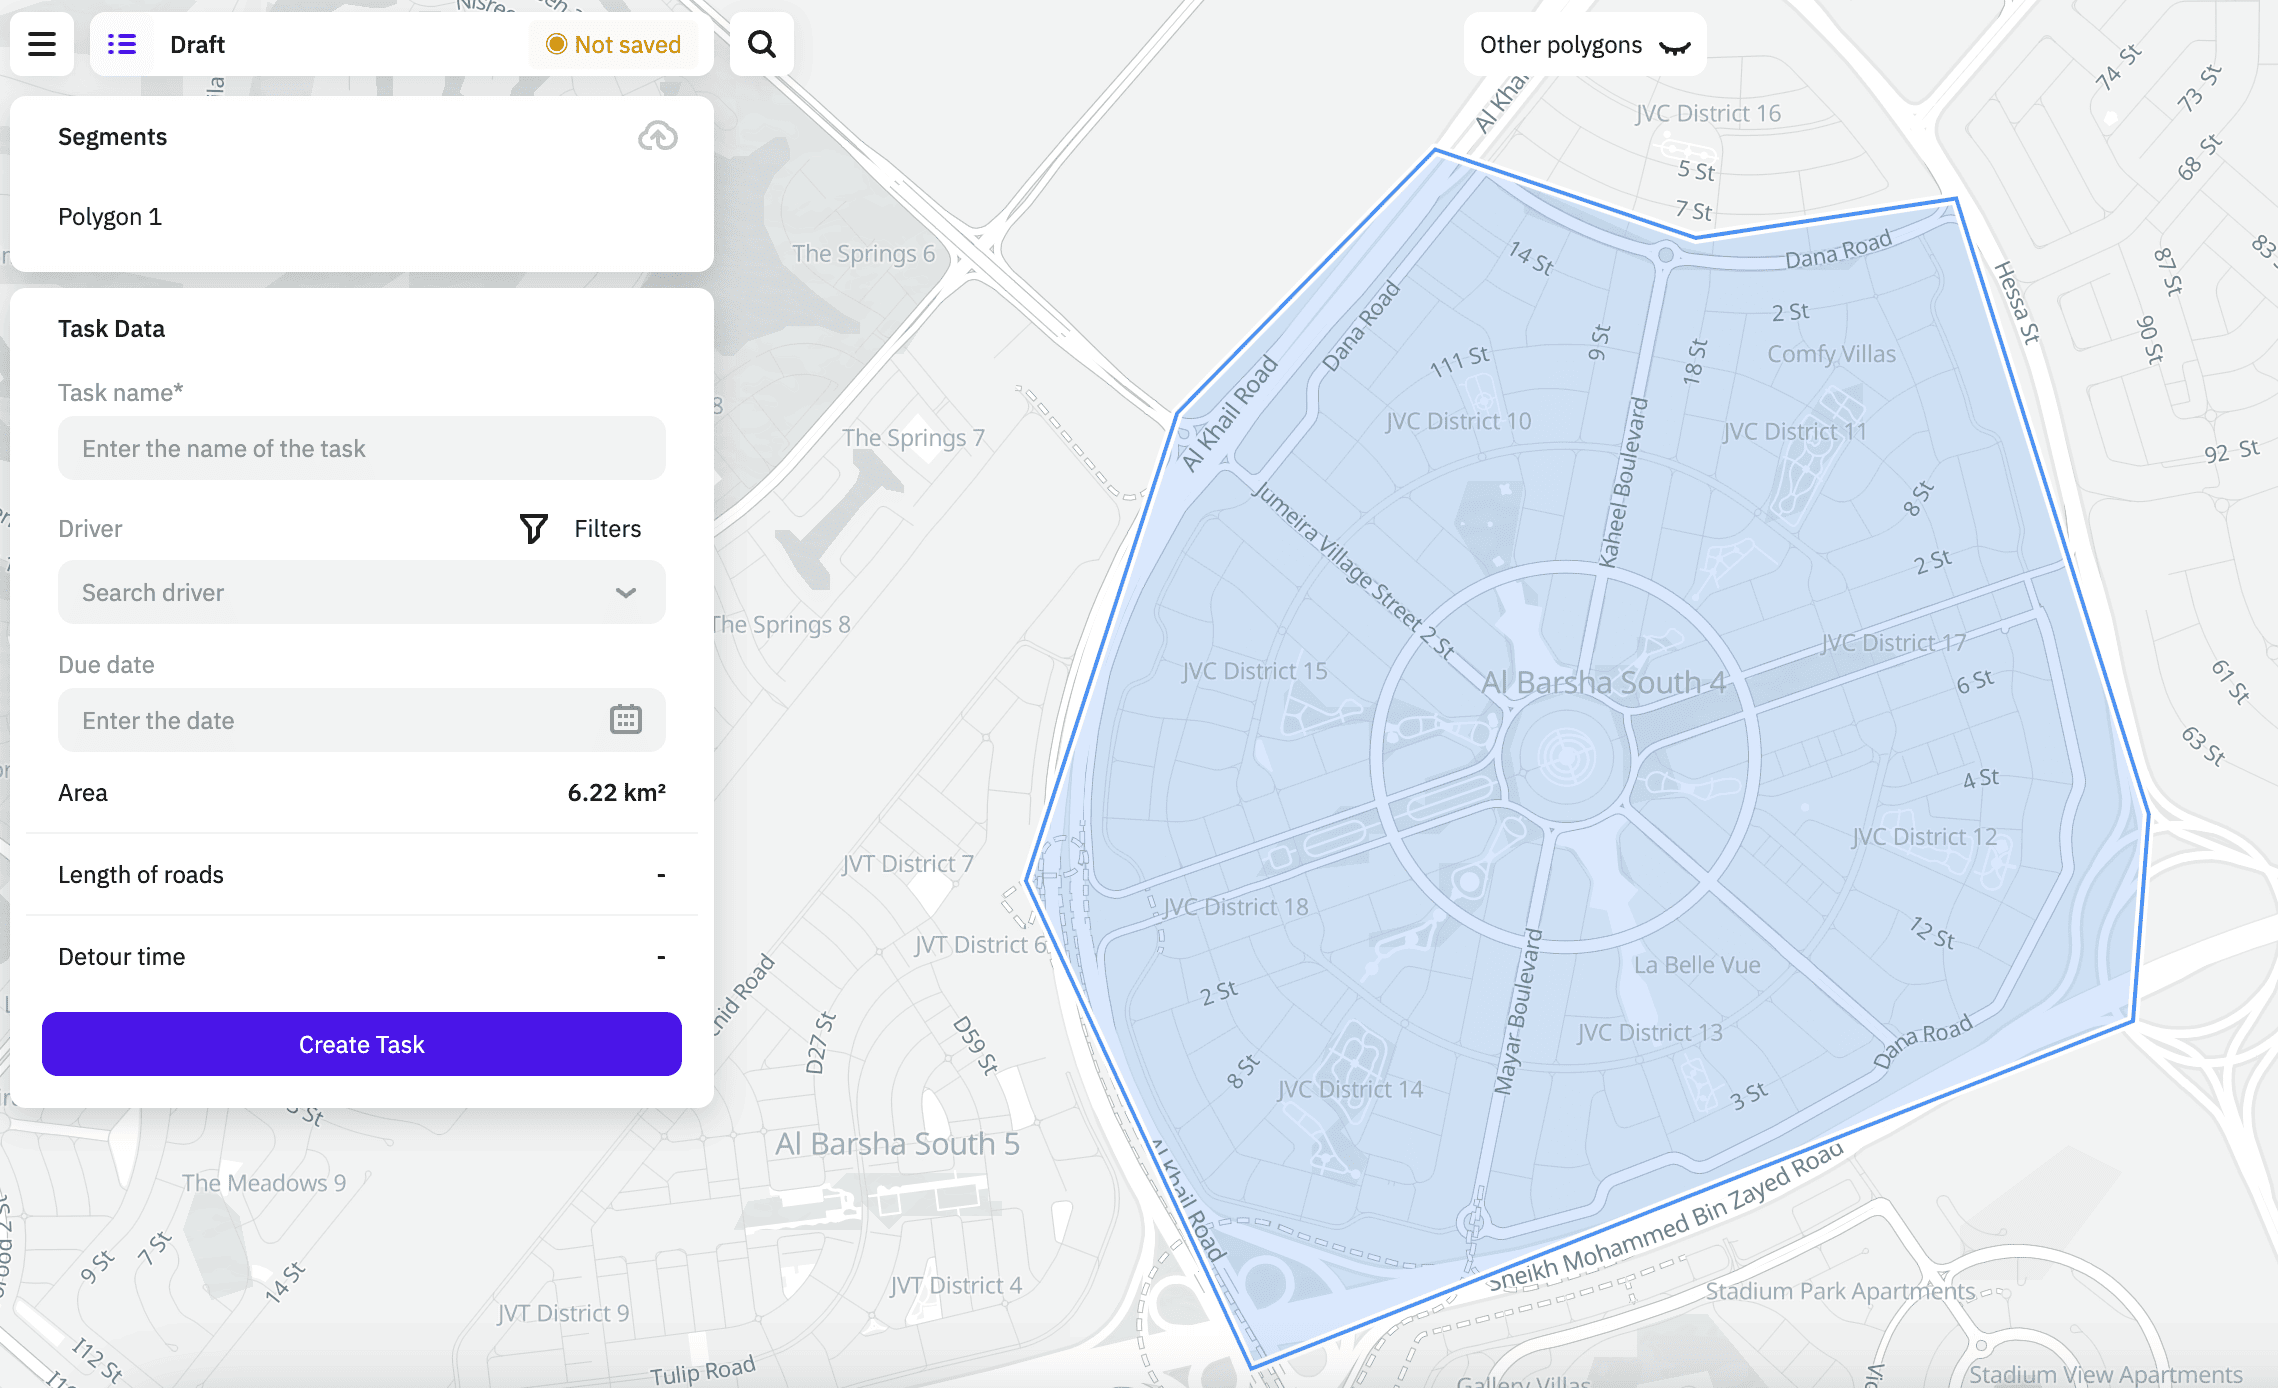
Example of a task with a polygon on the map:

-
Roads: highlight roads of the route on the map.
Example of a task with roads highlighted on the map:
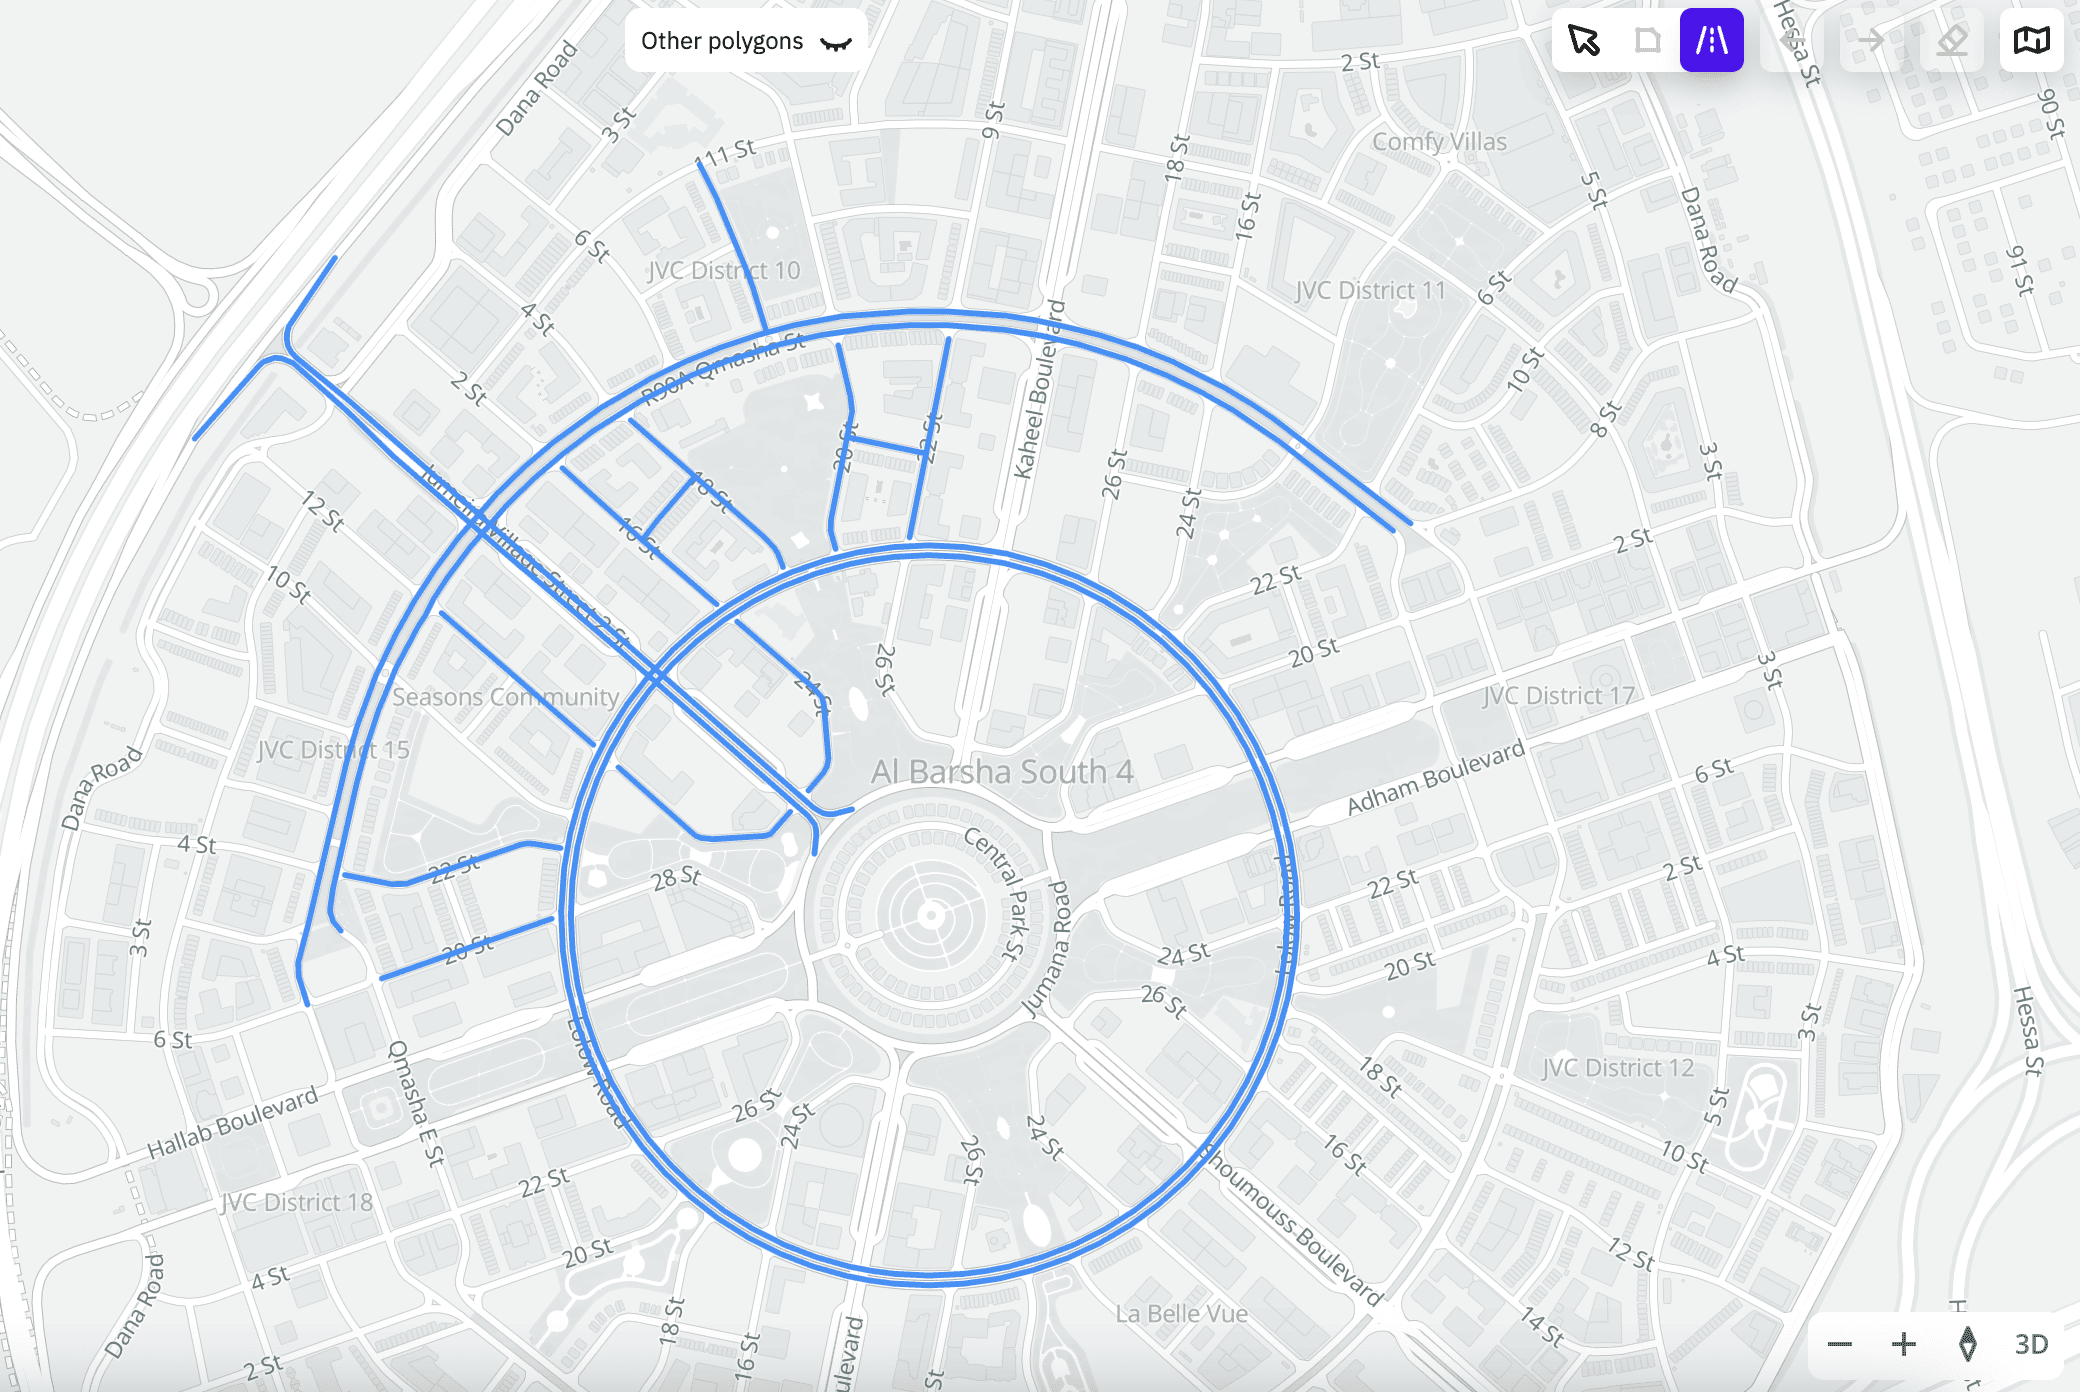
For each task, the total length of roads and the estimated travel time by car are calculated automatically. For tasks with polygons, the area of the polygon is also calculated.
In the Task Planner, you can work with tasks for covering territories on the Tasks tab:
- create tasks
- automatically split polygons into multiple tasks
- view information about tasks
- check the status of the created tasks
- edit tasks
- export polygons and routes from the task
- complete tasks
- cancel tasks
Creating a task
-
Go to the Tasks tab.
-
Open the page of the required territory and project.
-
Click New task.
-
Create a route in one of the following ways:
-
To draw a polygon on the map, click
 icon and place at least three points on the map. The points are connected automatically, and the polygon lines must not intersect. To close the polygon, connect the start and end points or press Enter.
To move a point, click and drag it to the required place on the map. To remove a point, hover over it and click
 icon.
icon.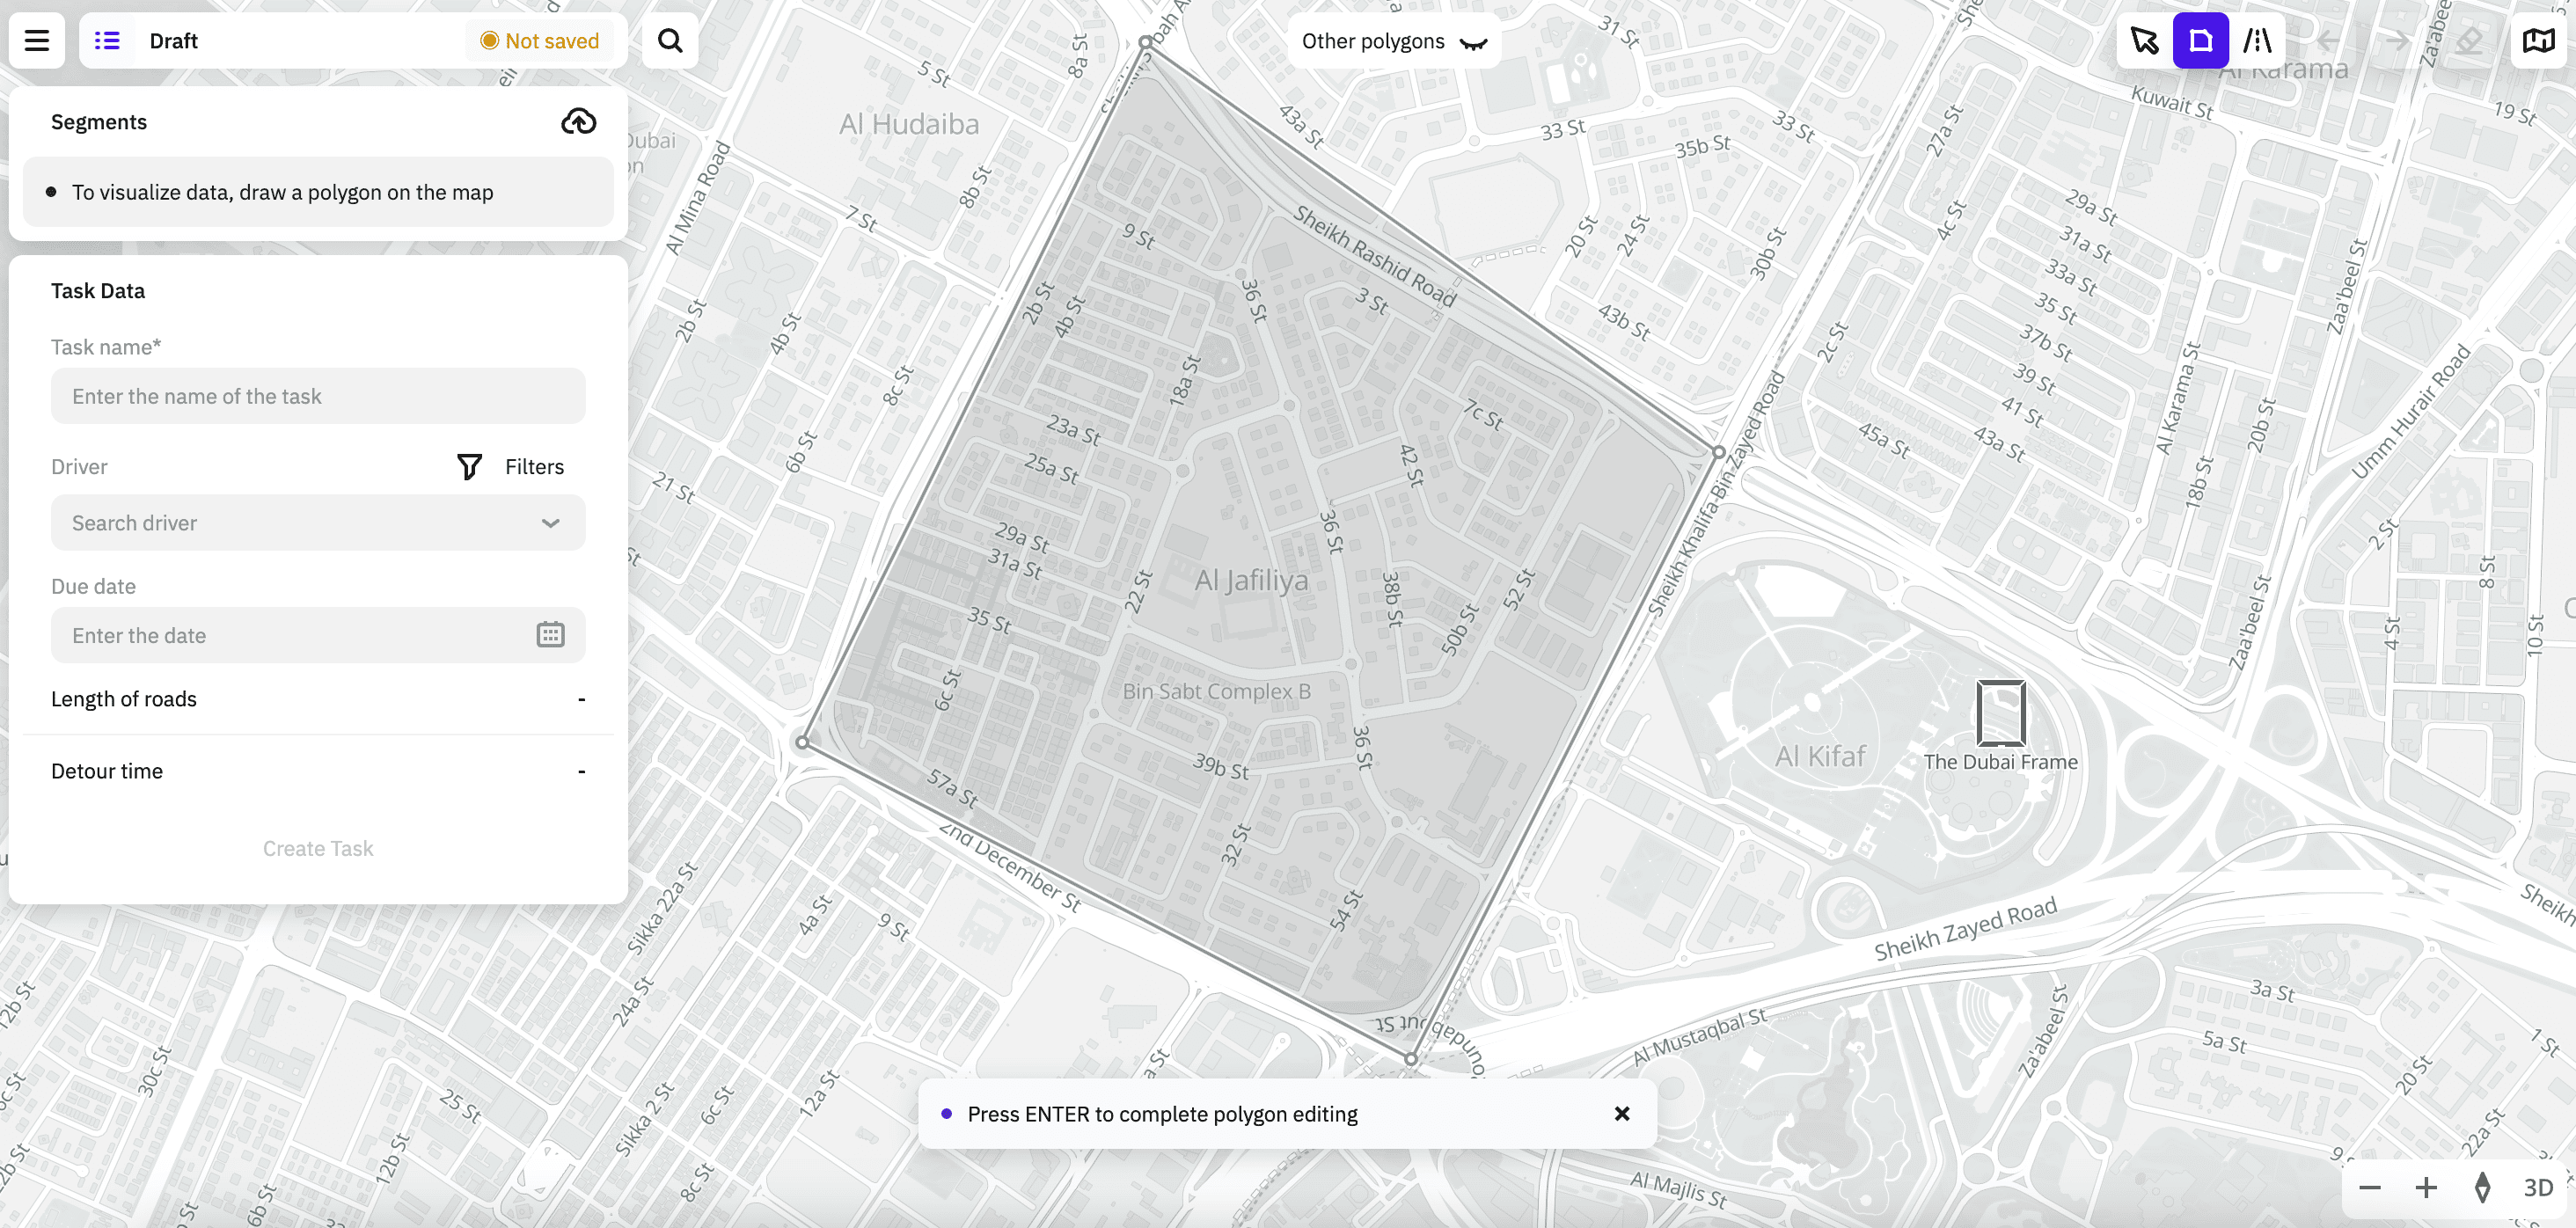
-
To upload your own polygon from a file (see polygon file requirements), click
 icon, drag a file to the upload area or Select a file on a computer.
 -
To highlight roads on the map, click
 icon and select the required segments. To delete a segment, click
  icon next to the required segment in the list.
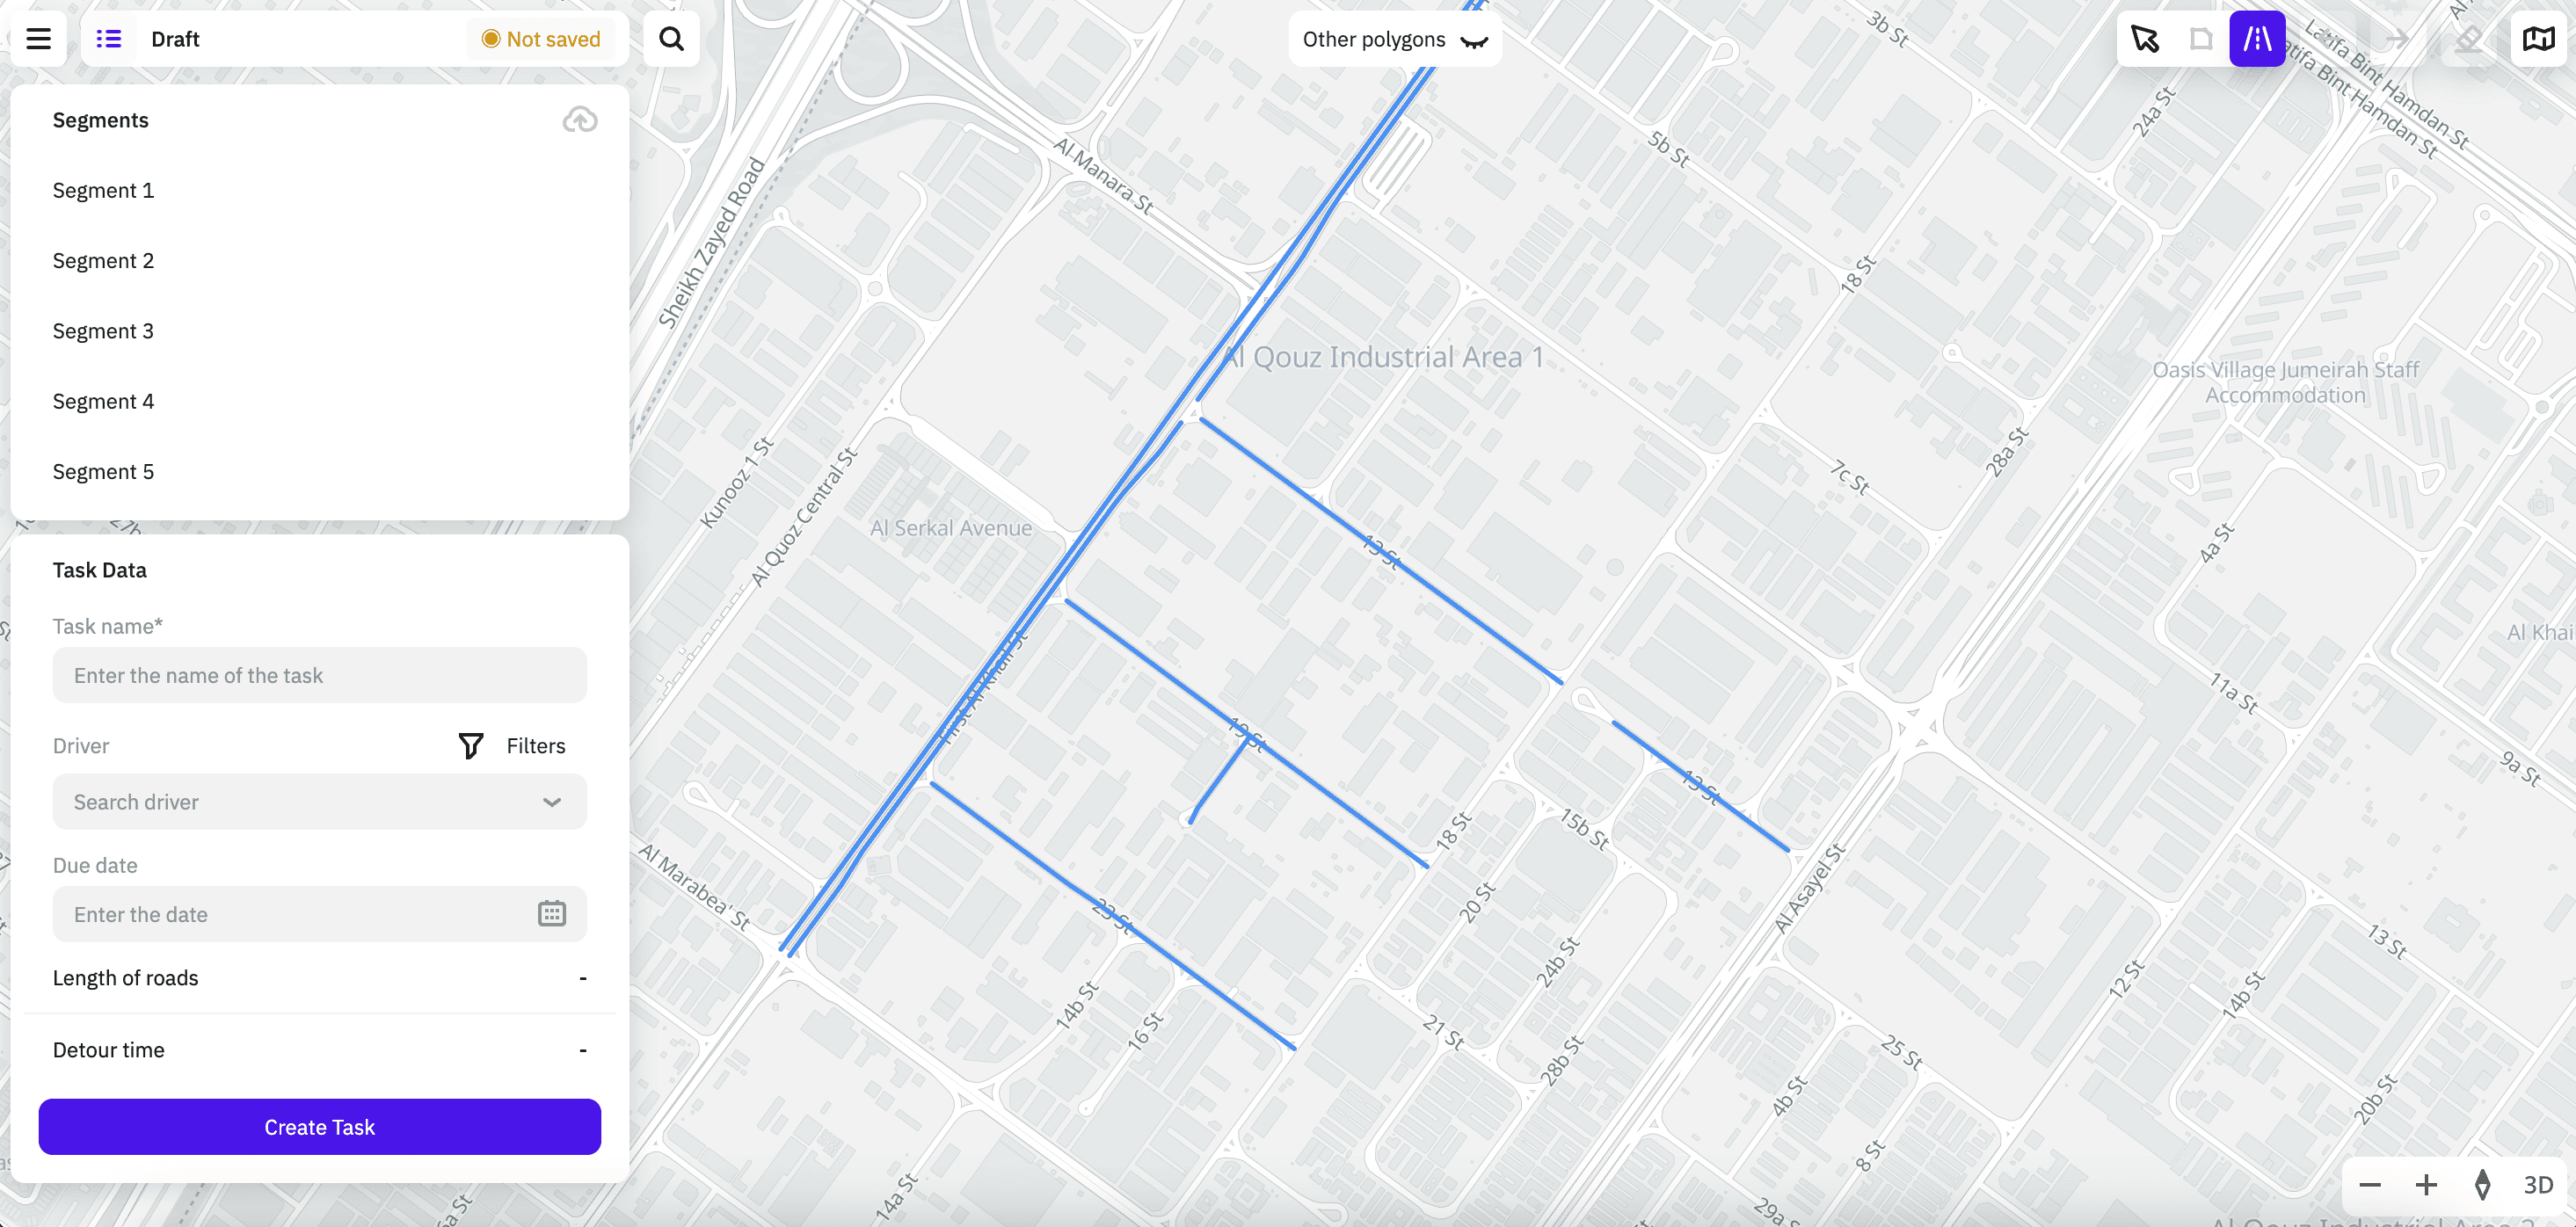
-
When you create a route, you can use the search by addresses, places, and organizations on the map. Also, you can use as polygons the standard territories (regions, districts, settlements, and others) selected in the search. The polygon is built on the map automatically:
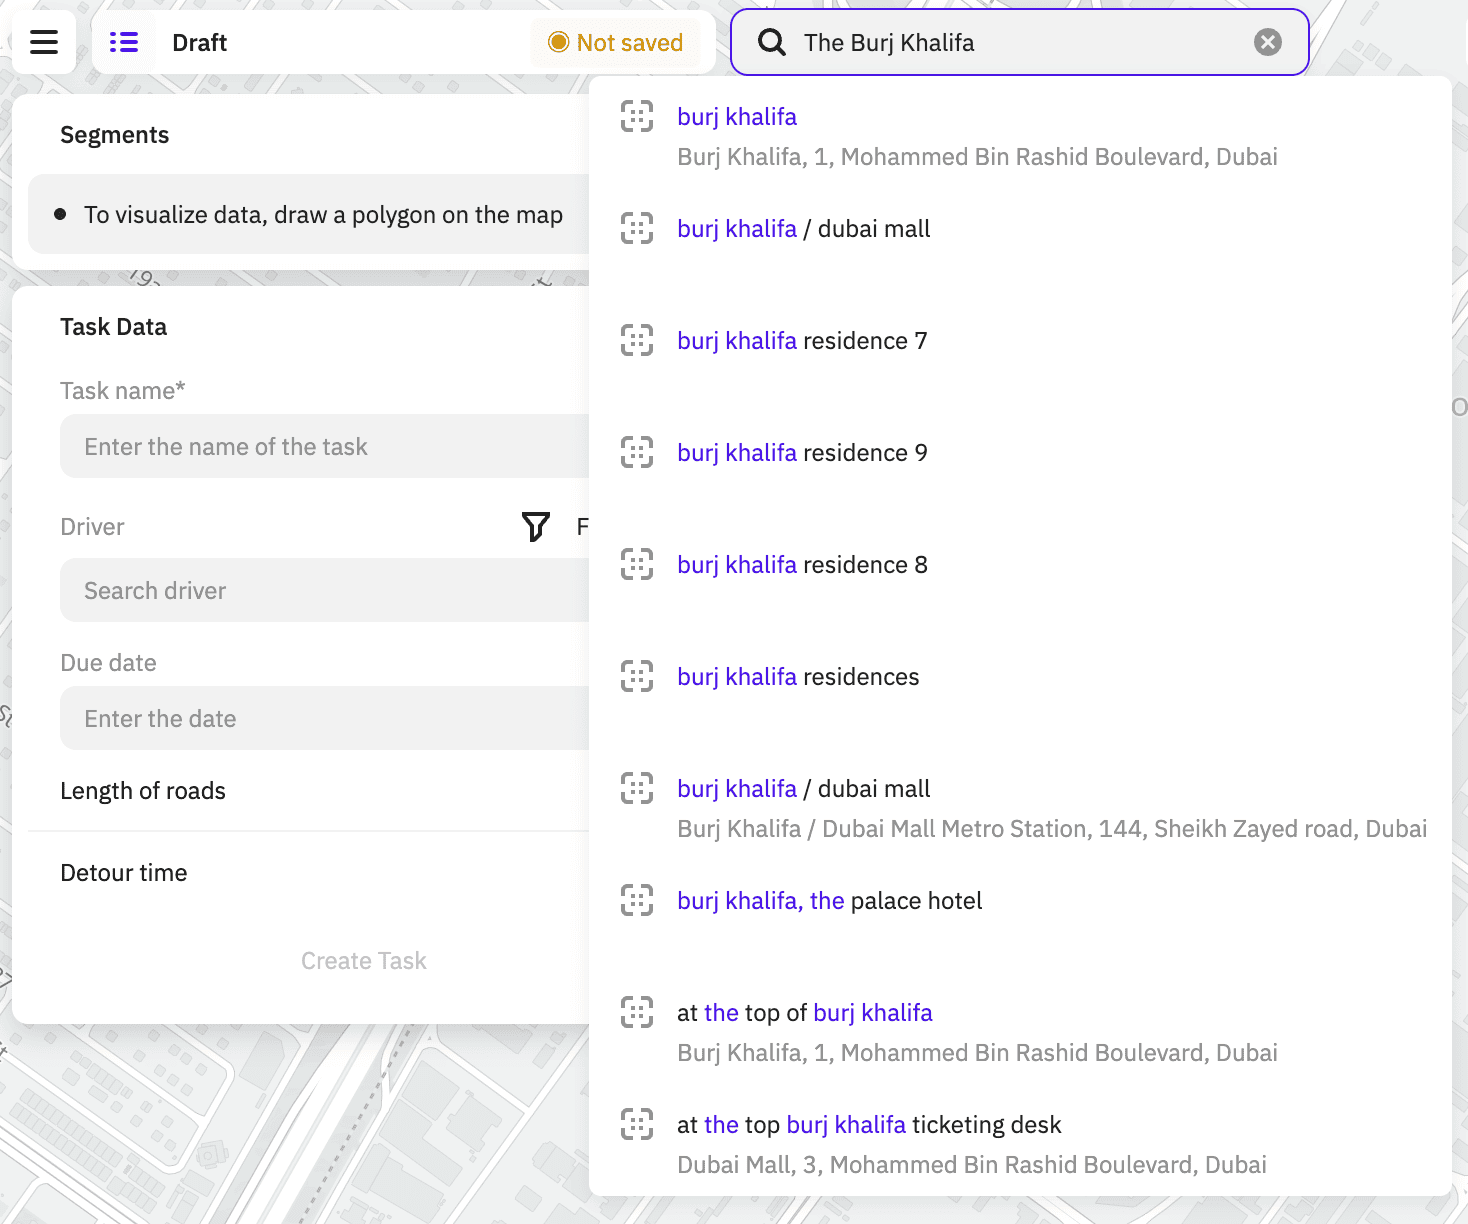
-
-
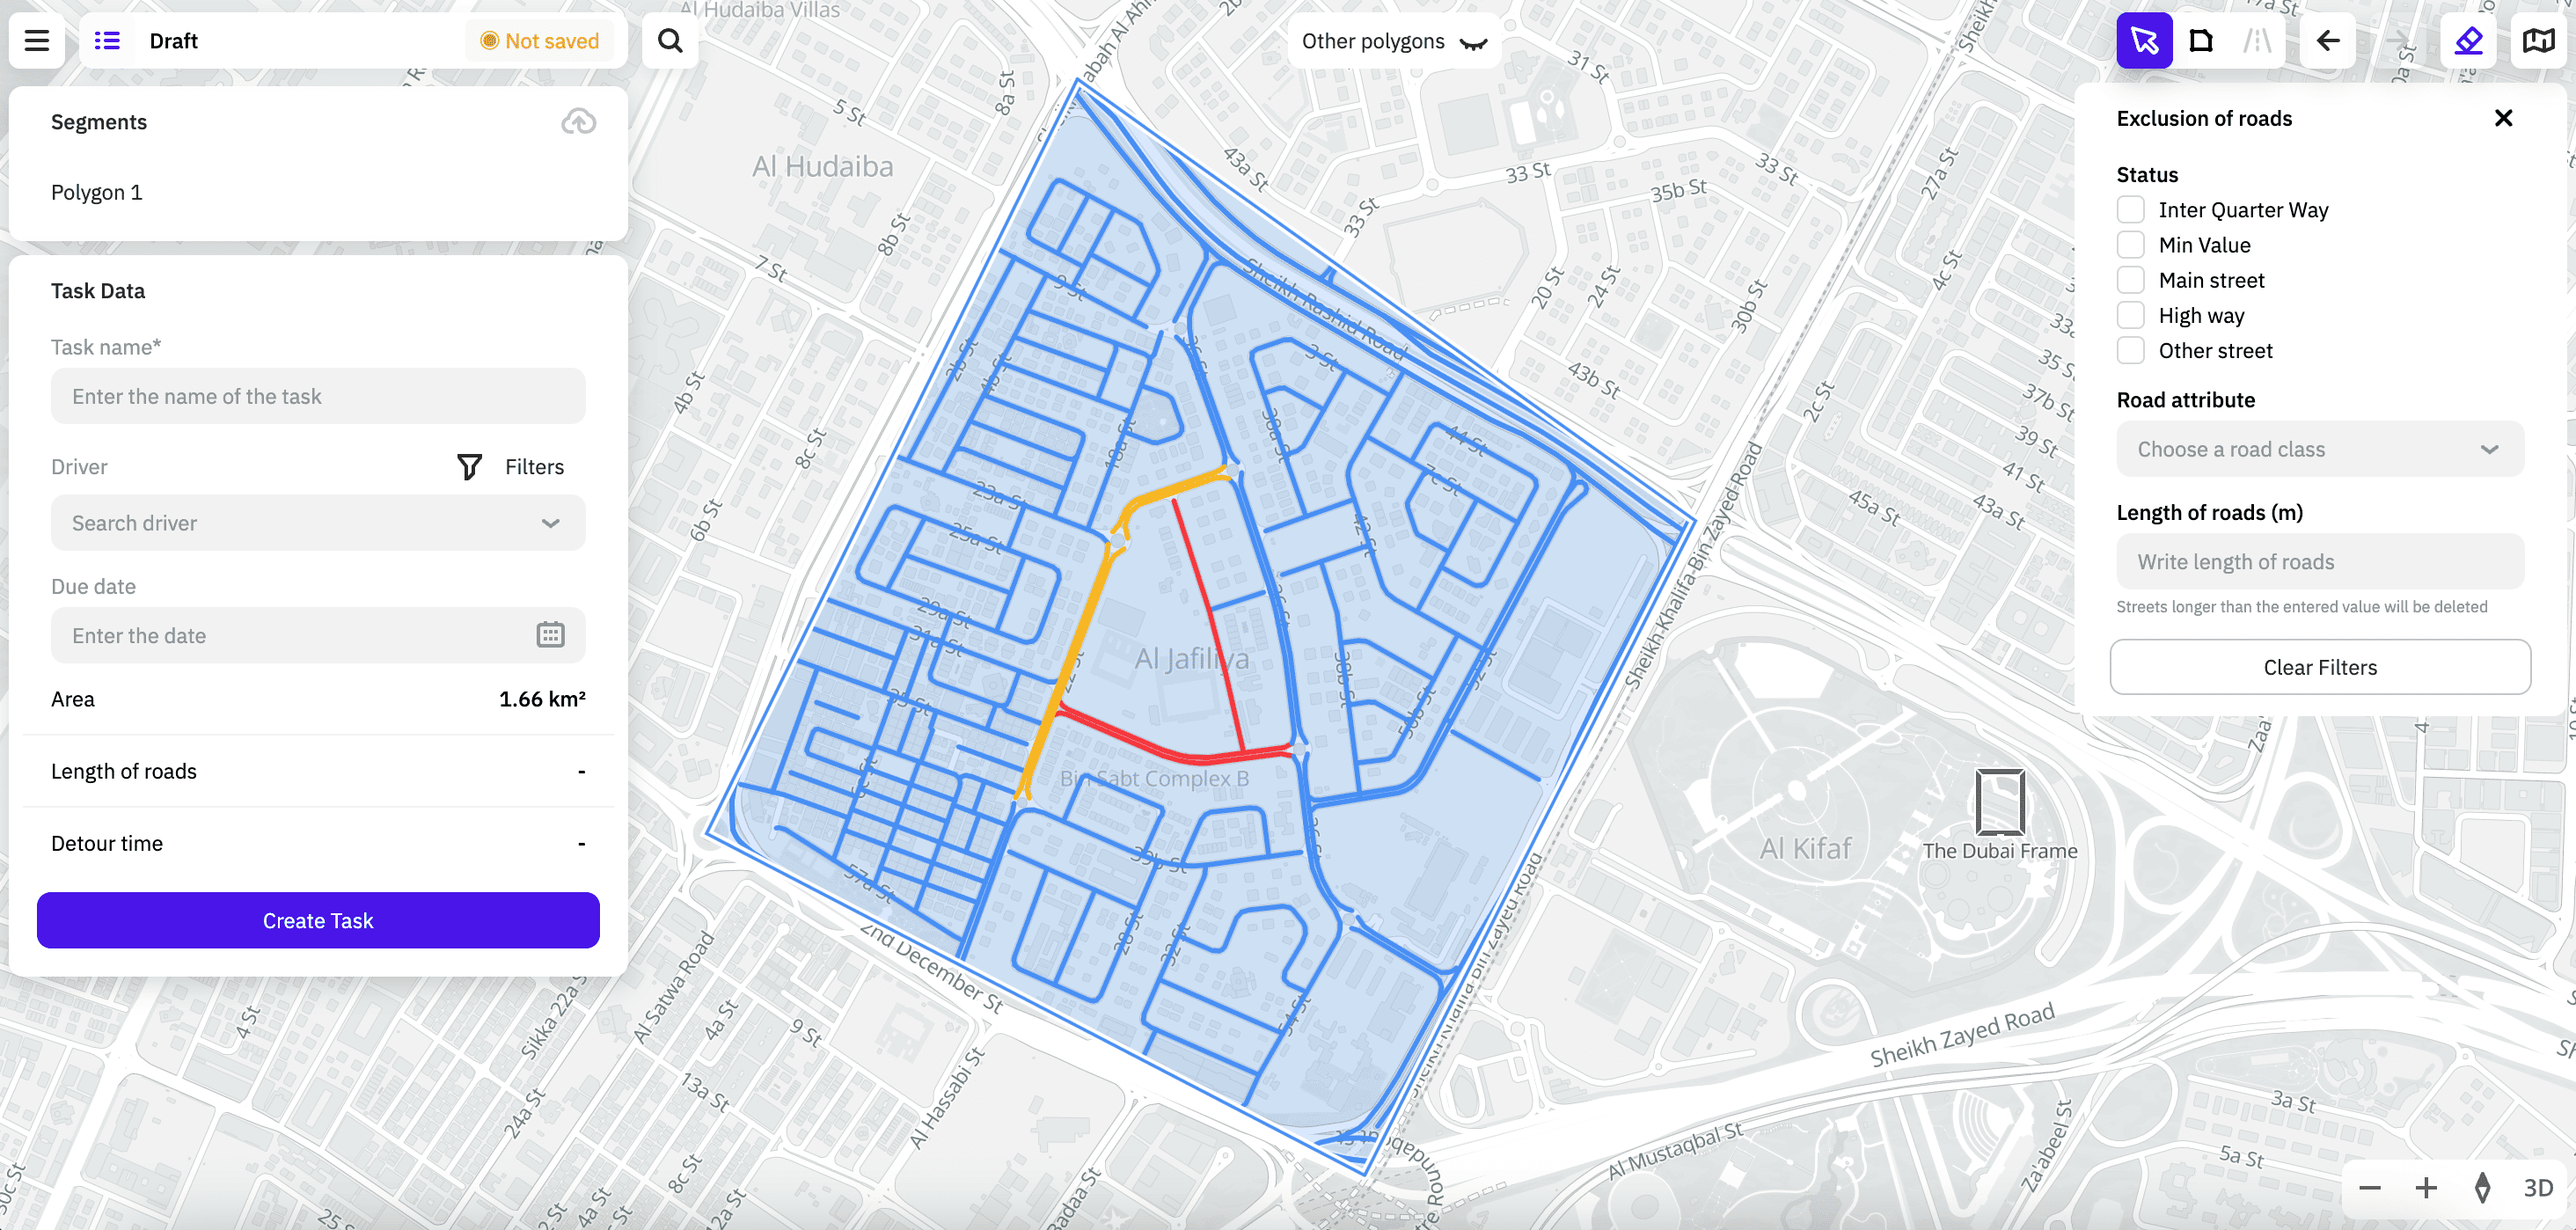
If you use a polygon for creating the route, all roads inside it are automatically included in the route. If you need to exclude some roads from the route (for example, move some roads to another task later), use the following methods:
- Click
 icon and click on the roads that you need to exclude. In edit mode, excluded roads are highlighted in red.
 - Select filters to exclude roads: by road class (main streets, highways, and others), road attribute (type of surface, toll roads, and ferries), and road length in meters.
- Click
-
Specify task parameters:
- Task name (mandatory parameter): task name.
- Driver: driver assigned to the task. You can search drivers in the list and filter drivers by groups using tags. Only the drivers added to the territory are displayed in the list. You can skip selecting a driver and assign them later.
- Due date: date the driver must complete the task.
-
Click Create task.
Automatic polygon splitting
You can speed up task planning by automatically splitting a polygon into multiple tasks. The number of tasks depends on the number of drivers and one of the selected parameters:
- the number of hours a driver can spend on a detour within one task
- the maximum route length for each task
For each driver, one task per working day is assigned. The default working day length is 8 hours, the value cannot be changed.
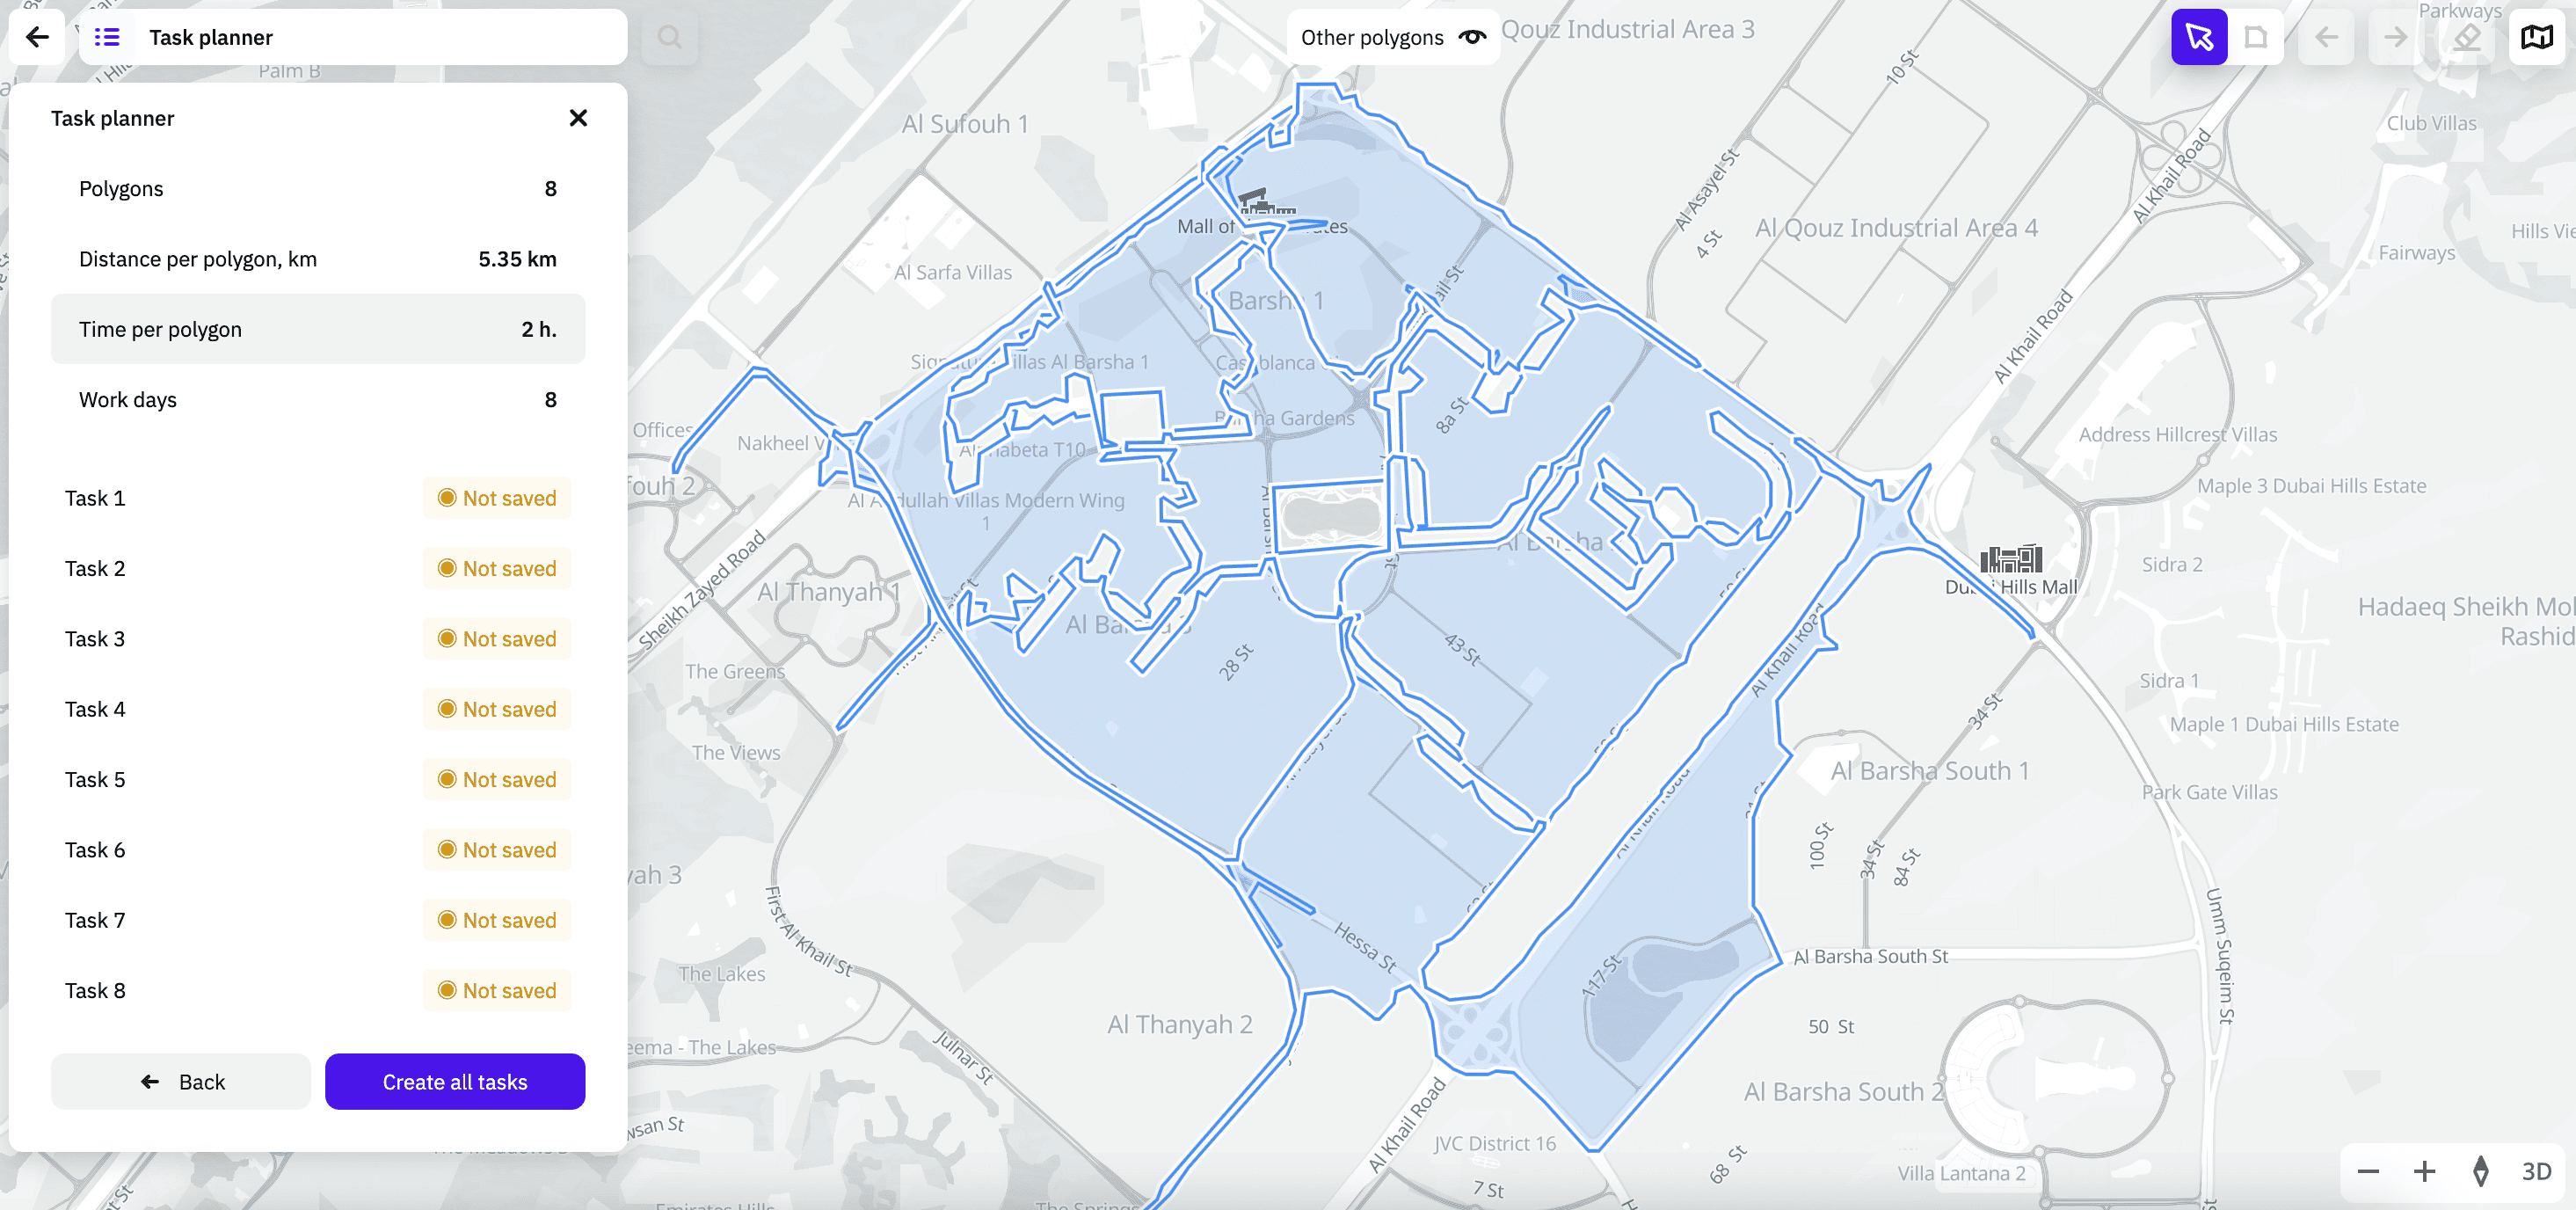
When splitting, the length of roads and the approximate time of detour by car are calculated for each polygon, as well as the total number of working days that is required to detour through all the polygons.
To automatically split a polygon into multiple tasks:
-
Go to the Tasks tab.
-
Open the page of the required territory and project.
-
Click Task planner.
-
Create a polygon in one of the following ways:
-
To draw a polygon on the map, click
icon and place at least three points on the map. The points are connected automatically, and the polygon lines must not intersect. To close the polygon, connect the start and end points or press Enter.To move a point, click and drag it to the required place on the map. To remove a point, hover over it and click
icon.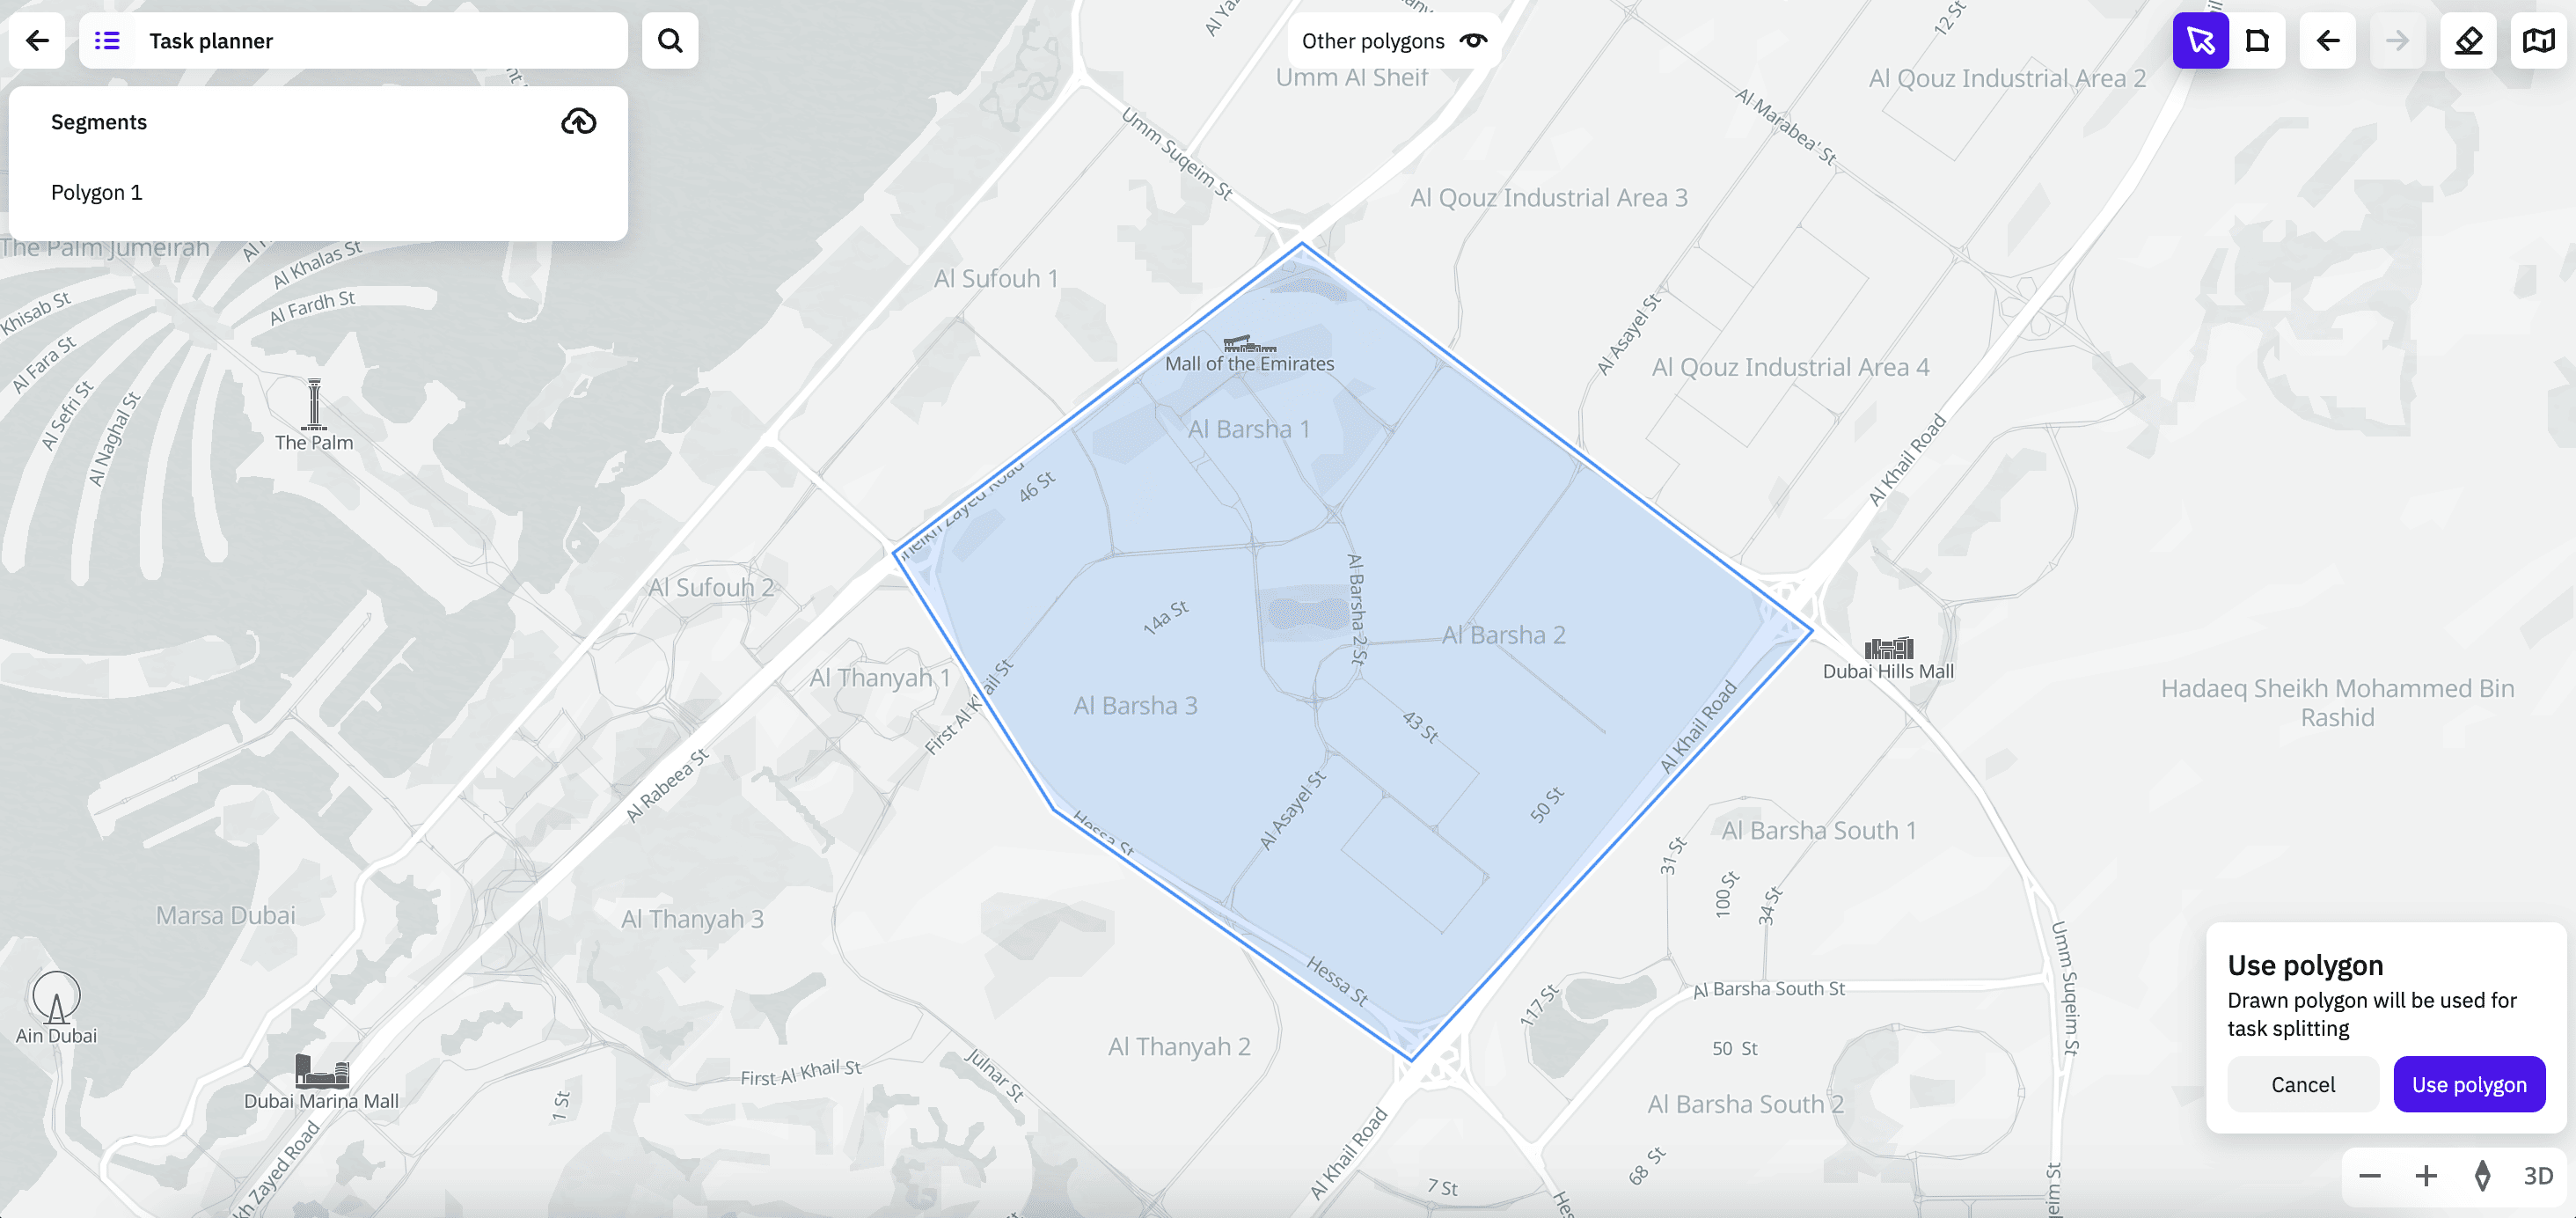
-
To upload your own polygon from a file (see polygon file requirements), click
icon, drag a file to the upload area or Select a file on a computer. -
When you create a route, you can use the search by addresses, places, and organizations on the map. Also, you can use as polygons the standard territories (regions, districts, settlements, and others) selected in the search. The polygon is built on the map automatically:
-
-
In the dialog in the lower-right corner, click Use polygon:
-
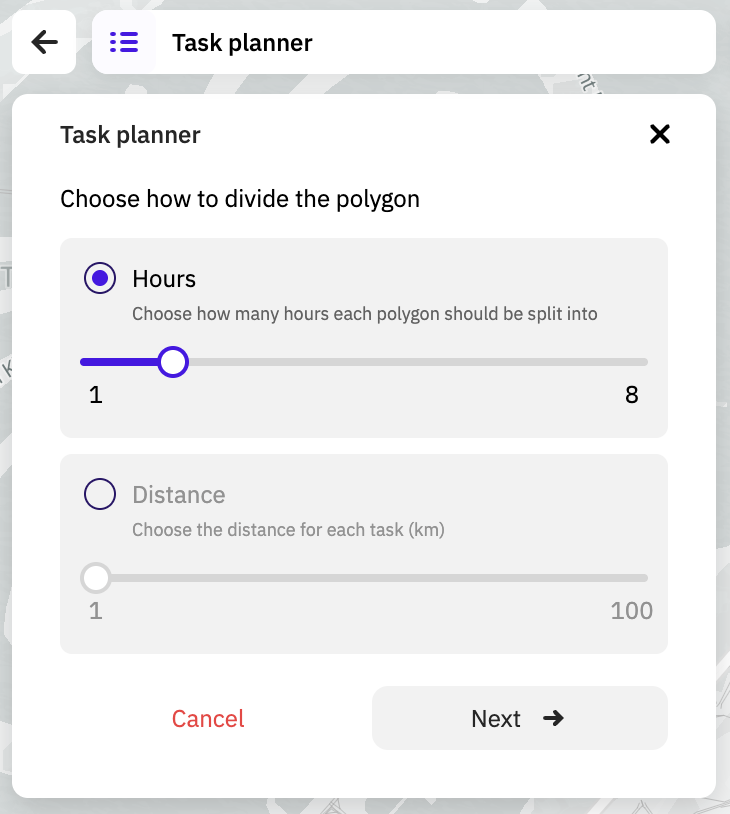
To split a polygon into multiple tasks, specify one of the parameters:
- Hours: number of hours to drive each polygon. When selecting a value, you can focus on the maximum number of hours that a driver can spend on a detour in a working day. Available values are from 1 to 8 hours.
- Distance: length of the route in kilometers for each polygon. Available values are from 1 to 100 km.
Click Next.
-
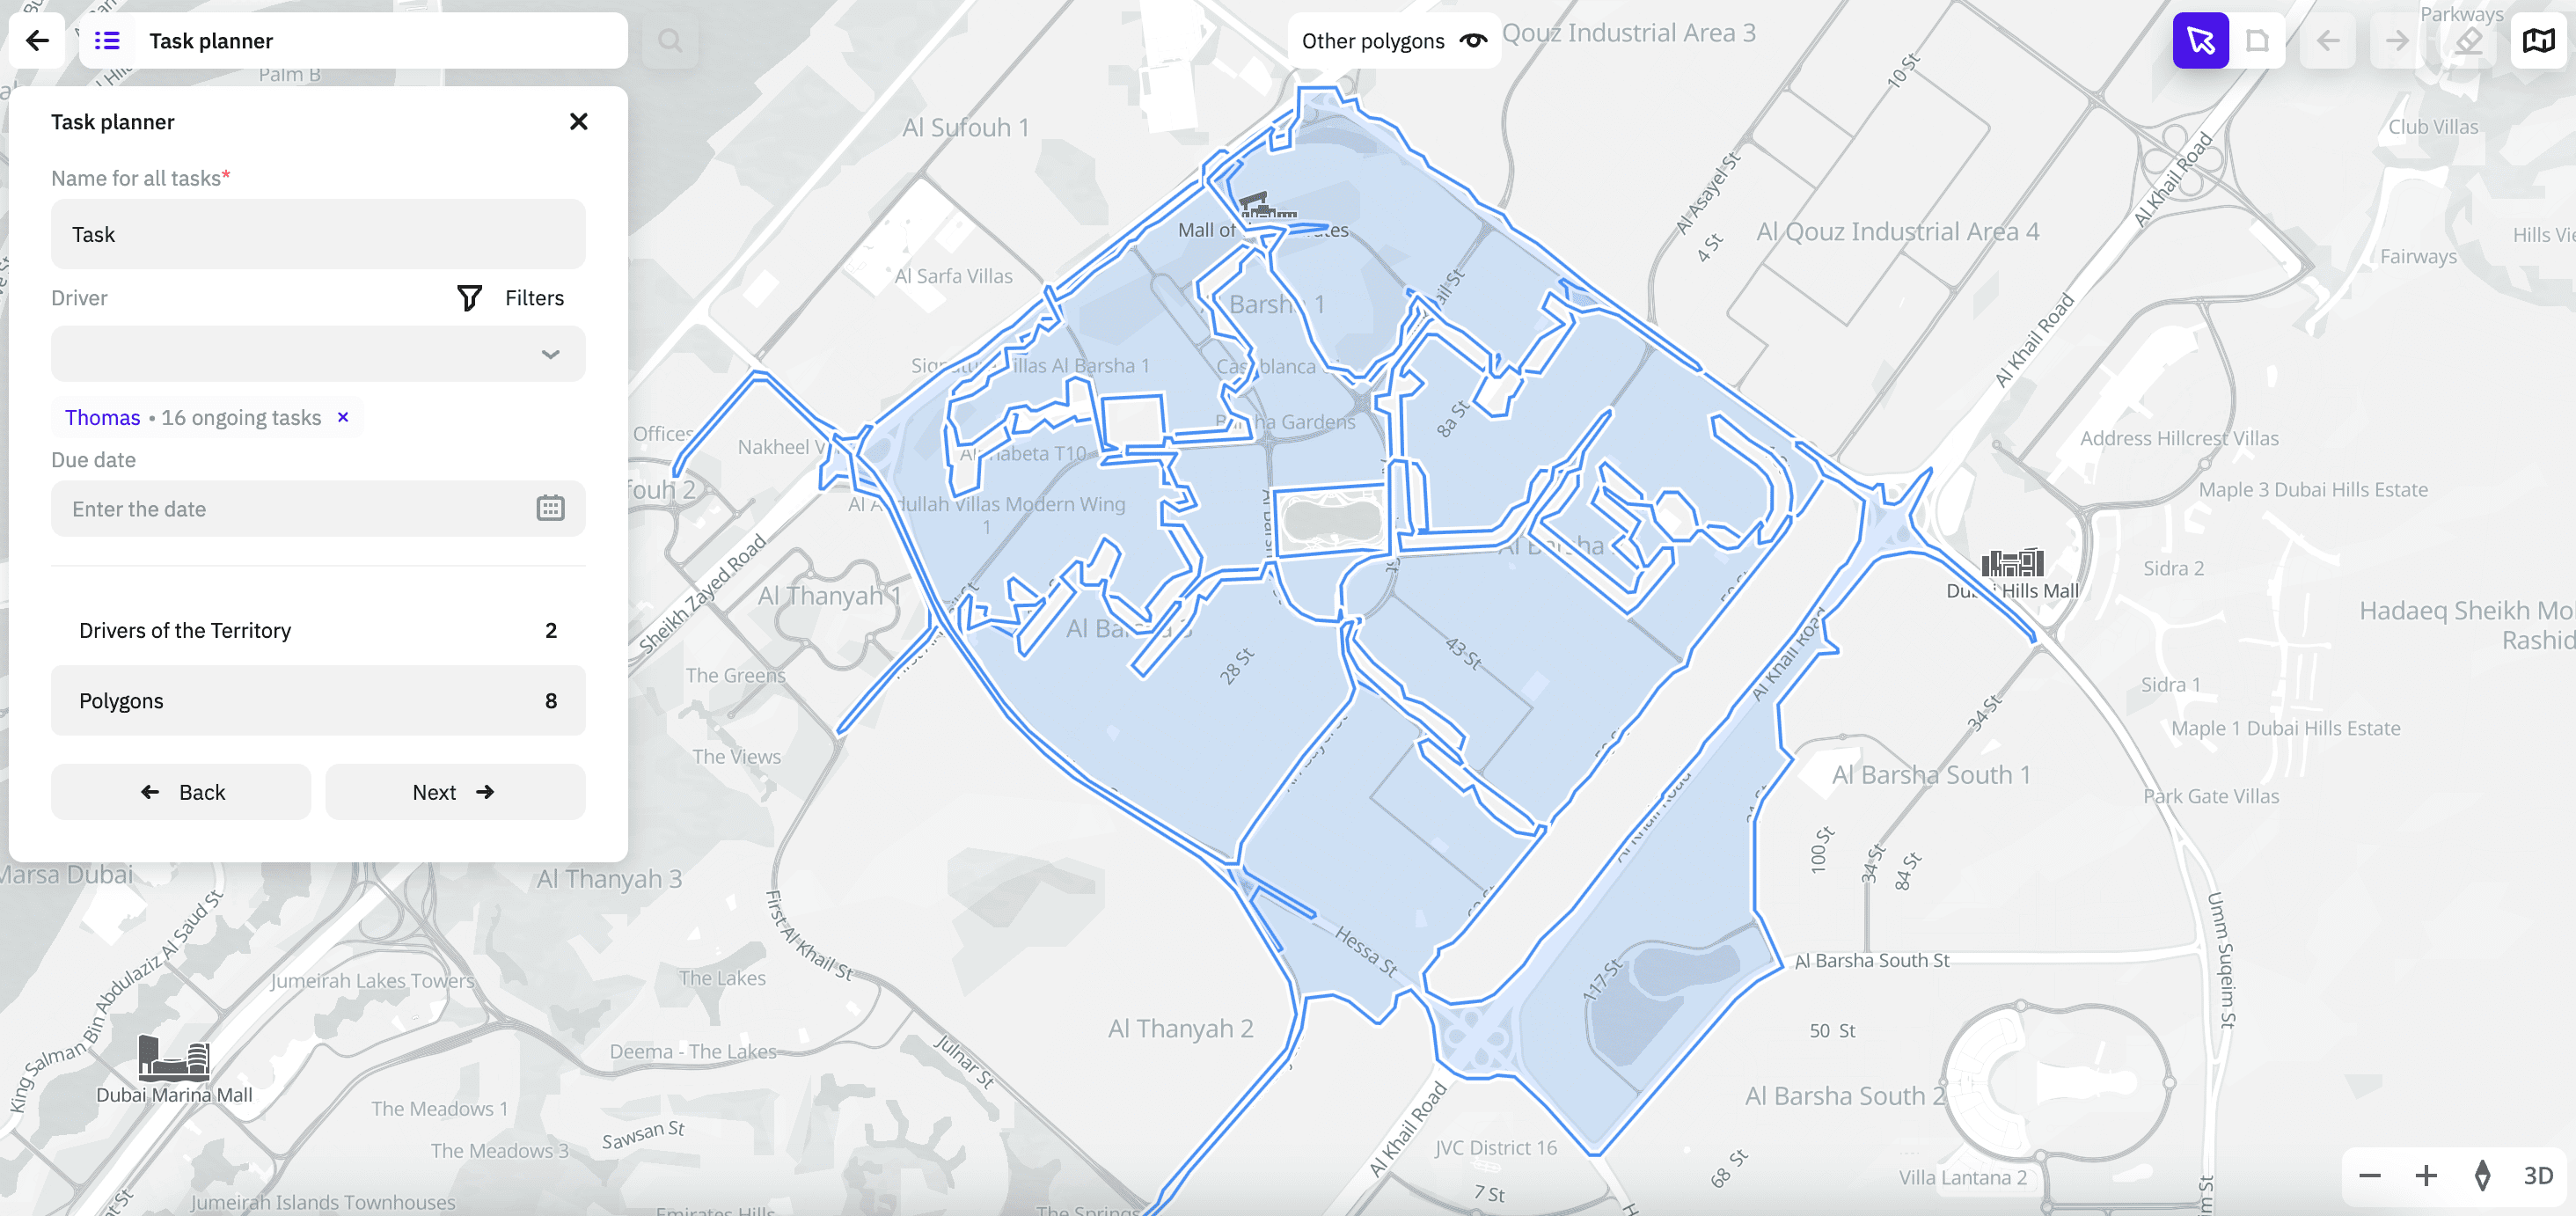
Specify parameters of tasks:
- Name for all tasks (mandatory parameter): name of each task. A sequential number is added to the specified name (e.g.
Task 1,Task 2, etc.). - Driver: one or more drivers assigned to the tasks. You can search drivers in the list and filter drivers by groups using tags. Only the drivers added to the territory are displayed in the list. You can skip selecting drivers and assign them to each task separately later.
- Due date: date the drivers must complete the tasks.
Click Next.
- Name for all tasks (mandatory parameter): name of each task. A sequential number is added to the specified name (e.g.
-
Review the task planning results. Click Create all tasks.
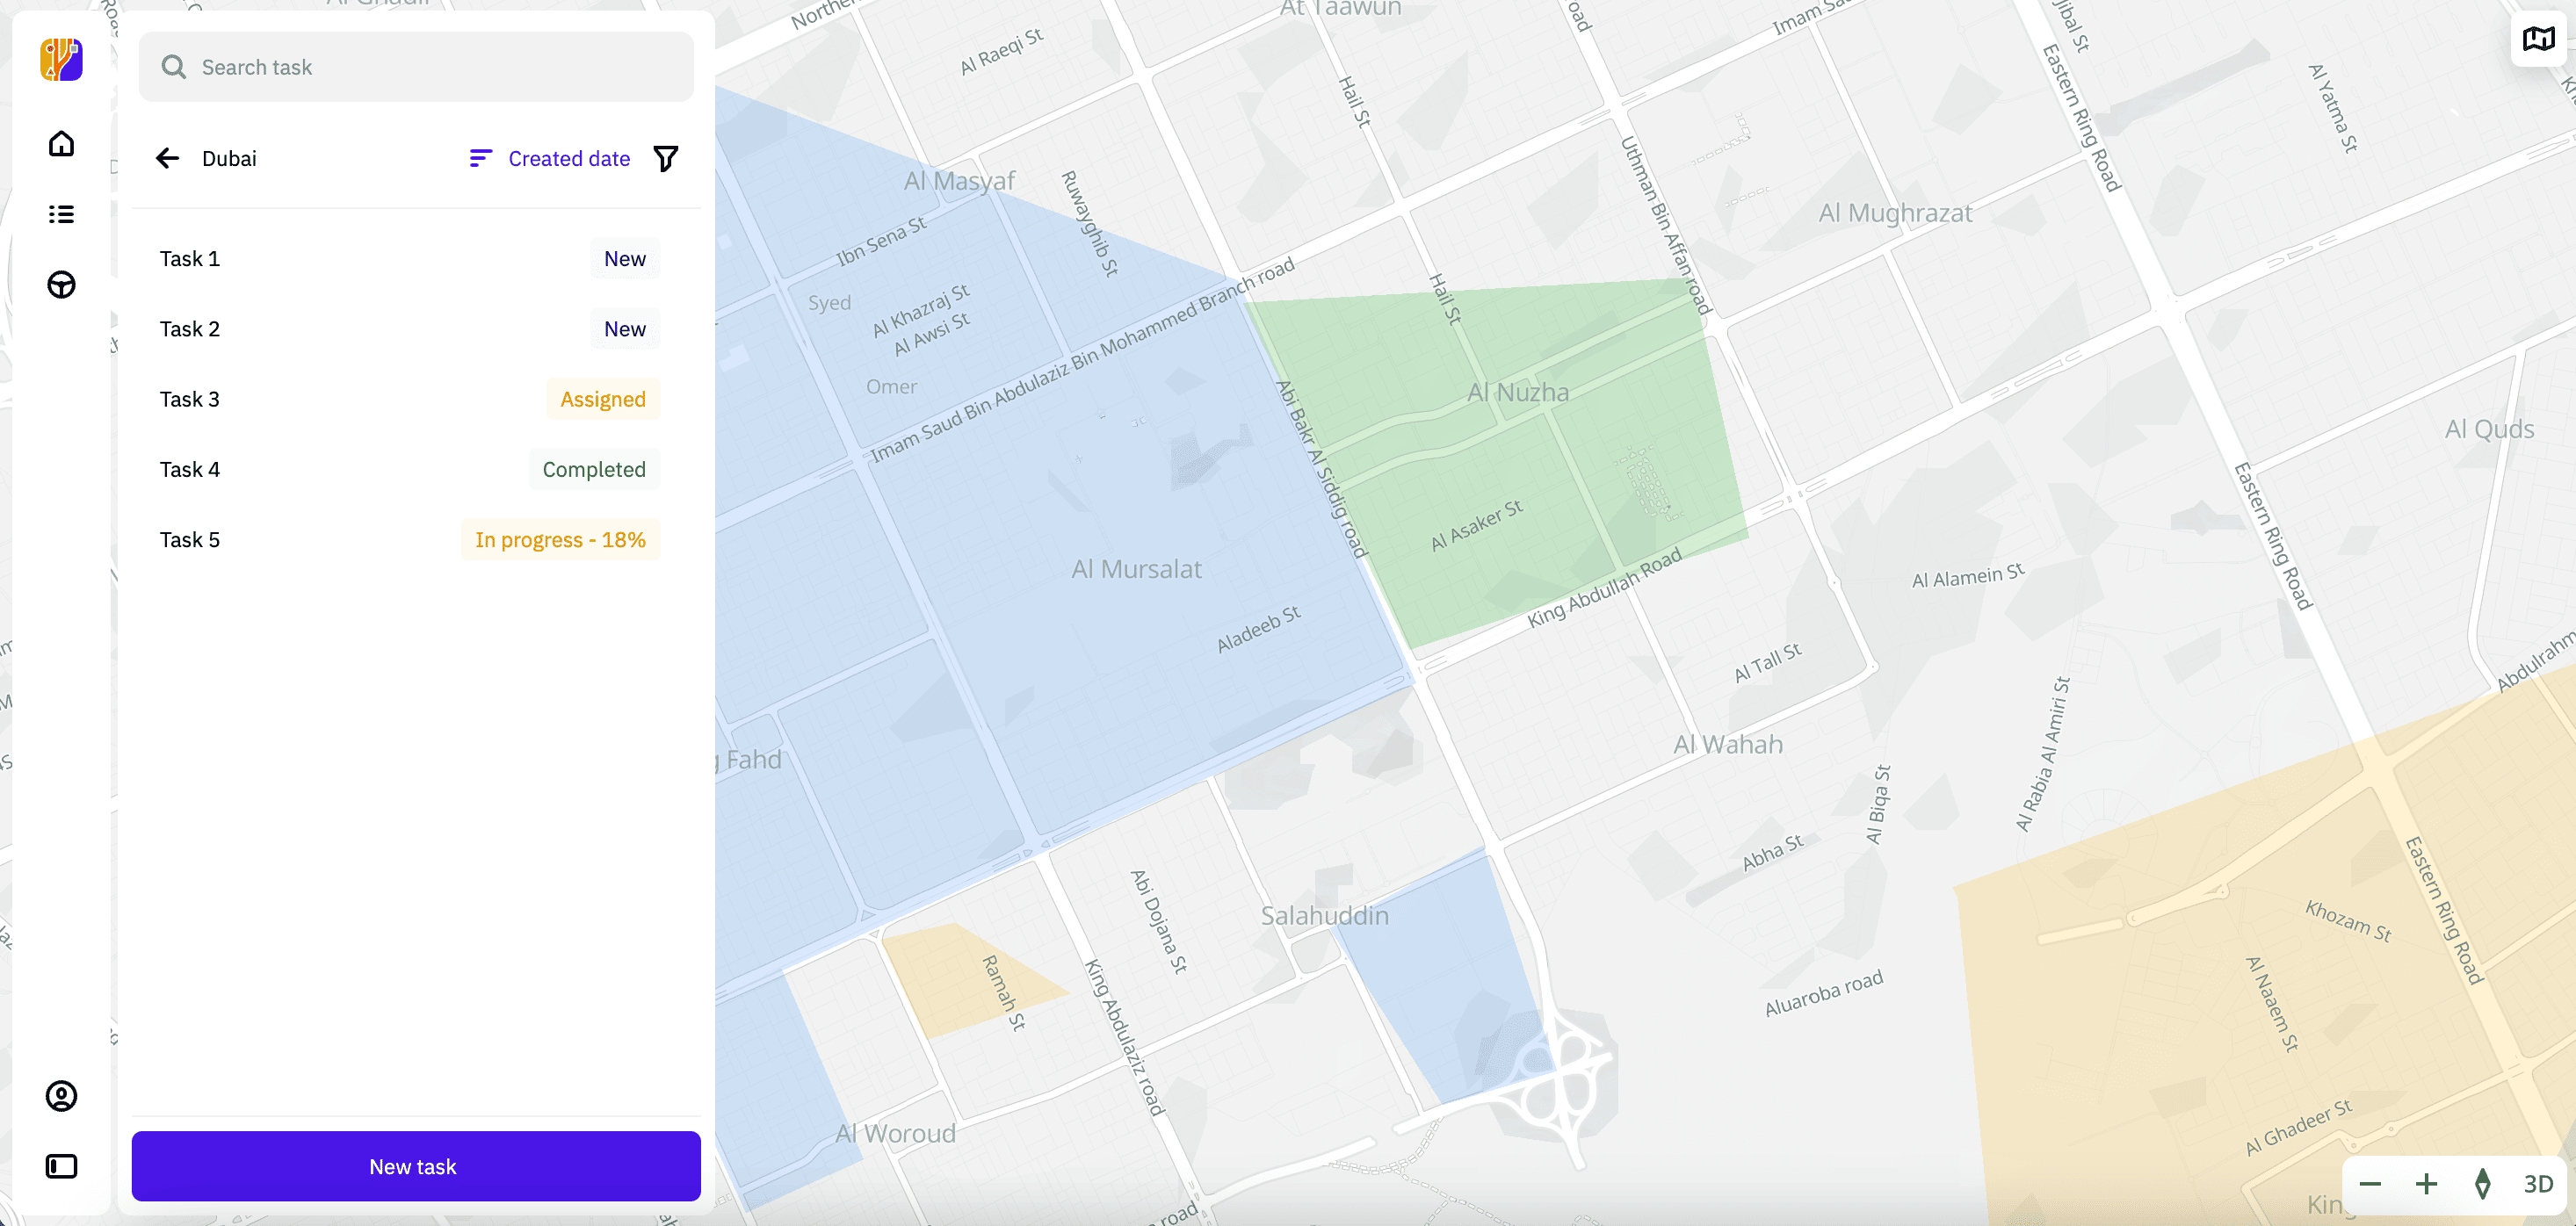
All created tasks appear in the list:
Polygon file requirements
If you are loading a polygon from a file, make sure that the file meets the requirements:
- Geometry: Polygon
- Formats:
.kml,.kmz,.shp,.geojson - Size: up to 100 MB
- Encoding: UTF-8
- Coordinate system: WGS84(4326)
File example:
example.geojson
{
    "type": "FeatureCollection",
    "features": [
        {
            "type": "Feature",
            "properties": {},
            "geometry": {
                "coordinates": [
                    [
                        [55.250045684992756, 25.214516586337368],
                        [55.23184311284339, 25.190451666684623],
                        [55.250268554857, 25.181176083495615],
                        [55.270626867225474, 25.204838345838027],
                        [55.250045684992756, 25.214516586337368]
                    ]
                ],
                "type": "Polygon"
            }
        }
    ]
}
Viewing information about a task
- Go to the Tasks tab.
- Open the page of the required territory and project.
- Select the required task in the list or click on the corresponding polygon or the route roads on the map. You can use the search by tasks in the list, sorting by task parameters, and also filtering tasks by tag, driver, status, and task type.
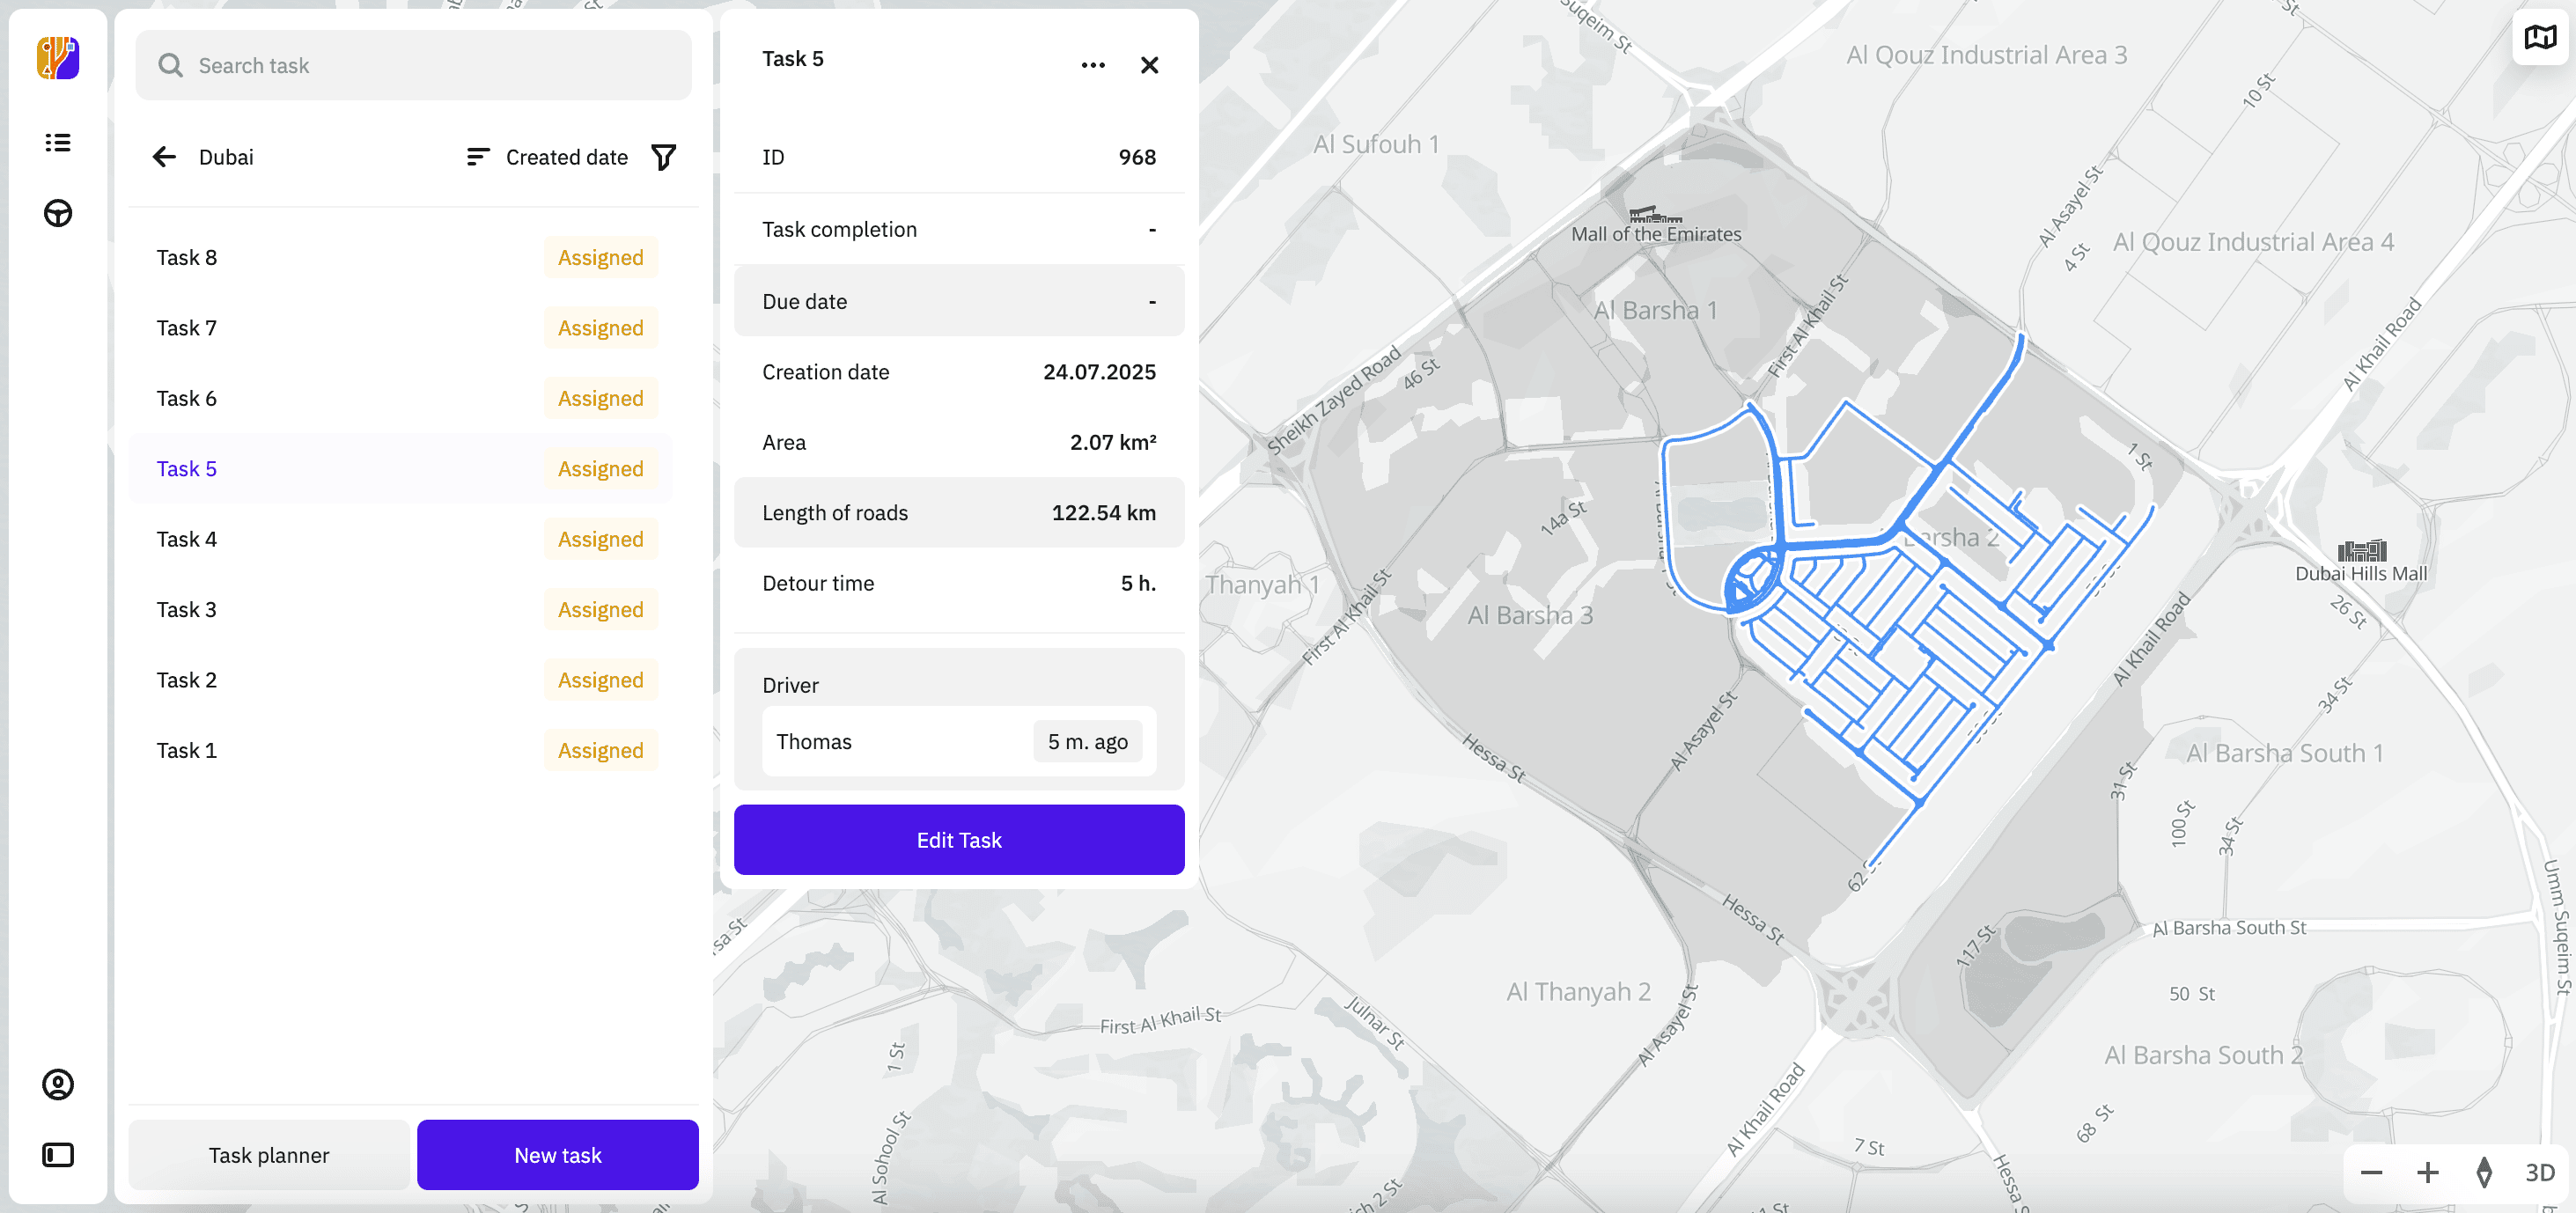
The following information about the task is displayed:
-
Data depending on the task status is displayed on the map:
- New and Assigned: planned route.
- In Progress:
- The driver latest geolocation.
- The completed part of the planned route (yellow).
- The remaining part of the planned route (blue).
- If the driver is currently working on the task, the current geolocation is displayed. Also, you can track their movement on the map in real time.
- Completed: completed route. The routes of completed tasks are also available in the Urbi Pro datasets: Tasks Planned Data (planned routes) and Tasks Actual Data (actual routes).
-
ID: unique task identifier.
-
Task completion: task completion percentage. Displayed only for tasks with the In Progress or Completed status.
-
Due date: scheduled date for task completion. Displayed if you filled in the field when creating or editing the task.
-
Creation date: date of the task creation.
-
Area: area of the territory (polygon) in km². Displayed only for tasks with polygons.
-
Length of roads: total length of roads of the route.
-
Detour time: estimated travel time around the polygon by car with traffic jams.
-
Driver: driver and the time of their last activity. Displayed if you assigned the driver to the task when creating or editing the task.
Viewing task status
- Go to the Tasks tab.
- Open the page of the required territory and project.
- View the task status in its row. The color of the corresponding polygon or the route roads on the map depend on the task status.
Possible task statuses:
- New (blue color): the task is created but is not assigned to a driver. You can edit a task or cancel a task with this status.
- Assigned (yellow color): the task is assigned to a driver, but the driver has not yet started it. You can edit a task or cancel a task with this status.
- In Progress (yellow color): the driver has started the task in the mobile application. The status shows task progress percentage. You can complete a task or cancel a task with this status.
- Completed (green color): the task is marked as completed.
- Canceled: the task is cancelled. Cancelled tasks are not displayed on the map, but all information about them is saved in the task card. Cancelled tasks are not removed from the list.
Editing a task
If the task is in the New or Assigned status, you can edit it:
- edit the route: change the drawn polygon, upload a new one, highlight roads, or exclude roads
- rename the task
- assign to another driver or remove a driver from the task
- change the planned task completion date
- make the task external and vice versa
To edit a task:
- Go to the Tasks tab.
- Open the page of the required territory and project.
- Select the required task and, in the opened dialog, click Edit task.
- Apply changes to the task.
- Click Save task.
Exporting geometry from a task
You can export routes in the .kml format (polygons and highlighted roads) created in the Task Planner. For example, if drivers view the route in another system instead of the mobile application, you can export geometries from the task and transfer them to the drivers.
- To export a task, mark it as external. To do this:
- Go to the Tasks tab.
- Open the page of the required territory and project.
- Select the required task and, in the opened dialog, click Edit task.
- Select the External task checkbox.
- Click Save task.
- In the list of tasks, select the task from which you want to export geometry.
- In the opened dialog, click
 icon and select Export (kml). A file with the task geometry will be downloaded.
To view the list of external tasks, in the list of tasks, select the Task type → External task checkbox in the filters.
Completing a task
You can mark a task with any completion percentage as completed and change its status to Completed. You can complete any tasks in the In Progress status and also external tasks in the New and Assigned statuses.
- Go to the Tasks tab.
- Open the page of the required territory and project.
- Select the required task.
- In the opened dialog, click icon and select Complete task.
Canceling a task
If a task is in the New, Assigned, or In Progress status, you can cancel the task and change its status to Canceled.
- Go to the Tasks tab.
- Open the page of the required territory and project.
- Select the required task.
- Click icon and select Cancel task.