Recording data
1. Start recording
Note
Internet connection is not required on this stage, as data is stored locally.
-
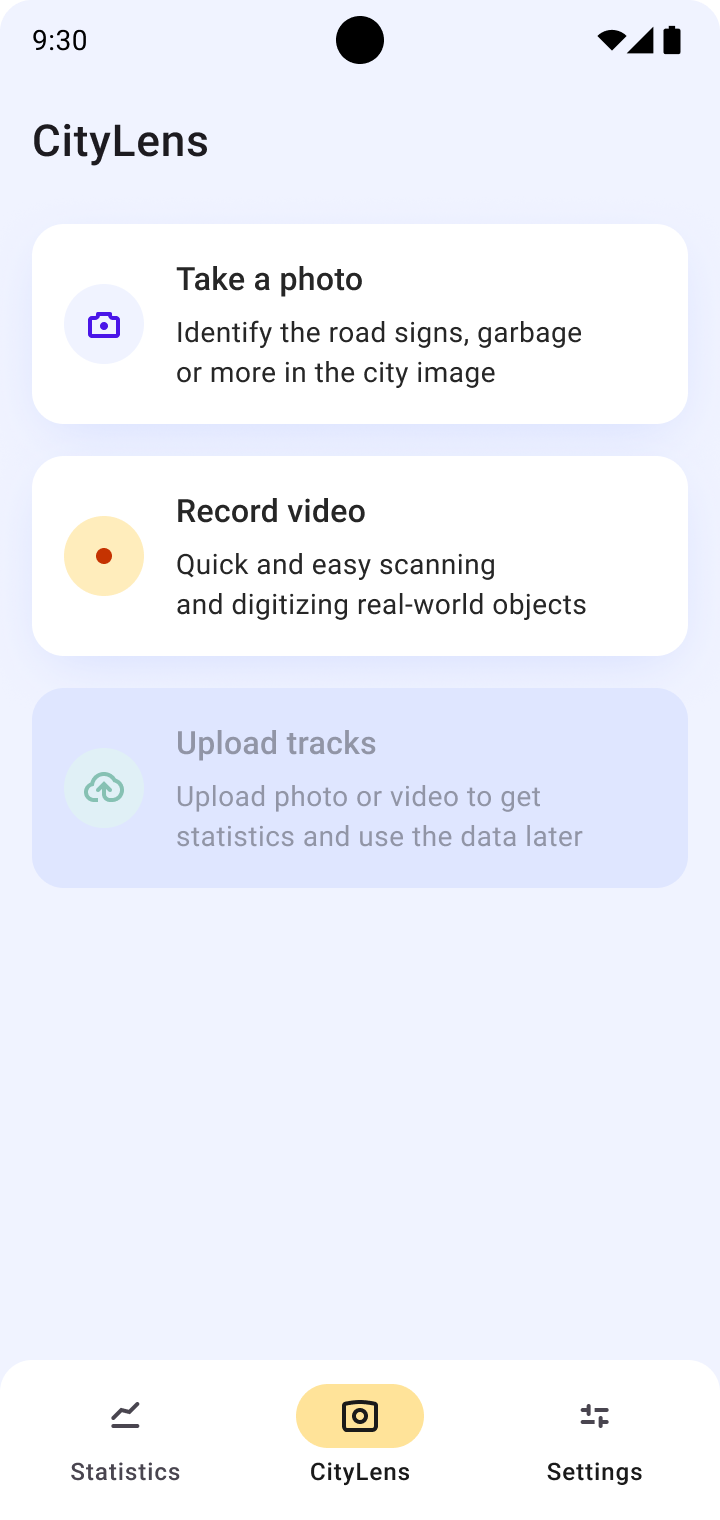
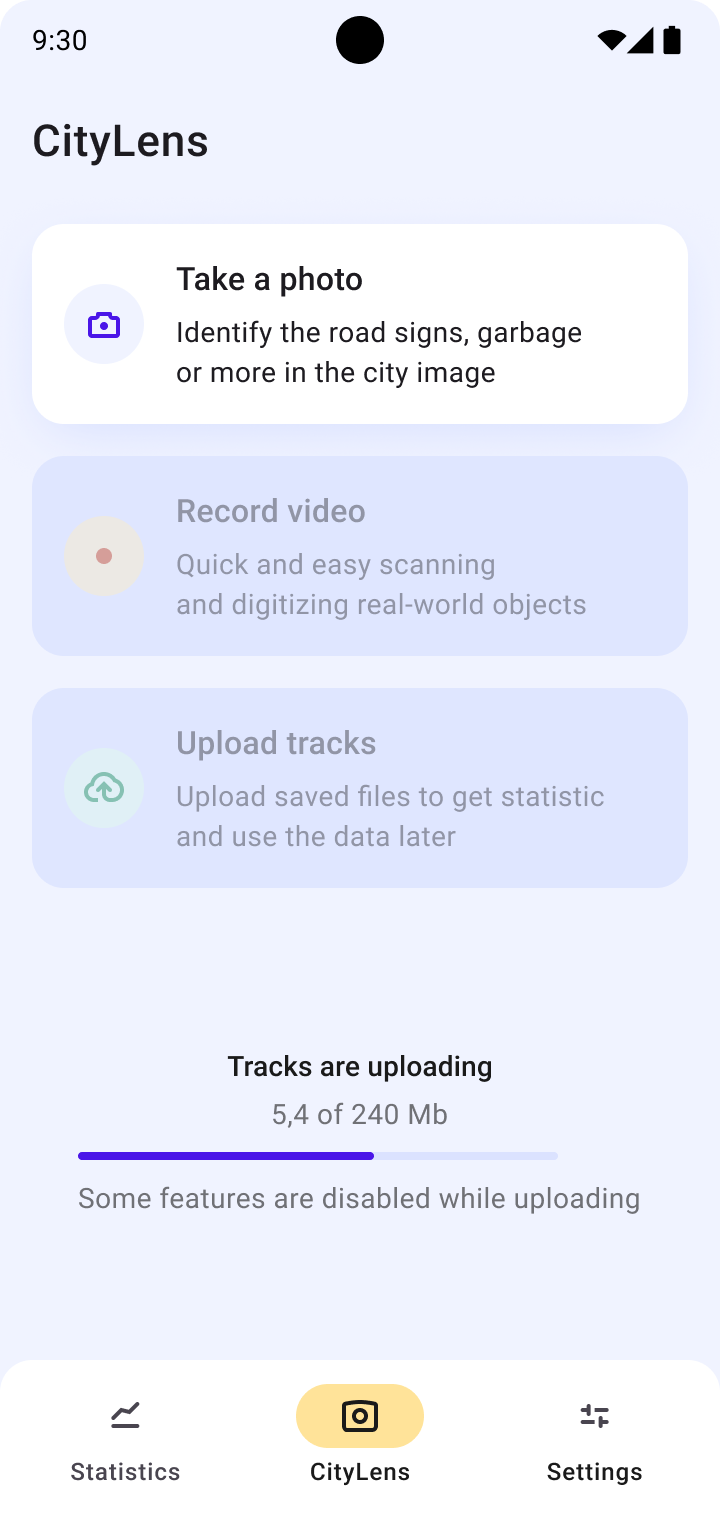
Go to the CityLens tab and select one of the recording modes:
- Free roam mode: driving without a specified route. In this mode, you can take photos or record videos to collect data.
- Task mode: completing a task from the Task Planner. If the administrator assigns you a task to cover an area, you can select it in the mobile application and use the built-in navigator to move along the required route.
Follow the instructions on working in the free roam mode or the task mode.
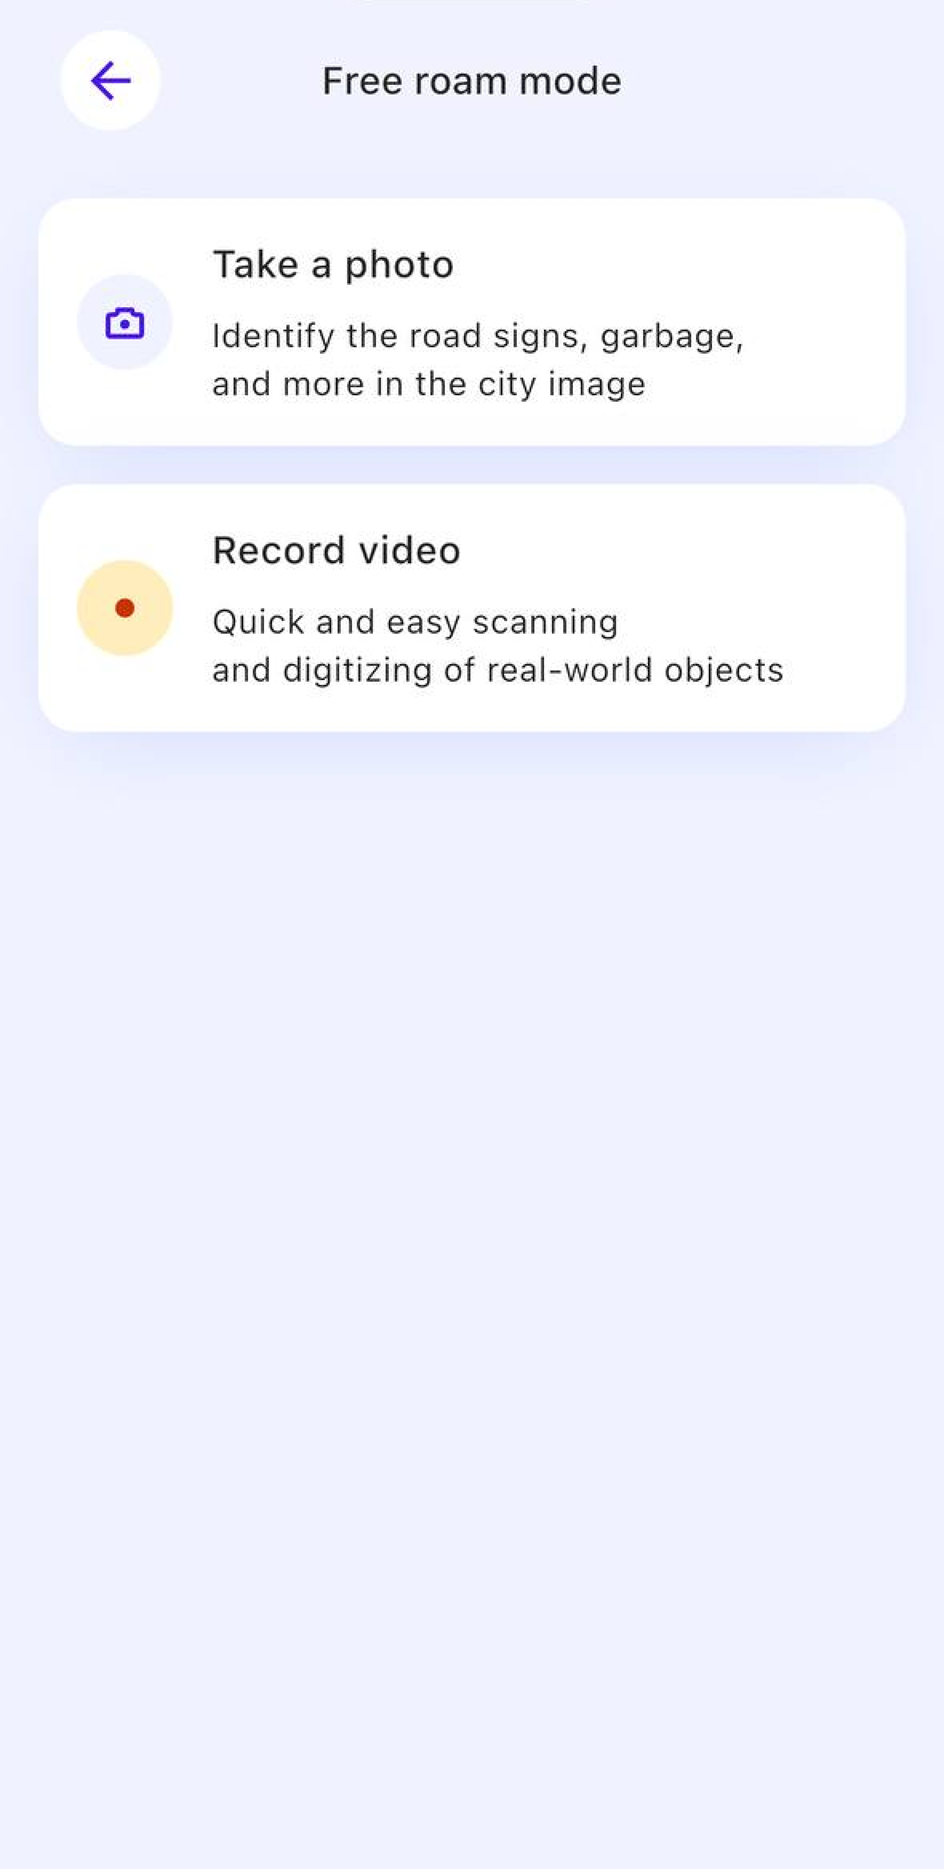
Free roam mode
-
Choose the recording method: taking photos or recording a video. The chosen recording method launches.
-
Place your mobile device horizontally.
Before starting the recording, you can see current recording parameters. You can configure them in settings.
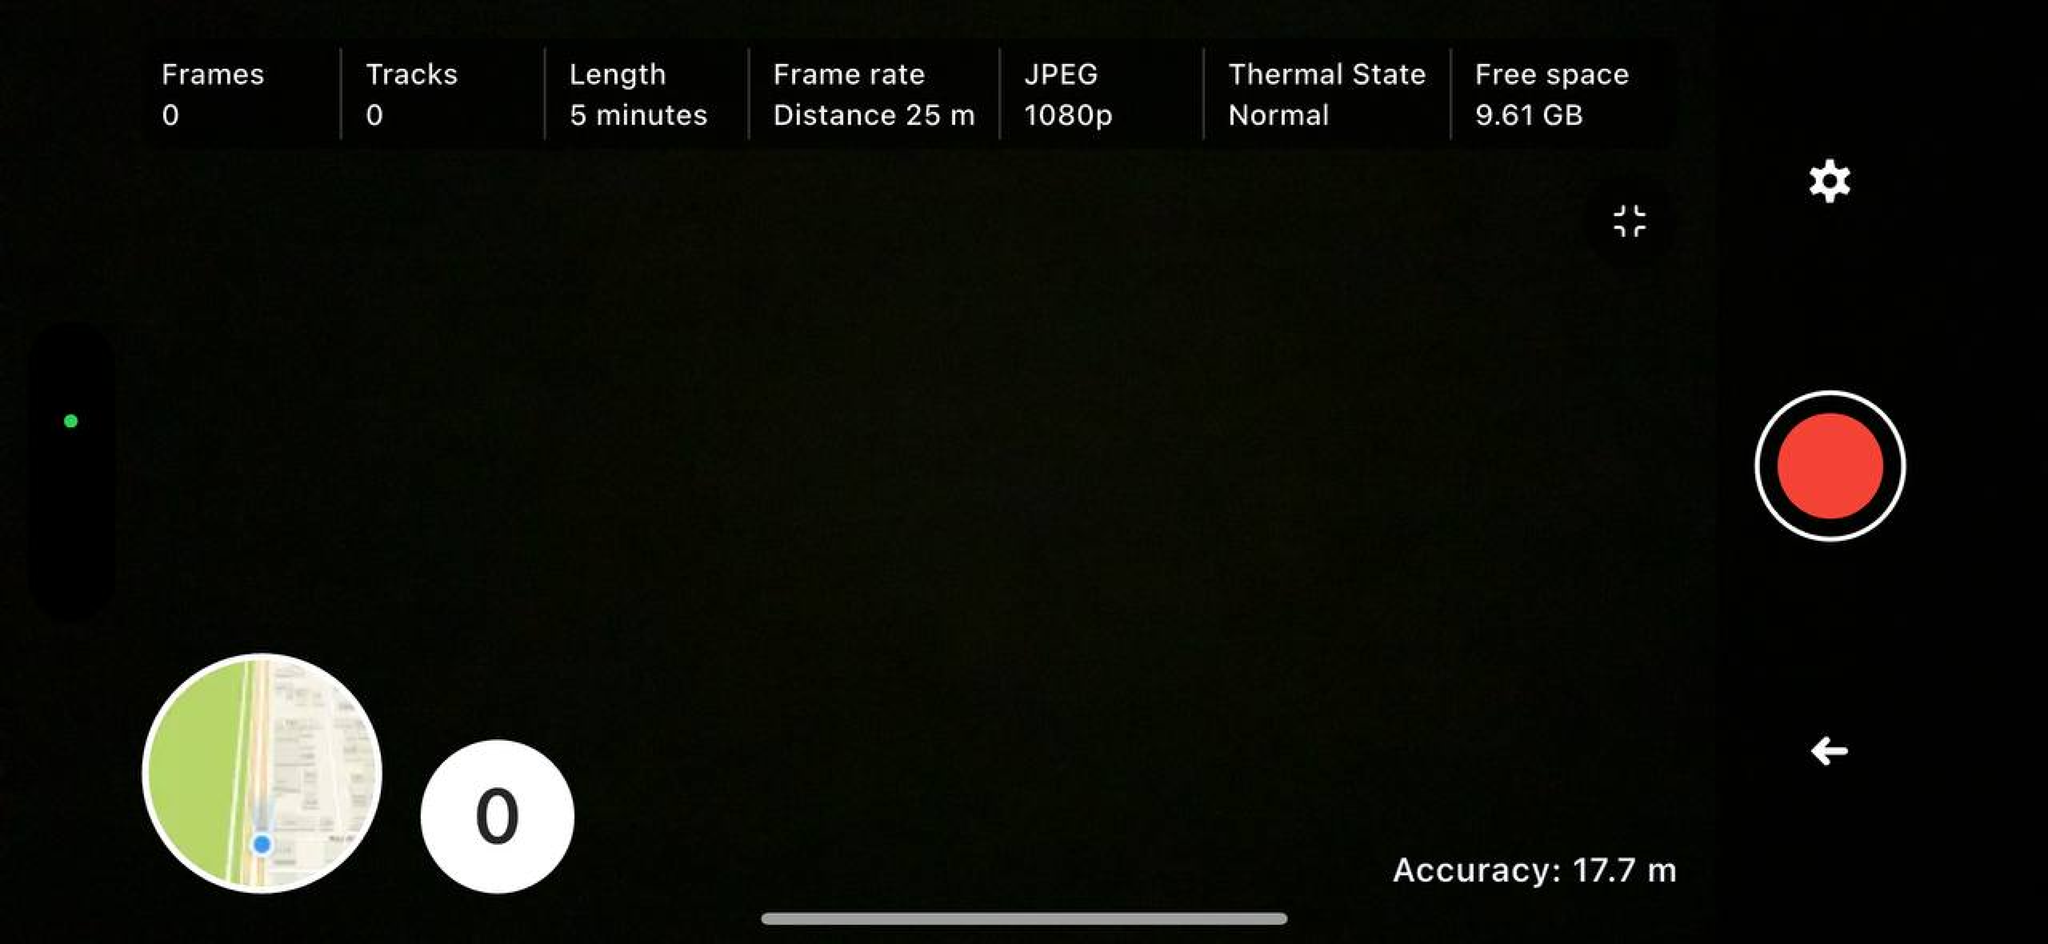
- Frames: number of frames (images tied to geographic coordinates) captured by the application and not yet uploaded for processing. When you record a video, frames are captured automatically depending on the configured frequency.
- Tracks: number of recorded and not yet uploaded tracks (time intervals and data collected during them).
- Length: duration of the current track in minutes. You can configure the maximum track length in settings.
- Frame rate: frequency of frame capturing. You can configure it to depend on speed, distance, or time intervals.
- JPEG: image resolution. You can select the level of image compression in settings.
- Thermal state: indicator of the processor heating state.
- Free space: available amount of device memory.
- Accuracy: accuracy of determining the device geolocation.
-
Tap the capture button to start recording.
Important
Follow the recommended speed limit to ensure high quality of captured frames.
-
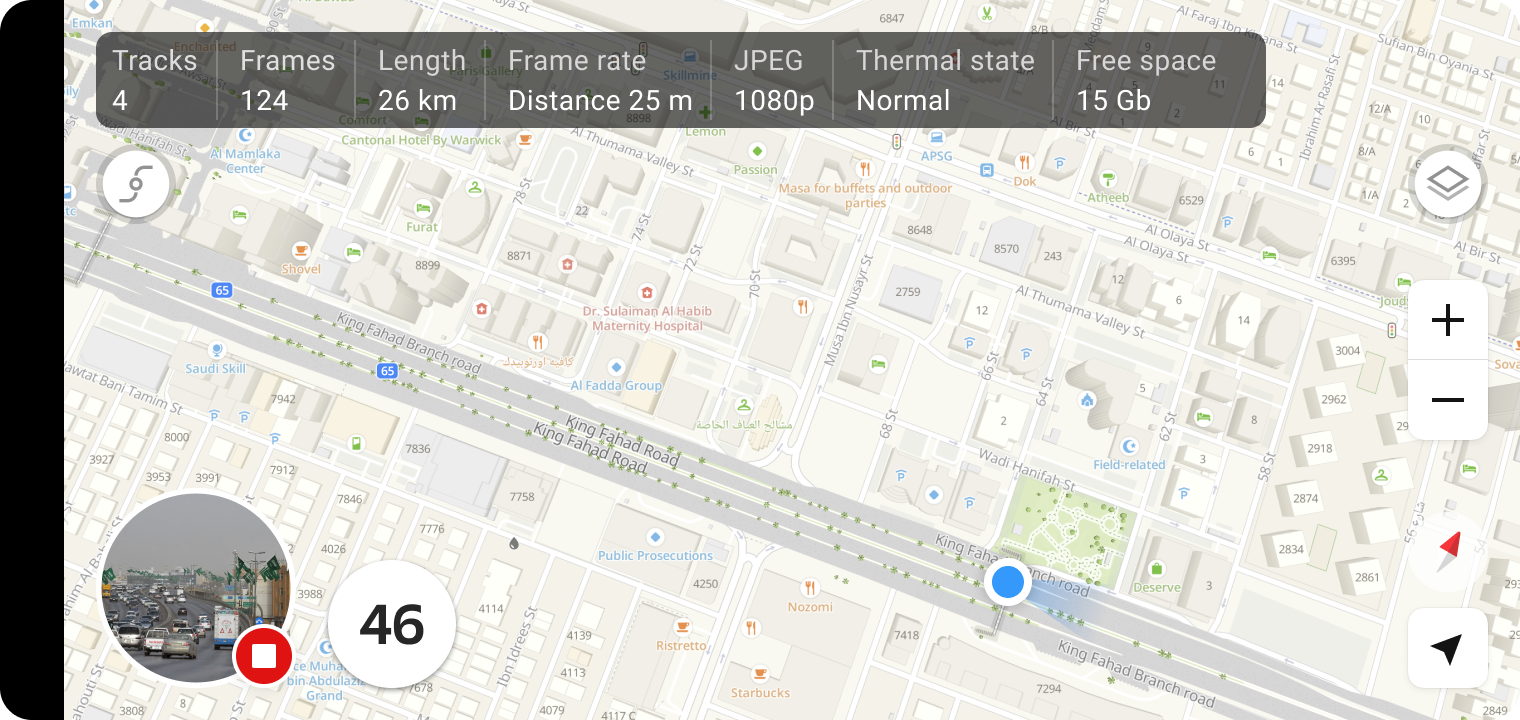
Open the map by tapping the round map icon in the lower-left corner.
You can also configure the map look to make it more convenient for your work: select a theme, enable tracking the traveled route, and more.
-
(Android devices only) If your device runs out of memory before you finish recording, you can temporarily export recorded tracks to an external storage device:
-
Connect the storage device (a flash drive) to your mobile phone.
-
Go to the Settings tab and open Track recording > Track management.
-
Tap Export.
Once the export is complete, device memory will be freed, and you can continue recording.
-
-
To finish recording, return to the recording mode and tap the recording button again.
-
To return to the main menu, tap
 icon.
icon.Then you can start recording again or proceed with uploading recorded data.
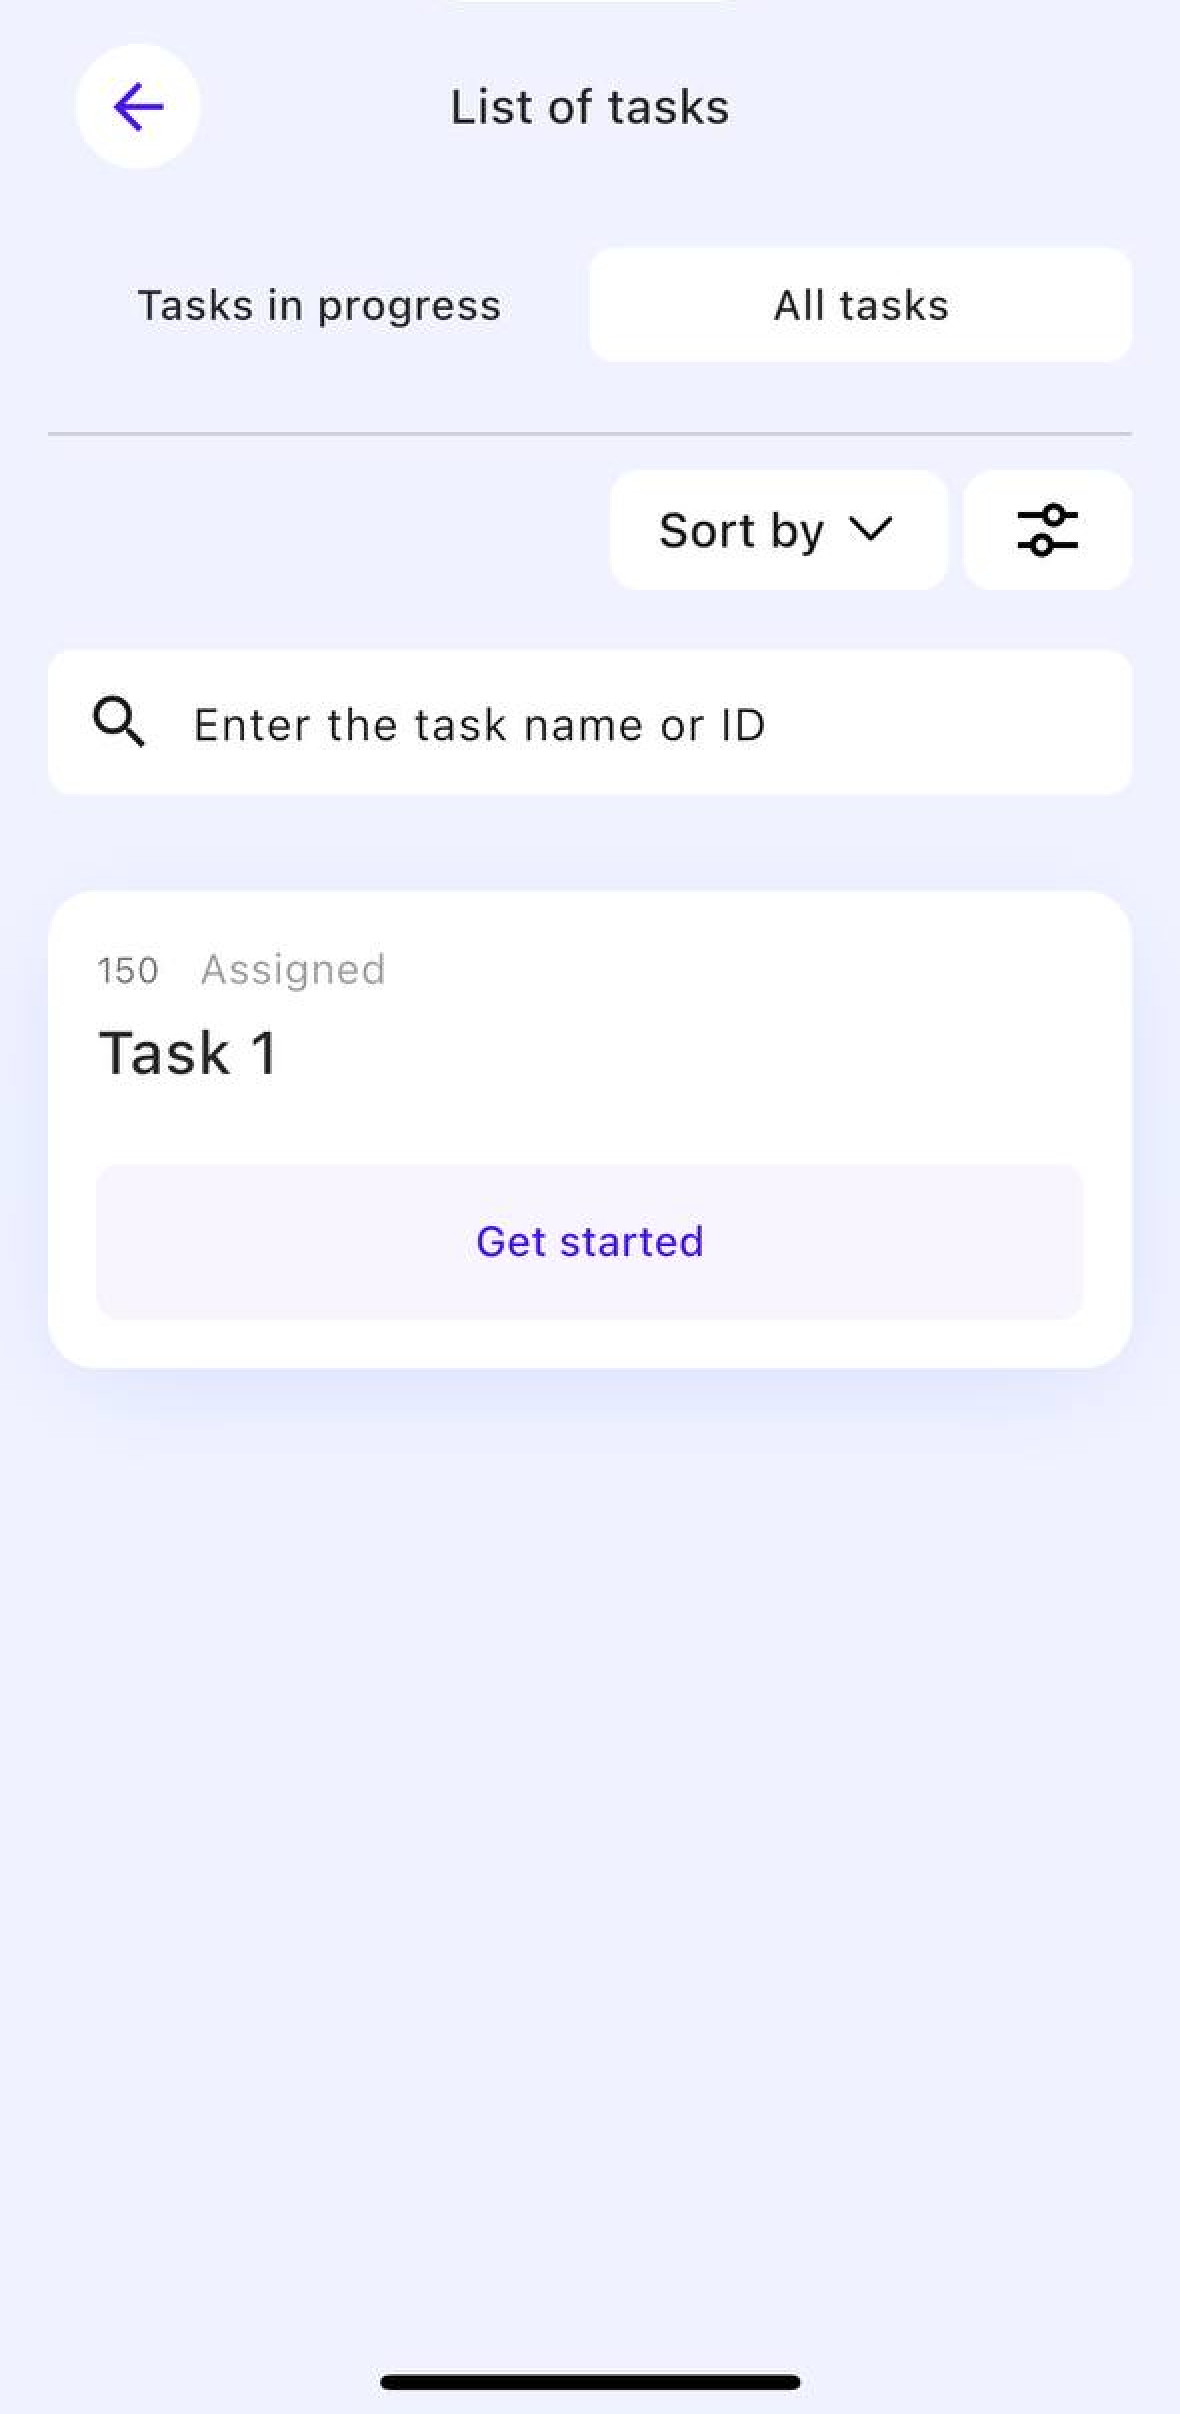
Task mode
All tasks assigned to you (if any) are displayed as cards. You can sort and filter tasks by statuses, route length, expected task duration, and completion dates.
-
Select the required task and tap Get started.
-
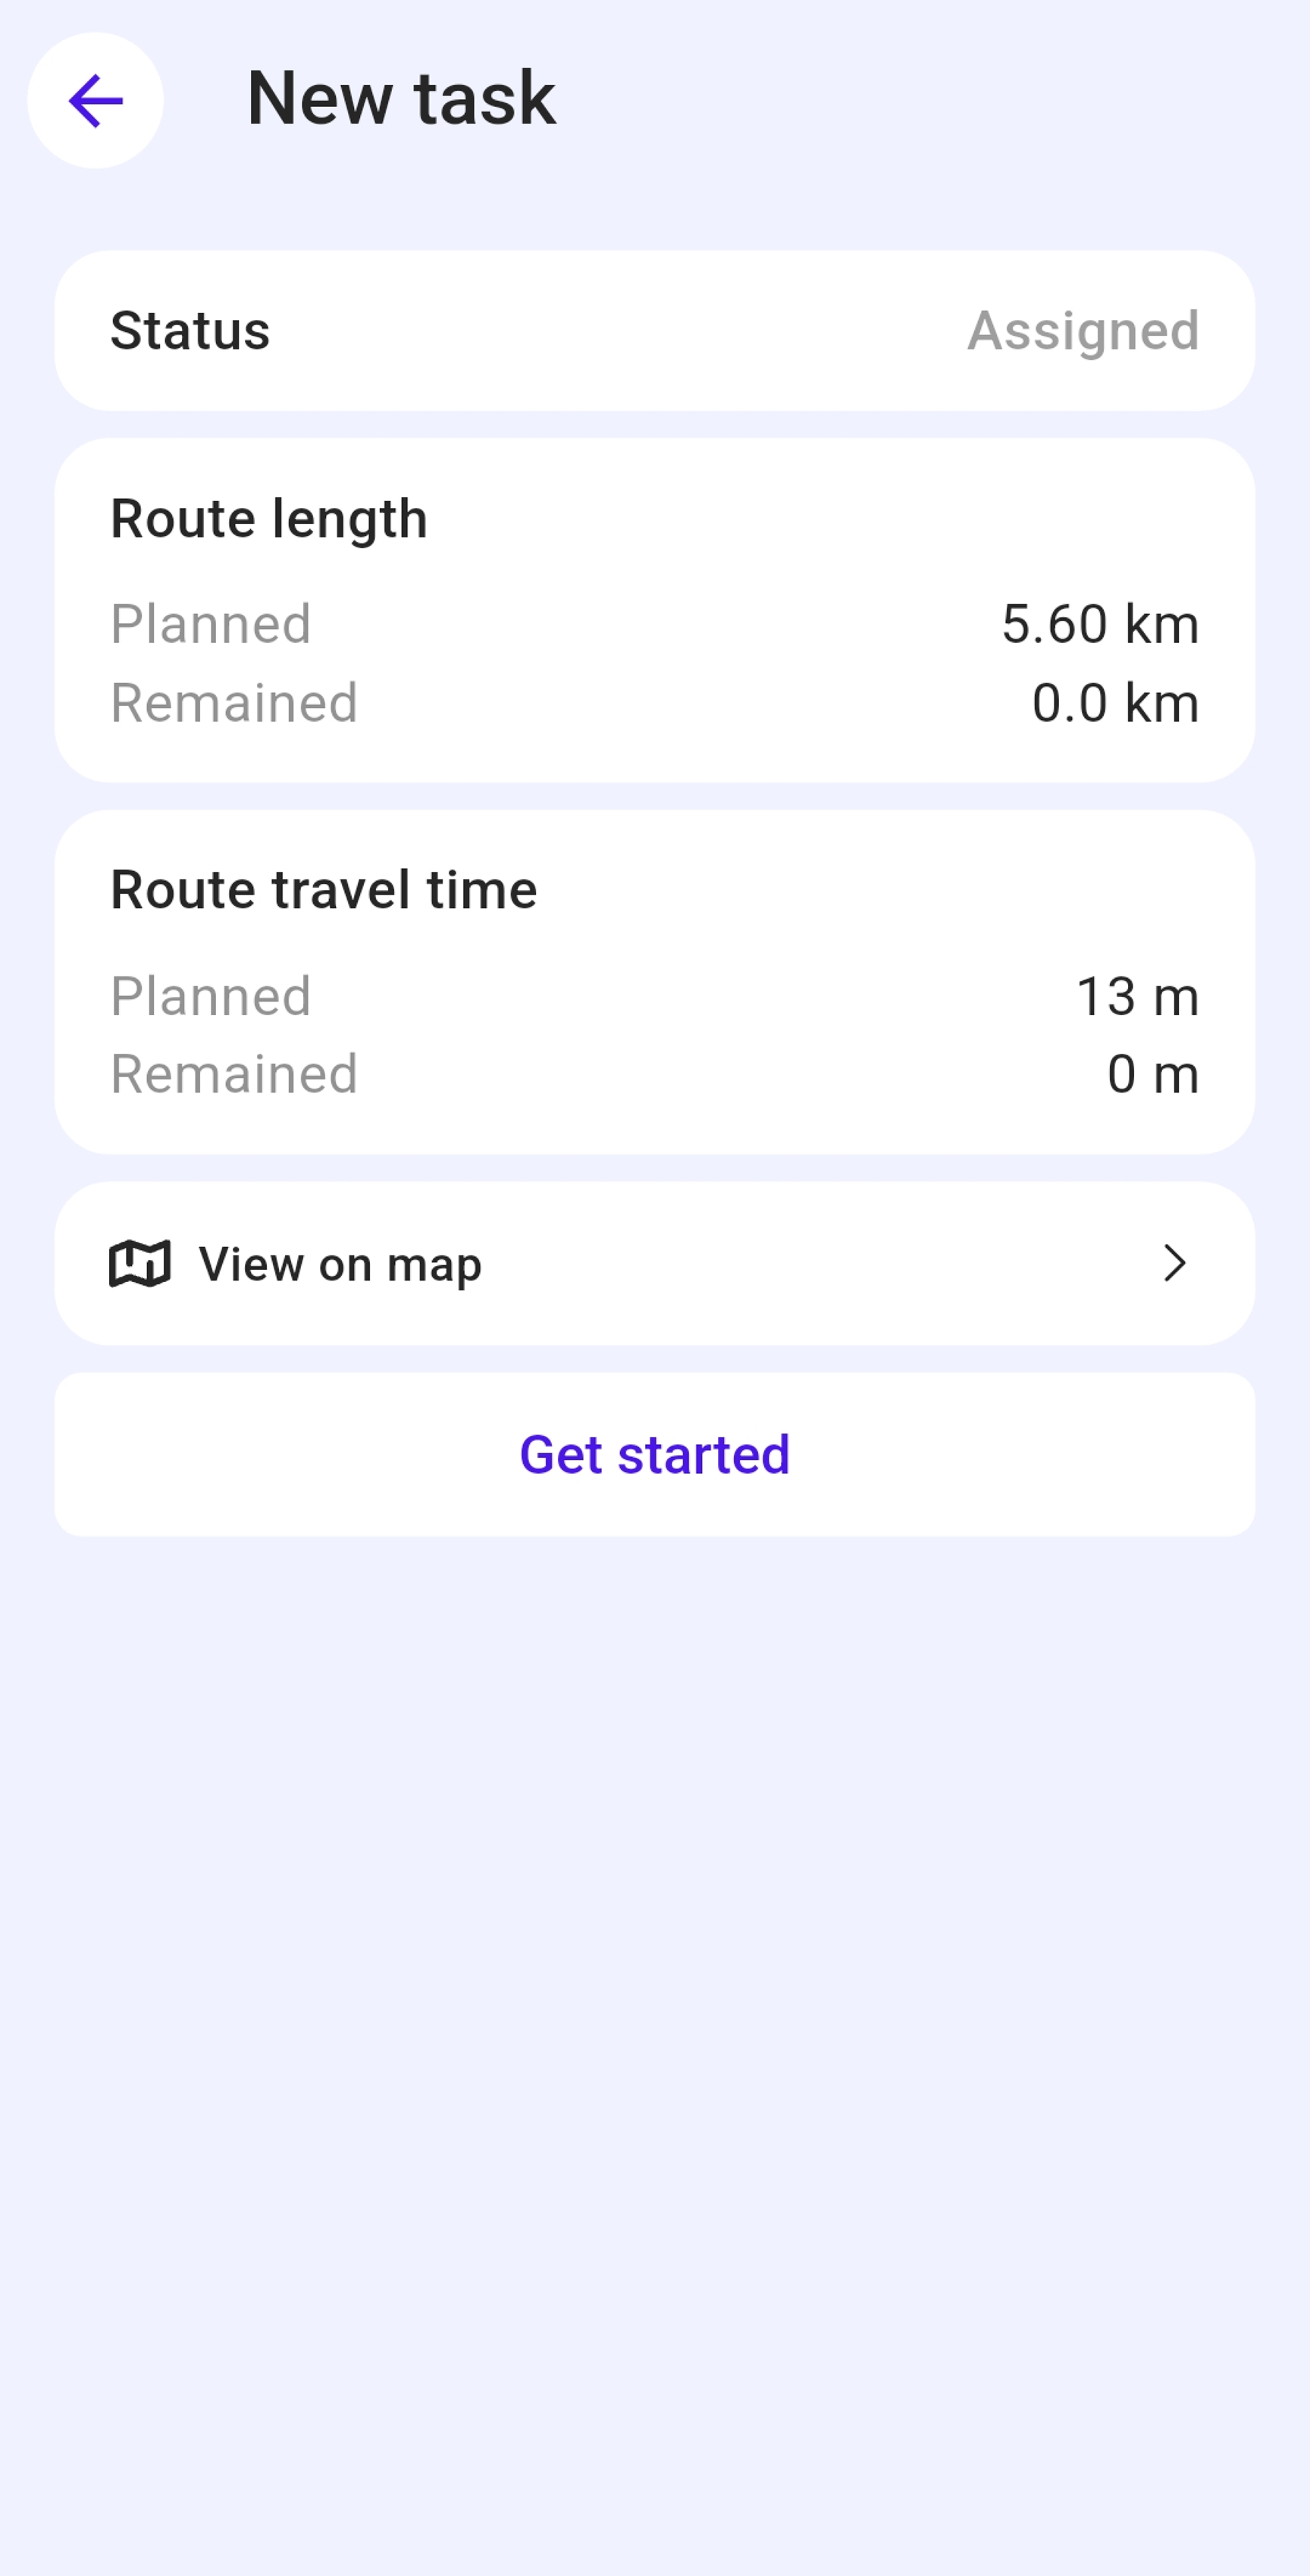
In the opened card, you can view the task status and statistics, and also see the full route on the map.
Check the information and tap Get started. The video recording launches.
-
Place your mobile device horizontally.
Before starting the recording, you can see current recording parameters. You can configure them in settings.
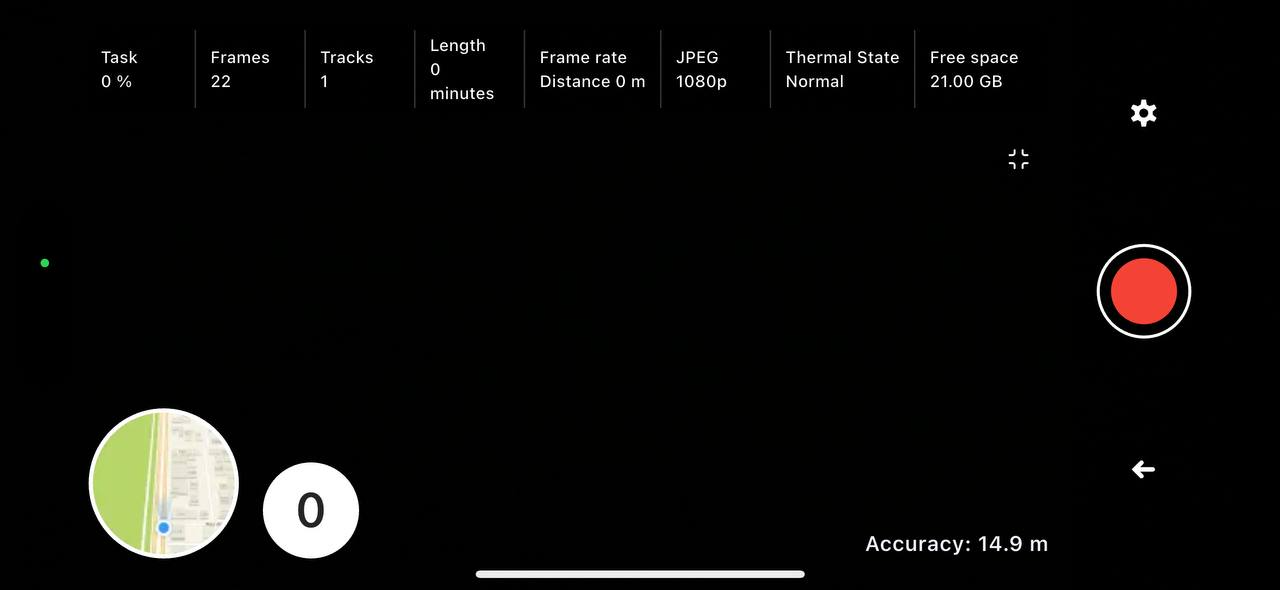
- Task: percentage of the current task completion.
- Frames: number of frames (images tied to geographic coordinates) captured by the application and not yet uploaded for processing. When you record a video, frames are captured automatically depending on the configured frequency.
- Tracks: number of recorded and not yet uploaded tracks (time intervals and data collected during them).
- Length: duration of the current track in minutes. You can configure the maximum track length in settings.
- Frame rate: frequency of frame capturing. You can configure it to depend on speed, distance, or time intervals.
- JPEG: image resolution. You can select the level of image compression in settings.
- Thermal state: indicator of the processor heating state.
- Free space: available amount of device memory.
- Accuracy: accuracy of determining the device geolocation.
-
Tap the capture button to start recording.
Important
Follow the recommended speed limit to ensure high quality of captured frames.
-
Open the map by tapping the round map icon in the lower-left corner.
-
To enable navigation mode, tap
 icon. Using the navigator is not required, however, it guides you along the most optimal route to complete the task.
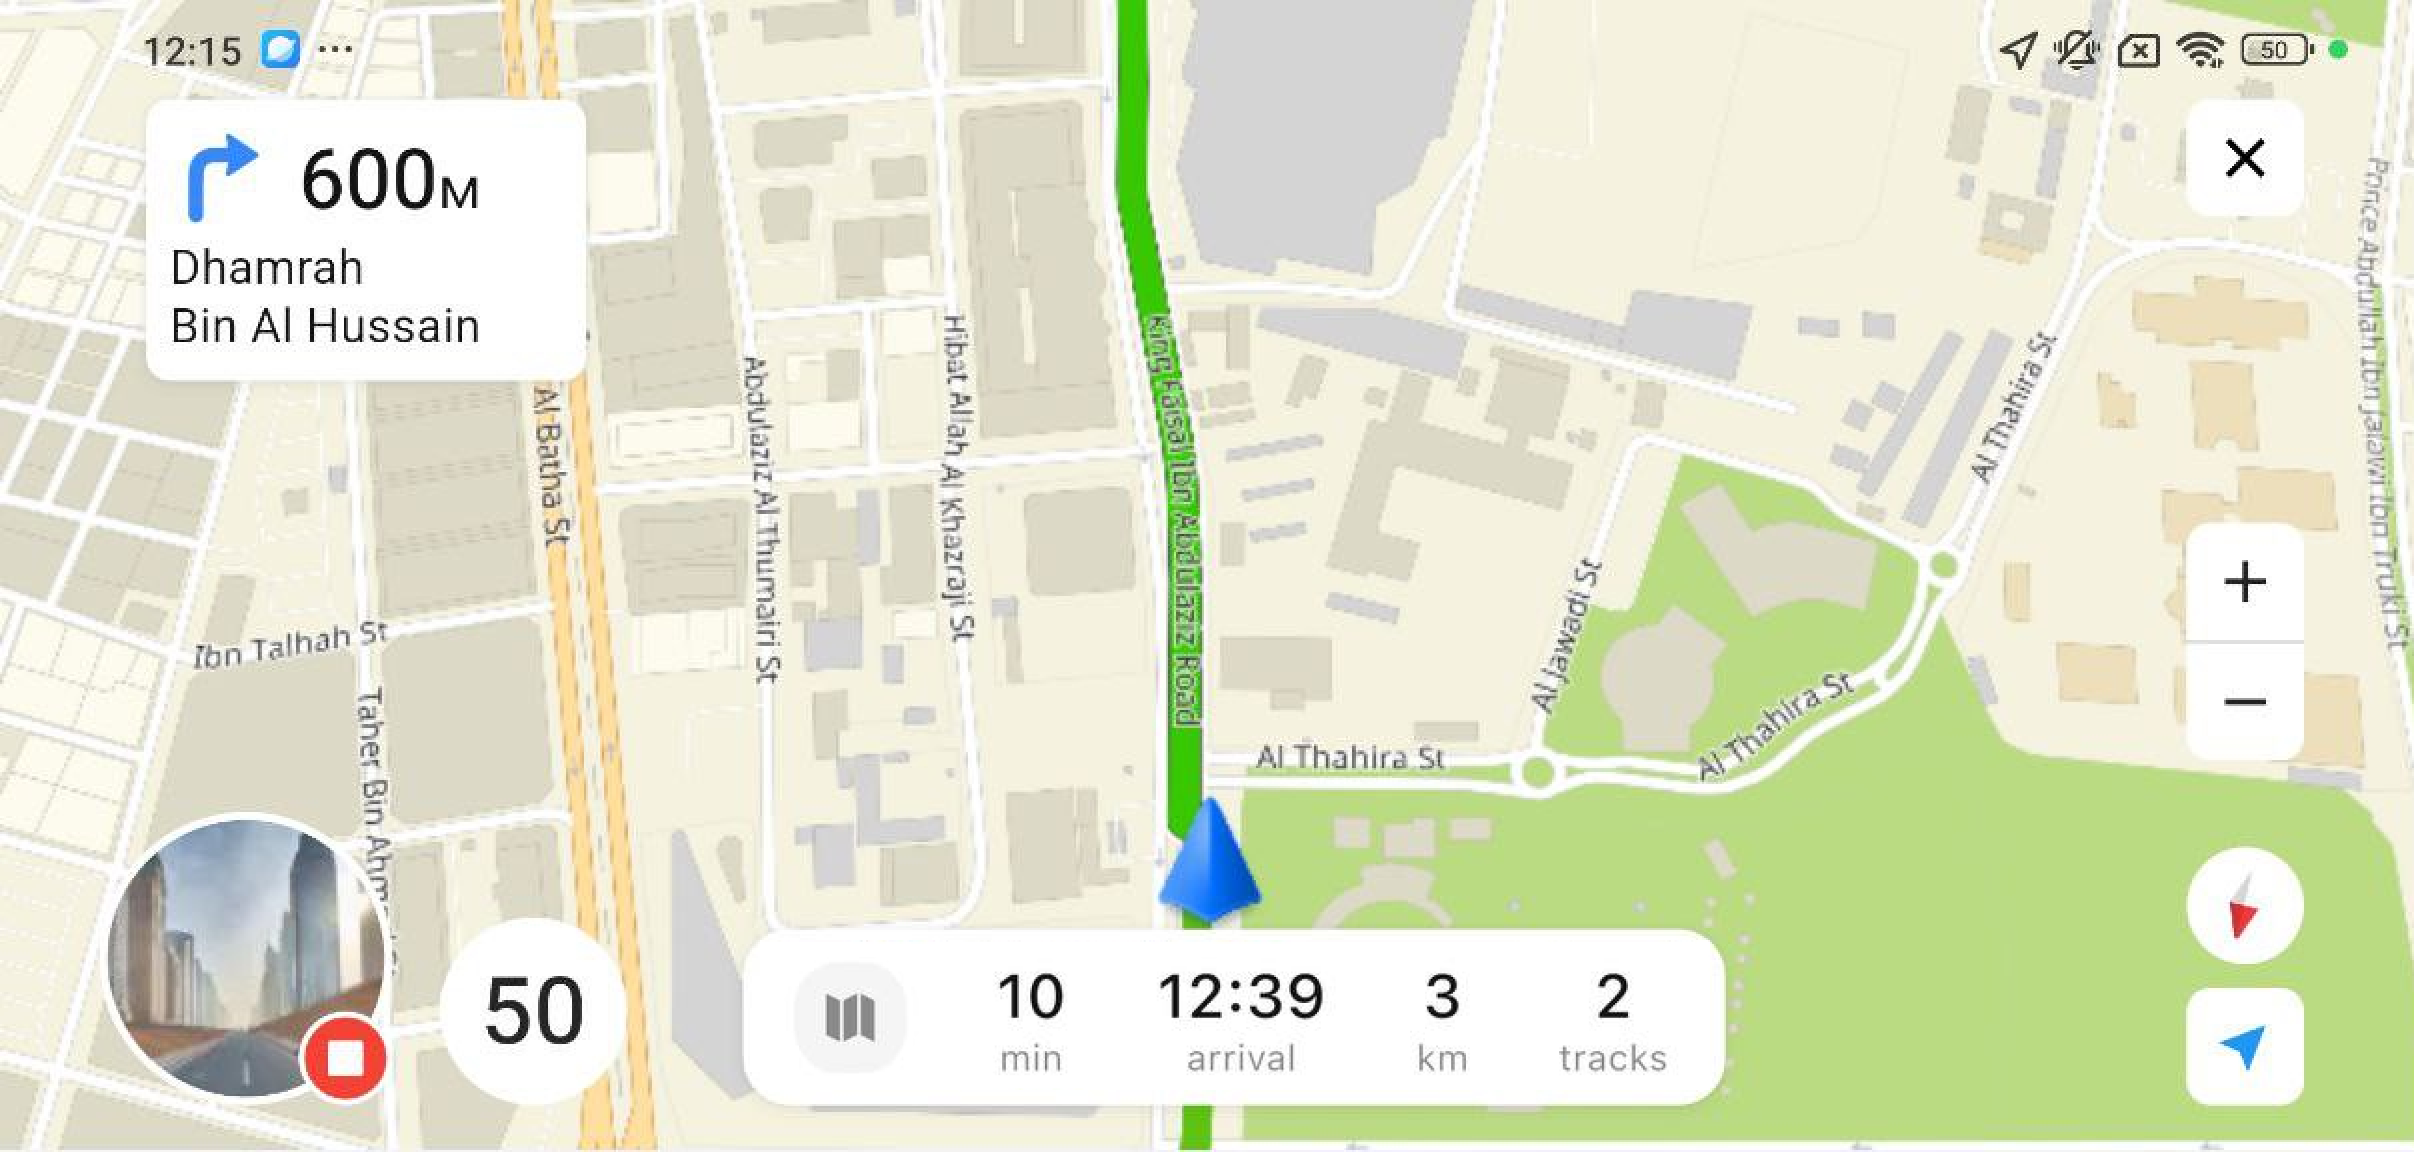
In navigation mode, the following route data is displayed at the bottom of the screen:
- expected route duration
- expected time of arrival to the finish point
- route length
- number of tracks recorded by the current moment
To zoom out and see the full route, tap
 icon.
icon.To stop navigation, tap
 icon. You can resume navigation at any moment from any plane on the map: the application will recalculate the route based on new conditions.
 -
(Android devices only) If your device runs out of memory before you finish recording, you can temporarily export recorded tracks to an external storage device:
-
Connect the storage device (a flash drive) to your mobile phone.
-
Go to the Settings tab and open Track recording > Track management.
-
Tap Export.
Once the export is complete, device memory will be freed, and you can continue recording.
-
-
To finish or suspend working on the task, return to the recording mode and tap the recording button again.
-
To return to the main menu, tap
icon.Then you can start recording again or proceed with uploading recorded data.
2. Send the recorded data
-
Make sure your device is connected to the internet.
-
Go to the CityLens tab and select Upload tracks.
-
(Android devices only) If you exported some tracks to external storage, import and upload them:
- Connect the storage device (flash drive) to your mobile phone.
- Go to the Settings tab and open Track recording > Track management.
- Tap Import and wait for the process to complete.
- Go to the CityLens tab and select Upload tracks.
Note
Uploading the tracks might take a while depending on the amount of data. You can continue taking photos or working with other application tabs.
The uploaded data becomes available in the administrator tools.
3. Check statistics
Once the data is uploaded, go to the Statistics tab to view the updates on the total traveled distance and the number of captured and uploaded frames. The data is relevant for the current day only.
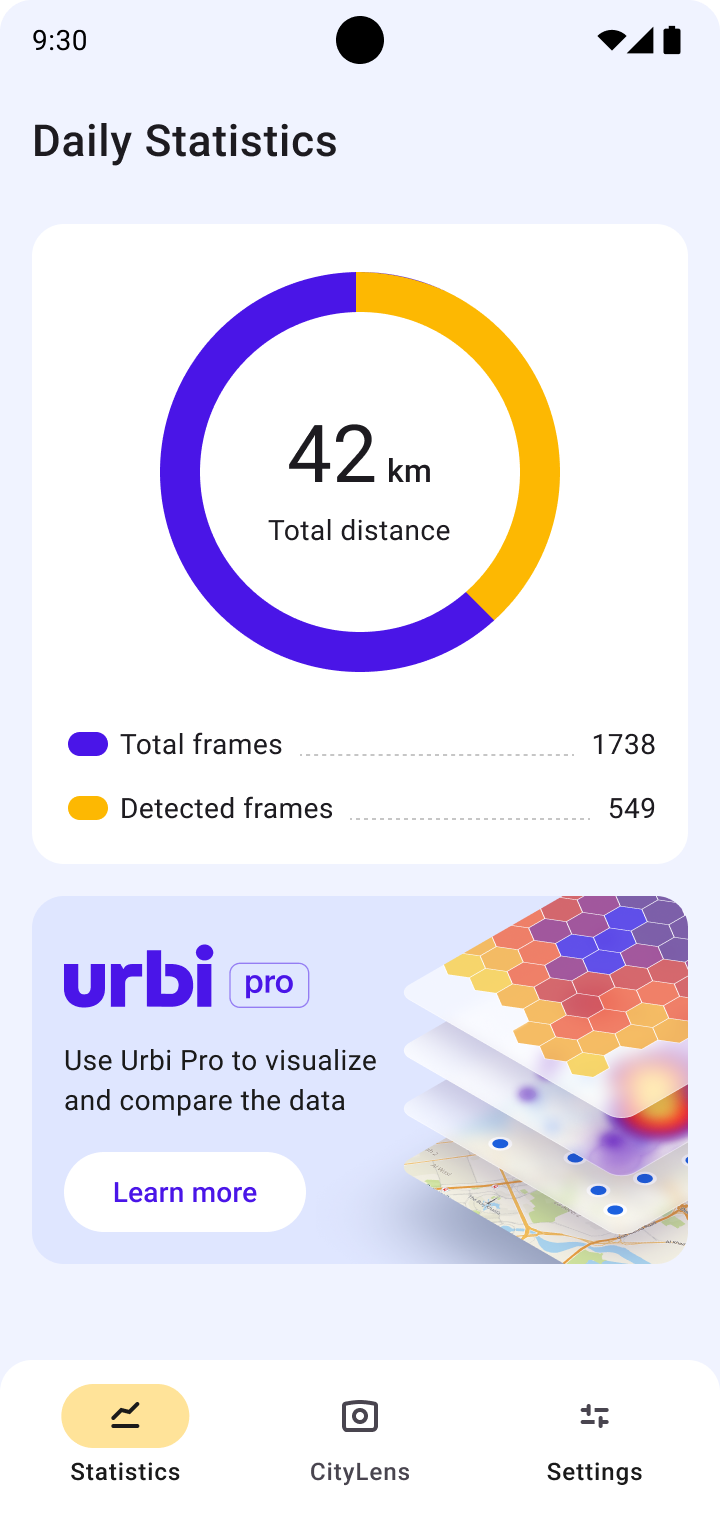
Once the frames are processed, the statistics are updated to display the number of detected objects.