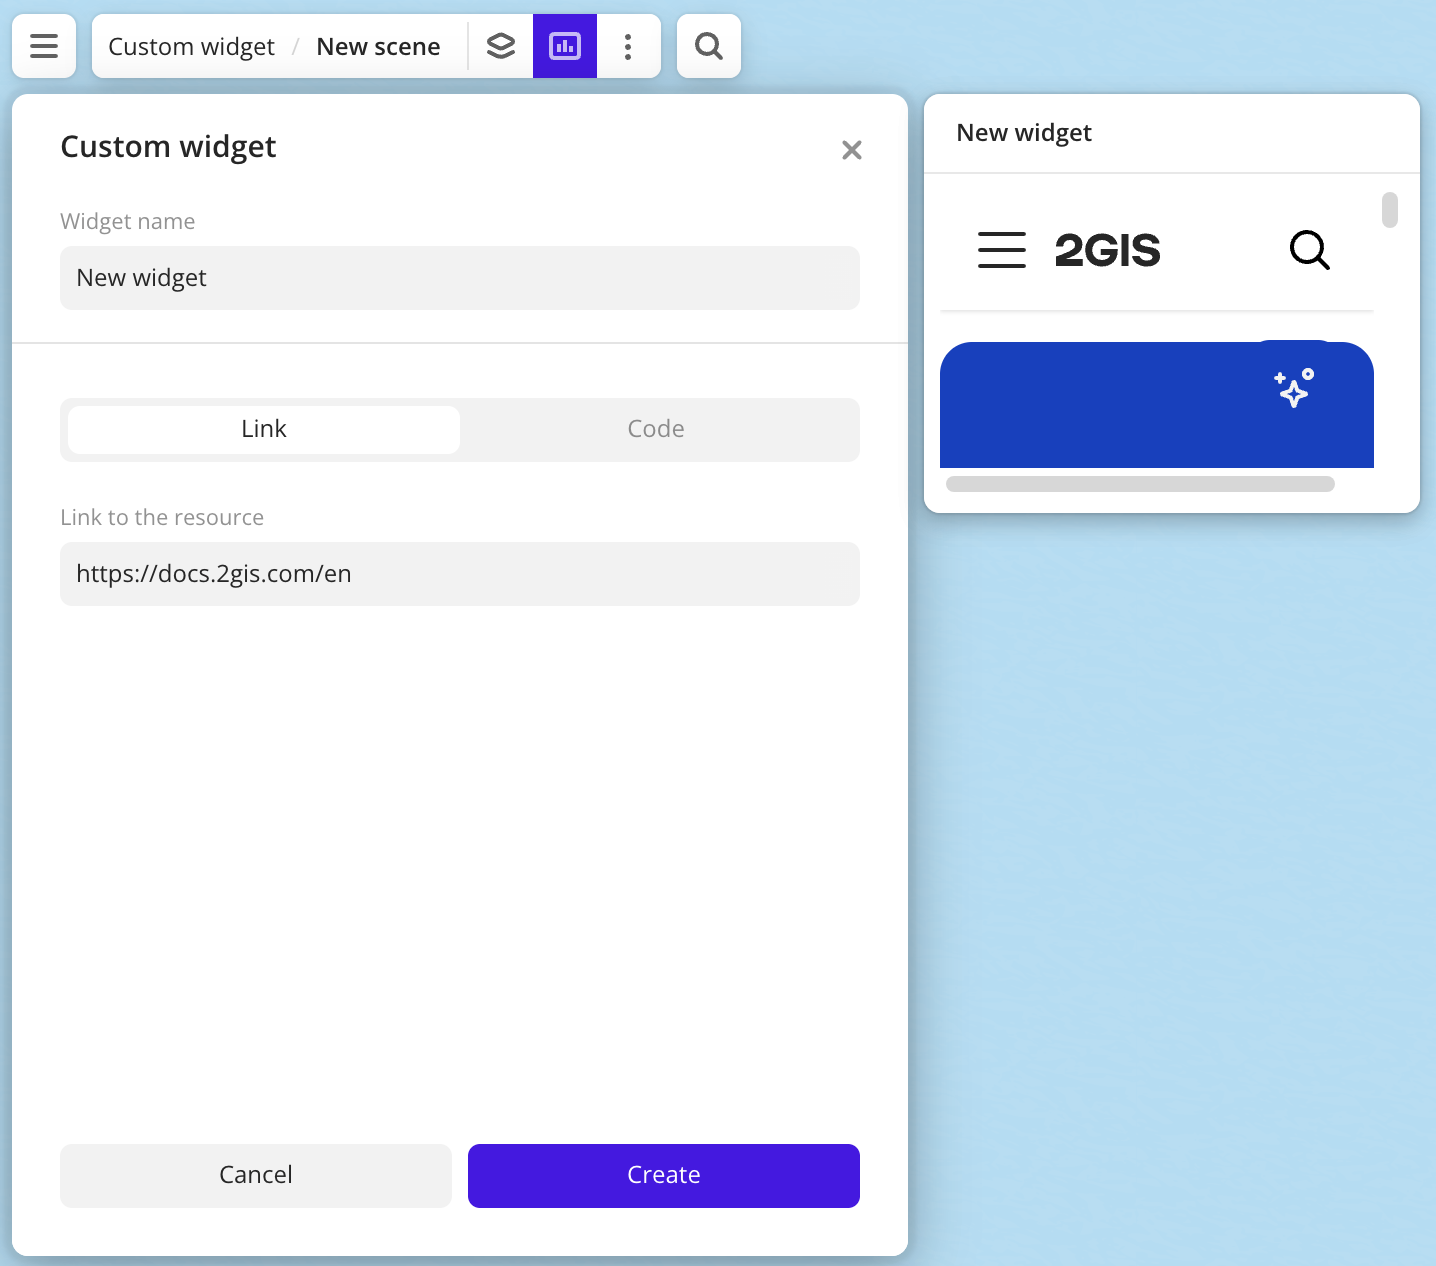
Custom widget
A custom widget allows you to embed custom content to dashboard scenes via frames (<iframe>). The widget is an HTML page that connects to the application via the Penpal library and gets access to the widget API: map control and event subscriptions.
In the widget creating form, you can specify:
- URL of an external page. To connect the application and the widget, you need to connect Penpal manually: for more details, see the Link section.
- HTML or JavaScript code. The widget will be inserted via the
srcdocattribute in the<iframe>tag. Penpal connection will be established automatically: for more details, see the Code section.
Creating a widget
- Go to the Dashboards tab and open the dashboard.
- Open a scene using the arrows
 and
and  . If there is only one scene in the dashboard, it opens automatically.
 - In the top menu of the dashboard, click
 icon.
icon. - Select the Custom widget widget type.
- Enter the source URL or source code for the HTML element to display in the widget. If you specified a URL, connect Penpal and establish the connection with the application: for more details, see the Link section.
- Click Create. The new widget is automatically added to the selected dashboard scene.
Parameters
General widget settings
Parameter | Description |
|---|---|
| Widget name | Widget name. |
Link
Parameter | Description |
|---|---|
| Link to the resource | The URL of an external page with the application in the https://example.com format.Example of a widget with an embedded website:  |
To connect Penpal, add the following to the application code:
<script src="https://pro.2gis.ru/static/penpal/penpal.min.js"></script>
<script>
(function() {
  var messenger = new Penpal.WindowMessenger({
    remoteWindow: window.parent,
    allowedOrigins: ['*']
  });
  var connection = Penpal.connect({
    messenger: messenger,
    methods: {
      onEvent: function(event) {
        window.dispatchEvent(new CustomEvent('pro:widget:event', { detail: event }));
      }
    },
    timeout: 30000
  });
  window.__proWidgetBridge = {
    ready: connection.promise,
    destroy: function() { connection.destroy(); }
  };
})();
</script>
Code
Parameter | Description |
|---|---|
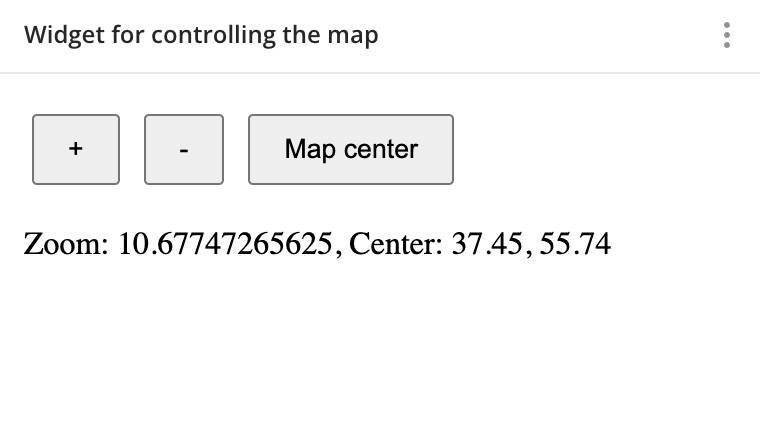
| Code | Source code in HTML or JavaScript for the HTML element to display in the widget. The code runs inside an iframe element.Example of a widget with an embedded map: 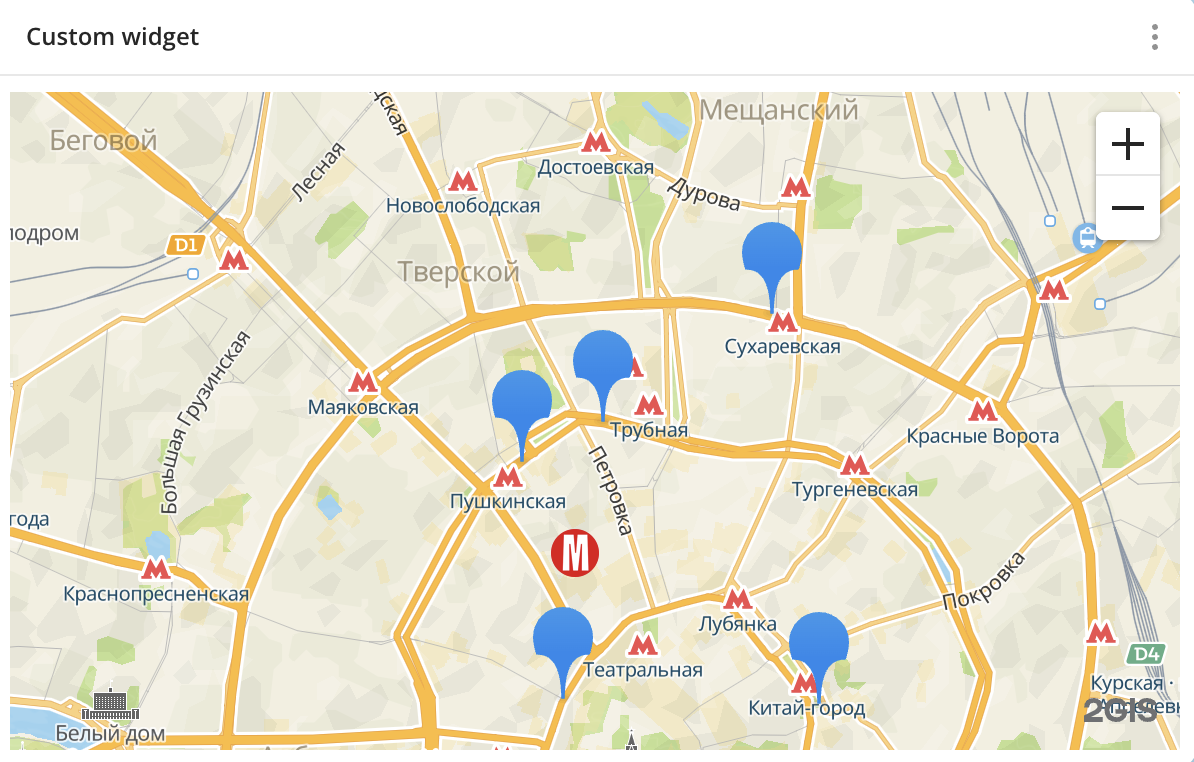 |
Example of a widget for controlling the map
The HTML code below creates a widget with map controls in Urbi Pro: buttons for zooming in, out, and moving to the map center (a specified point). The widget displays the current zoom level and the coordinates of the map center.
<!DOCTYPE html>
<html>
<head>
  <style>
    button { margin: 4px; padding: 8px 16px; }
  </style>
</head>
<body>
  <button id="zoom-in">+</button>
  <button id="zoom-out">-</button>
  <button id="center">Map center</button>
  <p id="info">Loading...</p>

  <script>
    var currentState;

    function renderInfo(state) {
      document.getElementById('info').textContent =
        `Zoom: ${state.zoom}, Center: ${state.center[0].toFixed(2)}, ${state.center[1].toFixed(2)}`;
    }

    // Automatically connecting __proWidgetBridge
    __proWidgetBridge.ready.then(async (remote) => {
      currentState = await remote.getMapState();
      renderInfo(currentState);

      document.getElementById('zoom-in').onclick = () =>
        remote.setMapState({ zoom: currentState.zoom + 1 }, { animate: true });

      document.getElementById('zoom-out').onclick = () =>
        remote.setMapState({ zoom: currentState.zoom - 1 }, { animate: true });

      document.getElementById('center').onclick = () =>
        remote.setMapState(
          { center: [37.615655, 55.768005], zoom: 14 },
          { animate: true, duration: 1000 }
        );

      // Subscribing to map changes
      await remote.subscribe(['mapState']);
    });

    window.addEventListener('pro:widget:event', (e) => {
      if (e.detail.type === 'mapState') {
        currentState = e.detail.payload;
        renderInfo(currentState);
      }
    });
  </script>
</body>
</html>
Widget API
The methods below are available via the remote object obtained from __proWidgetBridge.ready:
const remote = await __proWidgetBridge.ready;
Controlling the map
Getting the map state
To get the current map state, use the remote.getMapState() method:
const state = await remote.getMapState();
Response example:
{
  center: [37.615655, 55.768005],
  zoom: 14,
  pitch: 45,
  rotation: 90
}
Changing the map state
To set the map state, use the remote.setMapState(state, options?) method. You can pass individual parameters.
Map state parameters:
| Field | Type | Description |
|---|---|---|
center | [lon, lat] | Map center coordinates: longitude and latitude. Allowed longitude values: from -180 to 180. Allowed latitude values: from -90 to 90. |
zoom | number | Zoom level. Allowed values: from 1 to 22. |
pitch | number | Map tilt. Allowed values: from 0 to 60. |
rotation | number | Map rotation. Allowed values: from 0 to 360. |
Animation options:
| Field | Type | Default value | Description |
|---|---|---|---|
animate | boolean | true | Transition animation. |
duration | number | - | Animation duration in ms. Allowed values: from 0 to 10000. |
Example of changing the map state:
// Moving the map
await remote.setMapState({ center: [37.615655, 55.768005] });

// Changing the zoom level and adding an animation
await remote.setMapState({ zoom: 18 }, { animate: true, duration: 1000 });

// Setting multiple parameters at once
await remote.setMapState({
  center: [37.615655, 55.768005],
  zoom: 14,
  pitch: 45,
  rotation: 90,
});
Fitting bounds
To change the center and the zoom level of the map to fit the specified bounds, use the remote.fitBounds(params) method:
await remote.fitBounds({
  northEast: [37.62, 55.77],
  southWest: [37.61, 55.76],
  padding: 20,
  maxZoom: 18,
});
Allowed values for the padding parameter: from 0 to 1000.
Getting the context
To get the widget context, use the remote.getContext() method:
const ctx = await remote.getContext();
Response example:
{
  widgetId: 'abc123...', // widget ID
  dashboardId: 'def456...', // dashboard ID
  sceneId: 'ghi789...', // scene ID
  theme: 'dark', // theme
  brand: 'brandName', // brand
  locale: 'en' // language
}
Subscribing to events
To subscribe to events, use the remote.subscribe(events) method. Events are delivered via CustomEvent in the browser.
Event types:
| Type | Payload | Trigger frequency |
|---|---|---|
mapState | { center, zoom, pitch, rotation } | On map changes (no more than every 150 ms). |
theme | { brand, theme } | On theme change. |
language | { locale } | On language change. |
The subscribe() method subscribes only to future updates. To get the initial state, request it separately via getMapState() or getContext().
To unsubscribe from events, use remote.unsubscribe(events).
Example of subscribing to events:
// Requesting the initial state
const initialState = await remote.getMapState();

// Subscribing to events
await remote.subscribe(['mapState']);

// Handling events
window.addEventListener('pro:widget:event', (e) => {
  const { type, payload } = e.detail;
  switch (type) {
    case 'mapState':
      console.log('Map:', payload.center, payload.zoom);
      break;
  }
});

// Unsubscribing from events
await remote.unsubscribe(['mapState']);
Limitations
Widget limitations:
- Call rate: 30 calls per second per widget. Exceeding the limit causes the request to be rejected.
- Connection timeout: 30 seconds to establish a connection with the application.
- Sandbox:
iframeis created with thesandbox="allow-scripts"setting, so there is no access to cookies, localStorage, sessionStorage, or the parent page DOM. - Parameter validation: all parameters passed via the widget API are validated. Invalid values are rejected: see the allowed values in the Widget API section.
What's next?
- Get to know more about other Widgets types.
- See available Operations with widgets.
- Getting started.
- Get to know how to work with Data and Data visualization.
- Learn more about Layers, Dashboards, and Scenes.
- Learn about ready-made Analytics scenarios.