Operations with dashboards
To open the dashboard list, go to the Main or Dashboards tab:
Renaming a dashboard
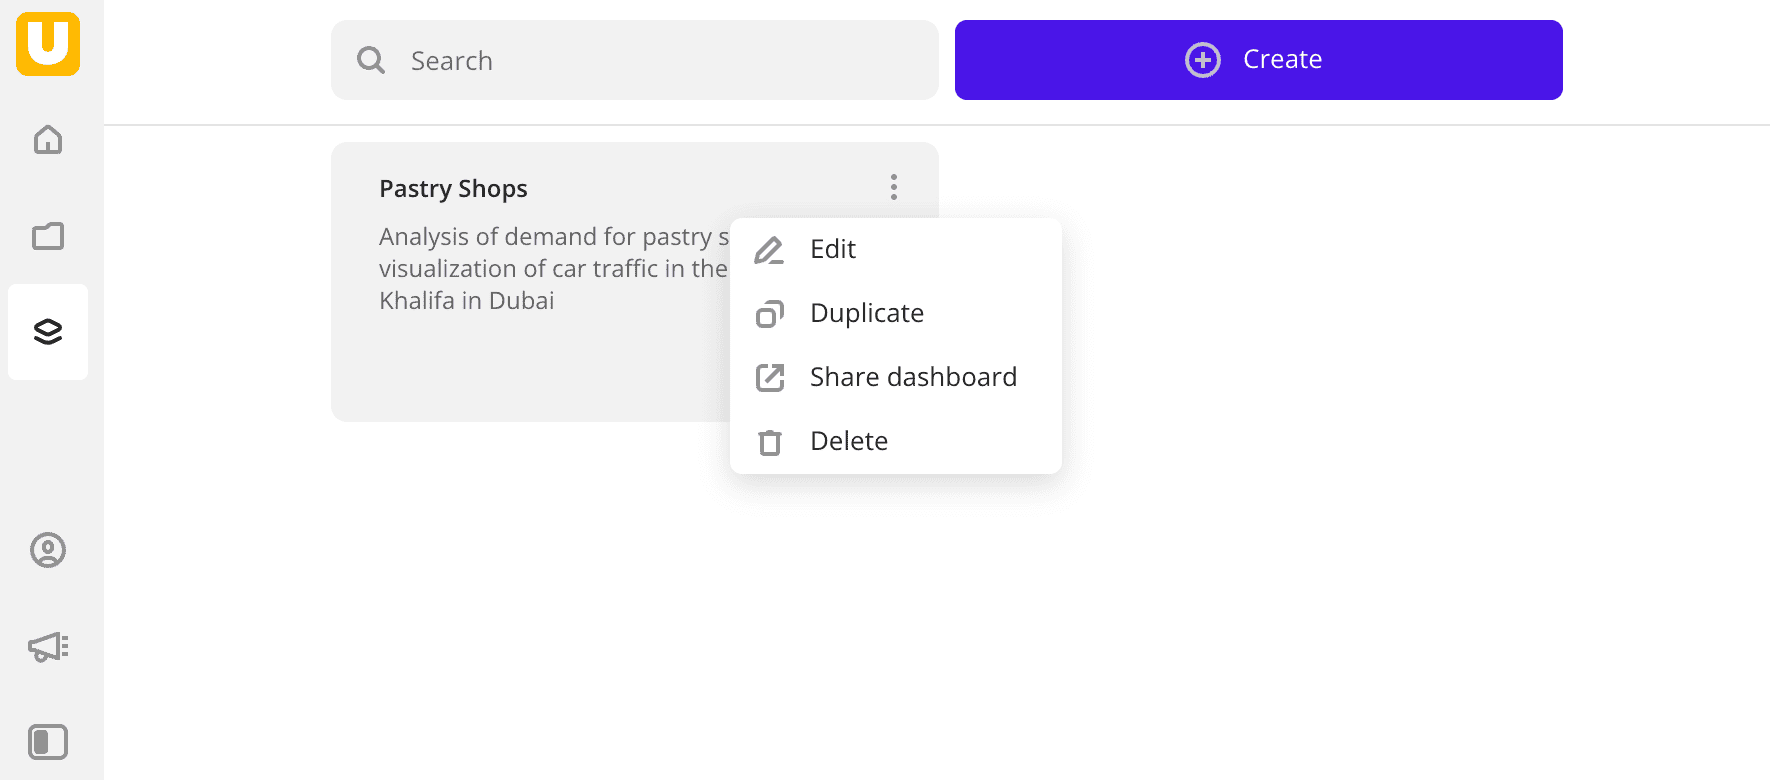
- On the dashboard card, click
 icon and select Edit.
 - Enter a new dashboard name.
- Click Edit.
Duplicating a dashboard
- On the dashboard card, click icon and select Duplicate.
- Enter a name of the dashboard copy.
- Click Save.
Switching scenes on a dashboard
To switch scenes, use the arrows ![]() and
and ![]() in the top menu of the dashboard.
in the top menu of the dashboard.
To immediately open the scene, click icon, select Scenes, and select a scene from the list.
Manage access to a dashboard
You can share dashboards and collaborate on them with other users. Three usage scenarios are available:
- Publishing a dashboard for viewing via a link.
- Granting access to view or edit a dashboard. Depending on the granted access level, another user will be able to view or edit the dashboard with you. To grant shared access to the particular users, specify their email addresses.
- Sending a dashboard copy. The recipient will be able to save the dashboard copy and edit it without affecting the original dashboard.
| Access period | User authorization is required | View | Edit | |
|---|---|---|---|---|
| Publishing via a link | Set by the dashboard owner | ✓ | ✓ | ✗ |
| Granting shared access (view) | Set by the dashboard owner | ✓ | ✓ | ✗ |
| Granting shared access (edit) | Set by the dashboard owner | ✓ | ✓ | ✓ |
| Sending a copy | Forever | ✓ | ✓ | ✗ (only editing a copy) |
If you use the demo tariff plan, you cannot grant access to a dashboard to other users.
Publishing a dashboard via link
You can enable viewing your dashboard via a link to other authorized users.
Via the link, users can view, switch, and open dashboard scenes in full-screen mode; show and hide layers; filter data by territory and by clicking a widget; drag widgets on the scene and resize them.
If the dashboard owner edits the original dashboard, the changes are displayed in the published dashboard. The owner can set a link expiration date or set up unlimited access. With unlimited access, the dashboard can be viewed as long as its owner has a valid tariff. If the dashboard is deleted, it cannot be opened via the link.
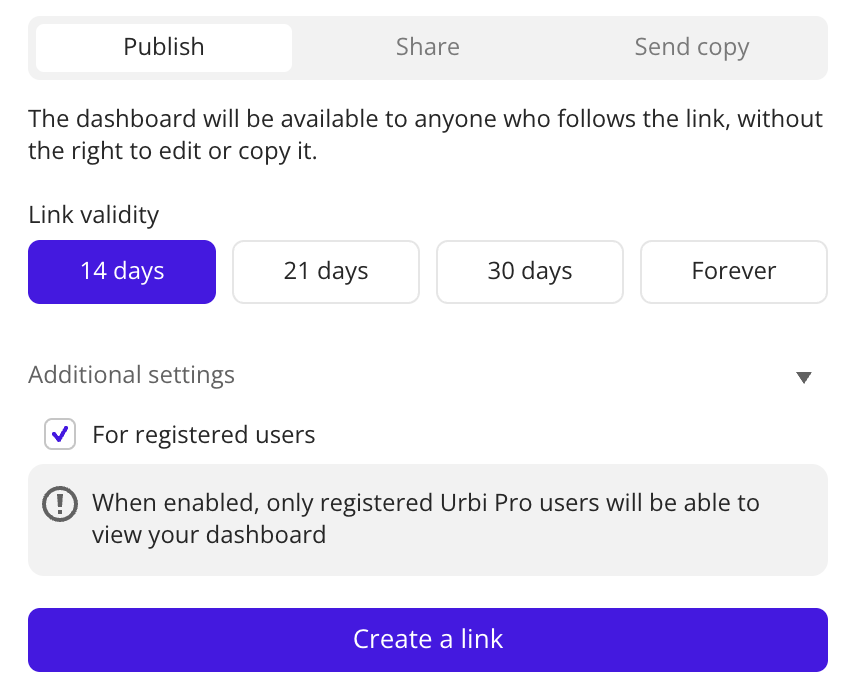
To publish a dashboard via a link:
- In the top menu of the dashboard, click icon and select Share dashboard.
- In the dialog, go to the Publish tab.
- Select the link expiration date:
14 days,30 days,Forever, or specify a date. For example, if you select the date February 2, the link will be valid until 23:59:59 on February 2. - (Optional) To restrict access to territories, specify up to 15 territories that will be available via the link. You can use standard and custom territories. For more information, see the Geofilters section.
- Click Create a link.
To copy the prepared link, in the Active links block, click ![]() icon next to the link. To unpublish the link, click
icon next to the link. To unpublish the link, click ![]() icon.
icon.
To share a dashboard only with particular users, grant them access to view the dashboard by specifying their emails.
Granting access to a dashboard
You can grant access to view or edit the dashboard to other authorized users.
Depending on the access level, the user can perform different operations:
-
View: view, switch, duplicate, and open dashboard scenes in full-screen mode; show and hide layers; filter data by territory and by clicking a widget; drag widgets on the scene and resize them; and manage the map style.
-
Edit: perform all actions available for the viewing access level, and also:
- Export dashboards.
- Grant access to a dashboard to other users.
- Send dashboard copies.
- Edit and create scenes, layers, and widgets. Changes will be visible to the owner and all users with access. To see changes made by other users, refresh the page.
- Delete the dashboard. The dashboard will be deleted for the owner and all users with access.
If the user with granted access to the dashboard does not have access to used built-in datasets, data categories, or territories, the data is not displayed on the dashboard. If datasets that you uploaded are used in the dashboard, users are granted access to them.
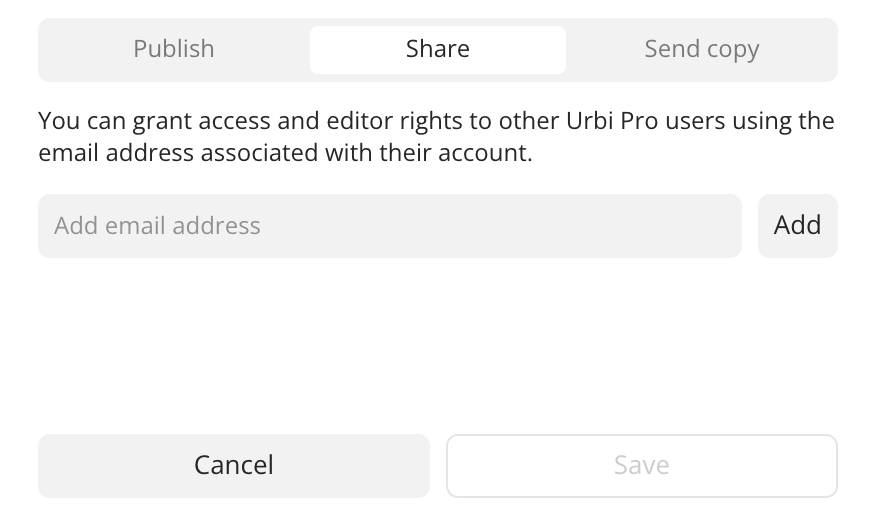
To grant access to a dashboard:
- In the top menu of the dashboard, click icon and select Share dashboard.
- In the dialog, go to the Share tab.
- Enter the email address of the user to grant access to and click Add.
- Next to the user address, select the access level in the list:
Can vieworCan edit. - Click Save.
To revoke access from the user, next to the user address, select Delete in the list.
Dashboards that have been granted access to are located in the user profile on the Dashboards tab, in the Available group. For each dashboard, the email address of the user who granted access is displayed.
Sending a dashboard copy
If you are the owner of the dashboard, or you have been granted access to edit it, you can send a dashboard copy to other authorized users by specifying their email addresses. The recipient obtains a copy that they can save and edit or reject. Editing the copy does not make any changes to the original dashboard.
The list of users with sent copies of the dashboard is not stored in Urbi Pro.
If the recipient of the dashboard copy does not have access to used built-in datasets, data categories, or territories, the data is not displayed on the dashboard. If datasets that you uploaded are used in the dashboard, users are granted access to them.
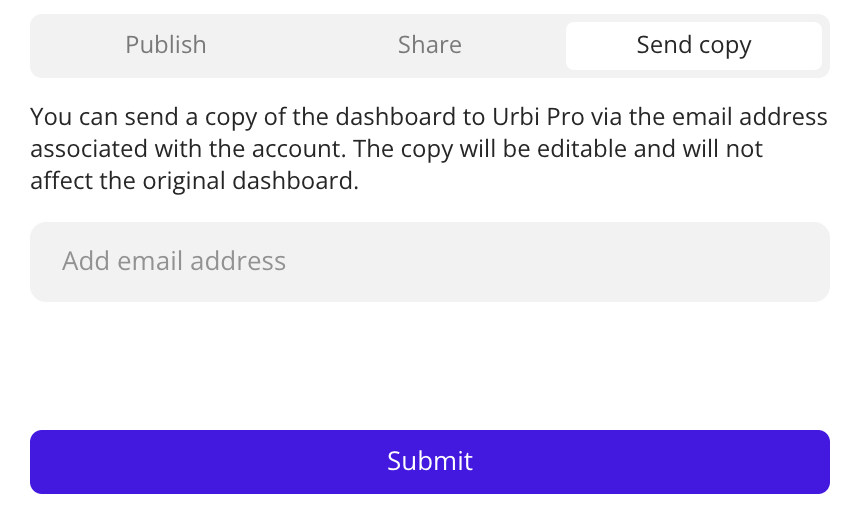
To send a dashboard copy:
- In the top menu of the dashboard, click icon and select Share dashboard.
- In the dialog, go to the Send copy tab.
- Enter the email address of the recipient.
- Click Submit.
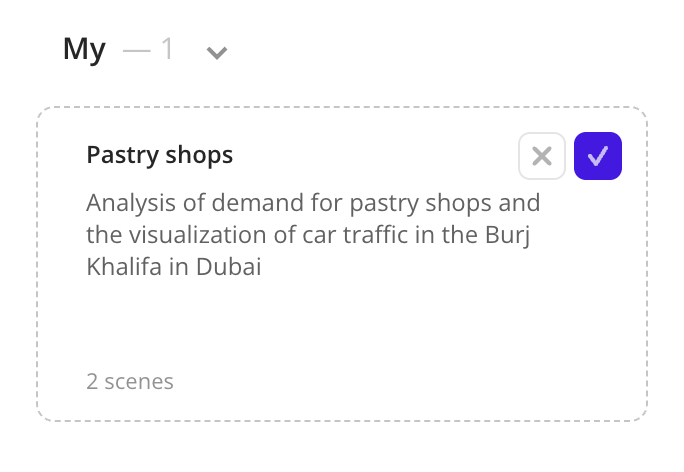
Dashboard copies are located in the recipient's profile on the Dashboards tab, in the My group. To save the dashboard copy or reject it, the recipient needs to go to the Dashboards tab and, in the card of the required copy, click ![]() or
or ![]() icon:
icon:
Updating a dashboard
If you are granted view access to a dashboard and the owner made changes to it, you will receive a notification at the bottom of the screen:

To see the latest version of the dashboard, use one of the following methods:
- In the notification, click Update.
- In the top menu of the dashboard, click icon and select Update.
The latest version of the dashboard from the owner will be loaded.
Exporting a dashboard
You can export a dashboard to a file (for example, to print out the map or widgets).
The file is created in PDF format with pages of A4 size and landscape orientation. Each dashboard scene is exported as separate pages:
- Scene map with layers shown and filters applied: geofilters and filtering via widgets, slice filter, and timeline.
- Scene legend (even if the legend was hidden on the map at the time of export).
- Widgets shown on the scene (each on a separate page).
Hidden layers and widgets are not included in the file.
If you use the demo tariff plan, you cannot export scenes.
- In the top menu of the dashboard, click icon and select Export to PDF.
- Click Export.
- Wait until the data export is complete and click Download.
Deleting a dashboard
A dashboard is deleted for the owner and all users who have been granted access to it.
- On the dashboard card, click icon and select Delete.
- To confirm deletion, click Delete.
What's next?
- Getting started.
- Get to know how to work with Data and Data visualization.
- Learn more about Layers, Scenes, and Widgets.
- Learn about ready-made Analytics scenarios.